
Gmail GroupUpdated 5 days ago
If you're using a Gmail Group email address, this guide will help you create a forwarding integration.
A Group is a collection of addresses that receive emails sent to a single address. For example, if a customer sends an email to [email protected], the email is also distributed to everyone in the group - [email protected], [email protected], [email protected], etc.
To integrate your Gmail Group email address into Gorgias, you'll need your email password, permissions to edit Groups in Google Workspace, and to be logged into Gorgias as an Admin.
Steps
1. Navigate to Settings -> Channels -> Email.
2. Click on Add Email Address in the top right corner.
3. Click on Connect Other Email Provider.
4. Enter your Address name, and below, the actual email address of the Gmail Group.
5. Click on Connect This Email Account.
6. Copy your default Gorgias email address (it'll look like a long email with a bunch of numbers and letters).
7. Navigate to your Gmail Forwarding Settings page under Gmail Inbox -> Settings -> See All Settings -> Forwarding and POP/IMAP.
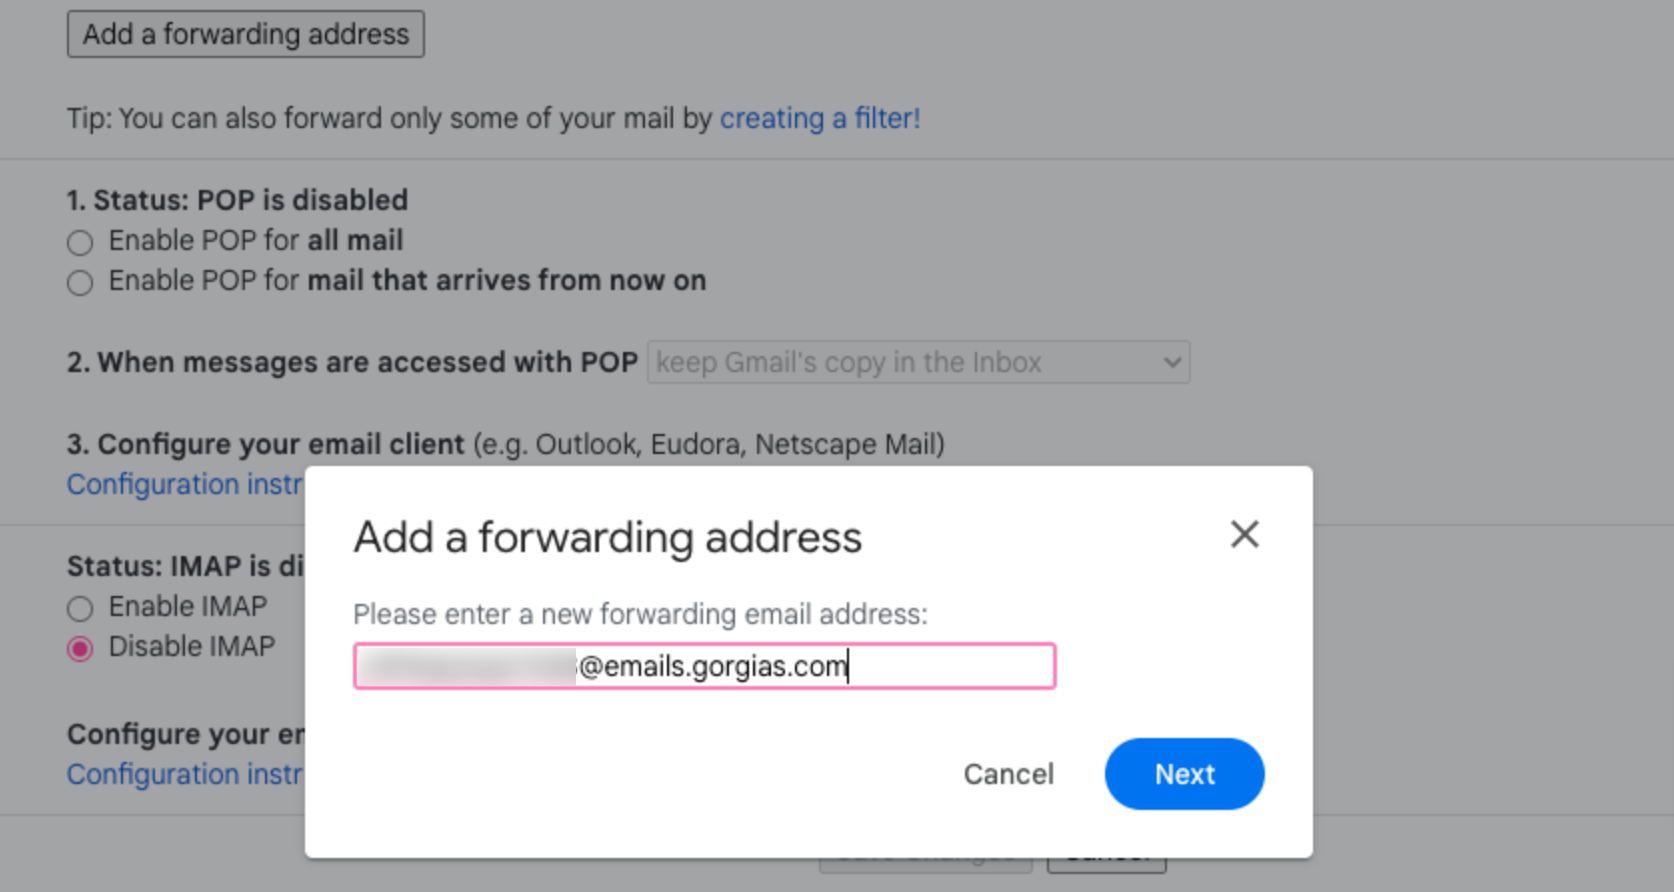
8. Click on Add a forwarding address.
9. Paste your Gorgias default address from before.
10. Click on Proceed, and the address will appear under Forwarding.
11. Navigate back to your Gorgias Tickets page, where you should be able to see a new ticket from Gmail Verification.
12. Simply click on the link to verify.
13. Navigate to your Gmail Groups page and click on Edit Settings -> Edit Icon (pencil).
14. Ensure that Publish posts to external source and Allow members outside of your organization are enabled.
15. Save your changes, then navigate to Add members.
16. You'll want to add a new User to the Google Group - the default Gorgias email address that you used before.
17. Click Add to Group.
18. Navigate back to Gorgias -> Settings -> Channels -> Email -> Gmail group integration, and click on Verify email forwarding.
19. Navigate back to your Gmail Forwarding Settings, and disable forwarding to your Default Gmail address.
If everything's been set up correctly, the integration will automatically verify itself after a minute or two and a new View for your group Email integration will be automatically created in your View sidebar on the left.
Domain Verification
All forwarding integrations require domain verification, to ensure maximum deliverability of emails - please check out our dedicated article and go through the steps there.
