
Custom HTTP WidgetsUpdated a month ago
You can create custom HTTP widgets to show information from your custom HTTP integrations in the sidebar, under your customers' profiles.
With custom action buttons and links, you can update data in another tool directly from inside Gorgias or navigate to a specific webpage from the widget in Gorgias with a click.
Custom actions will appear below the title of the widget card on the right-hand side of every ticket (when the customer has that type of data). These will be buttons which will run predefined HTTP calls on click, but you can also define some more basic redirection links.

Steps
Create a button
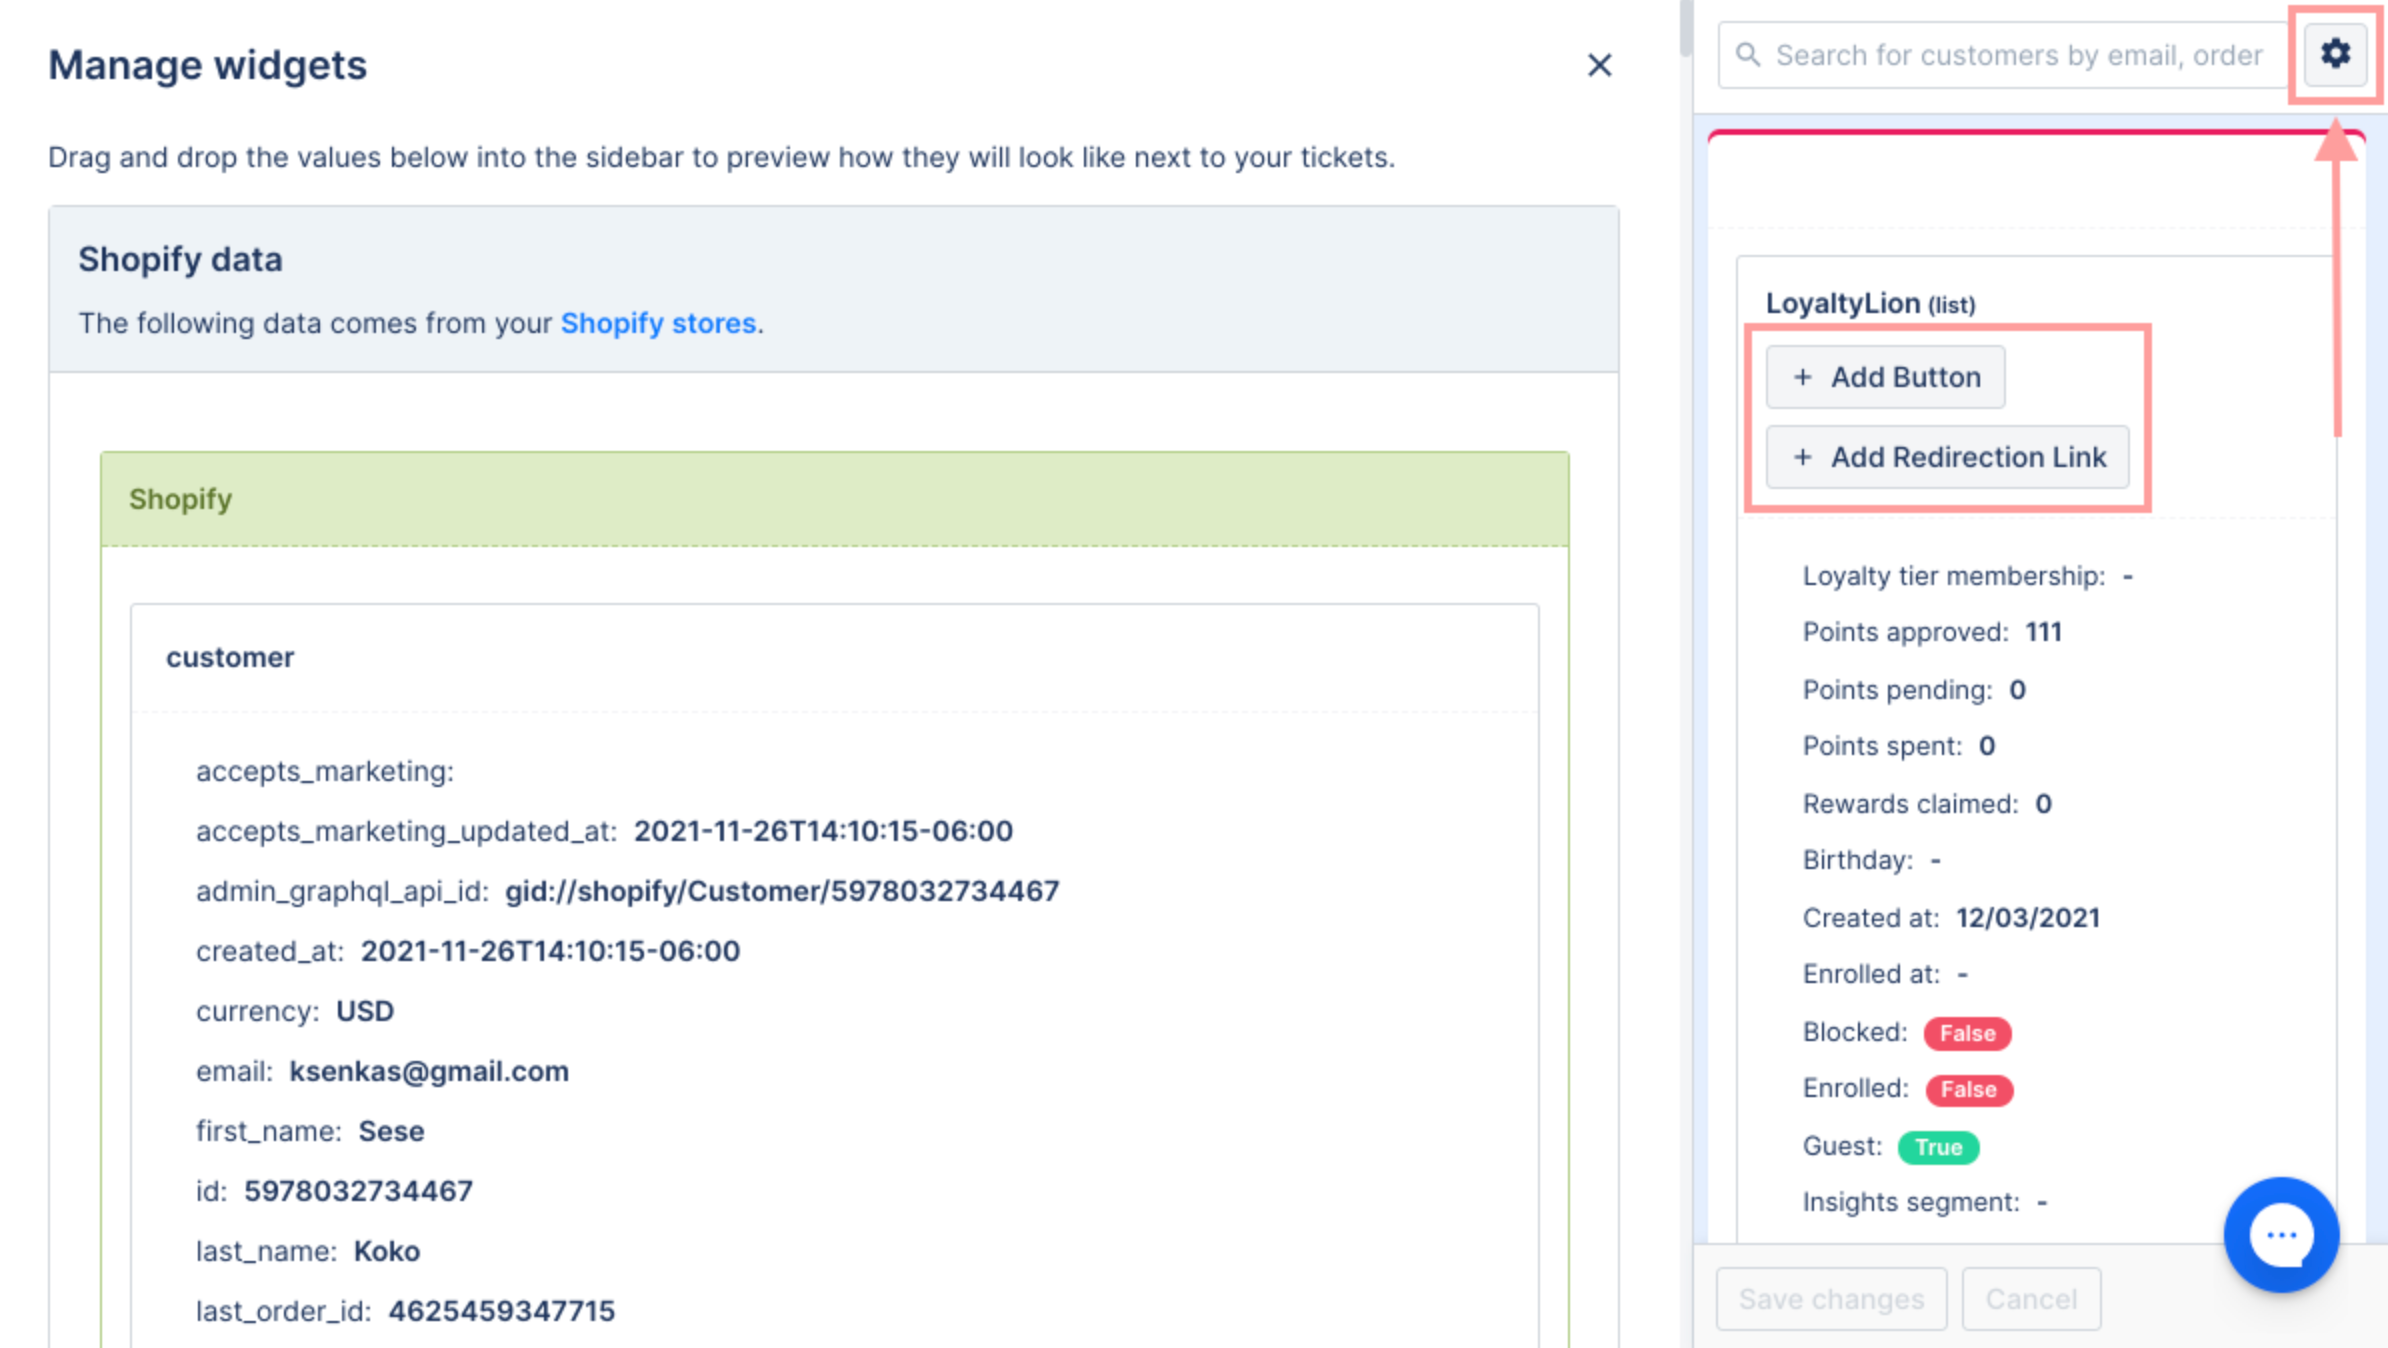
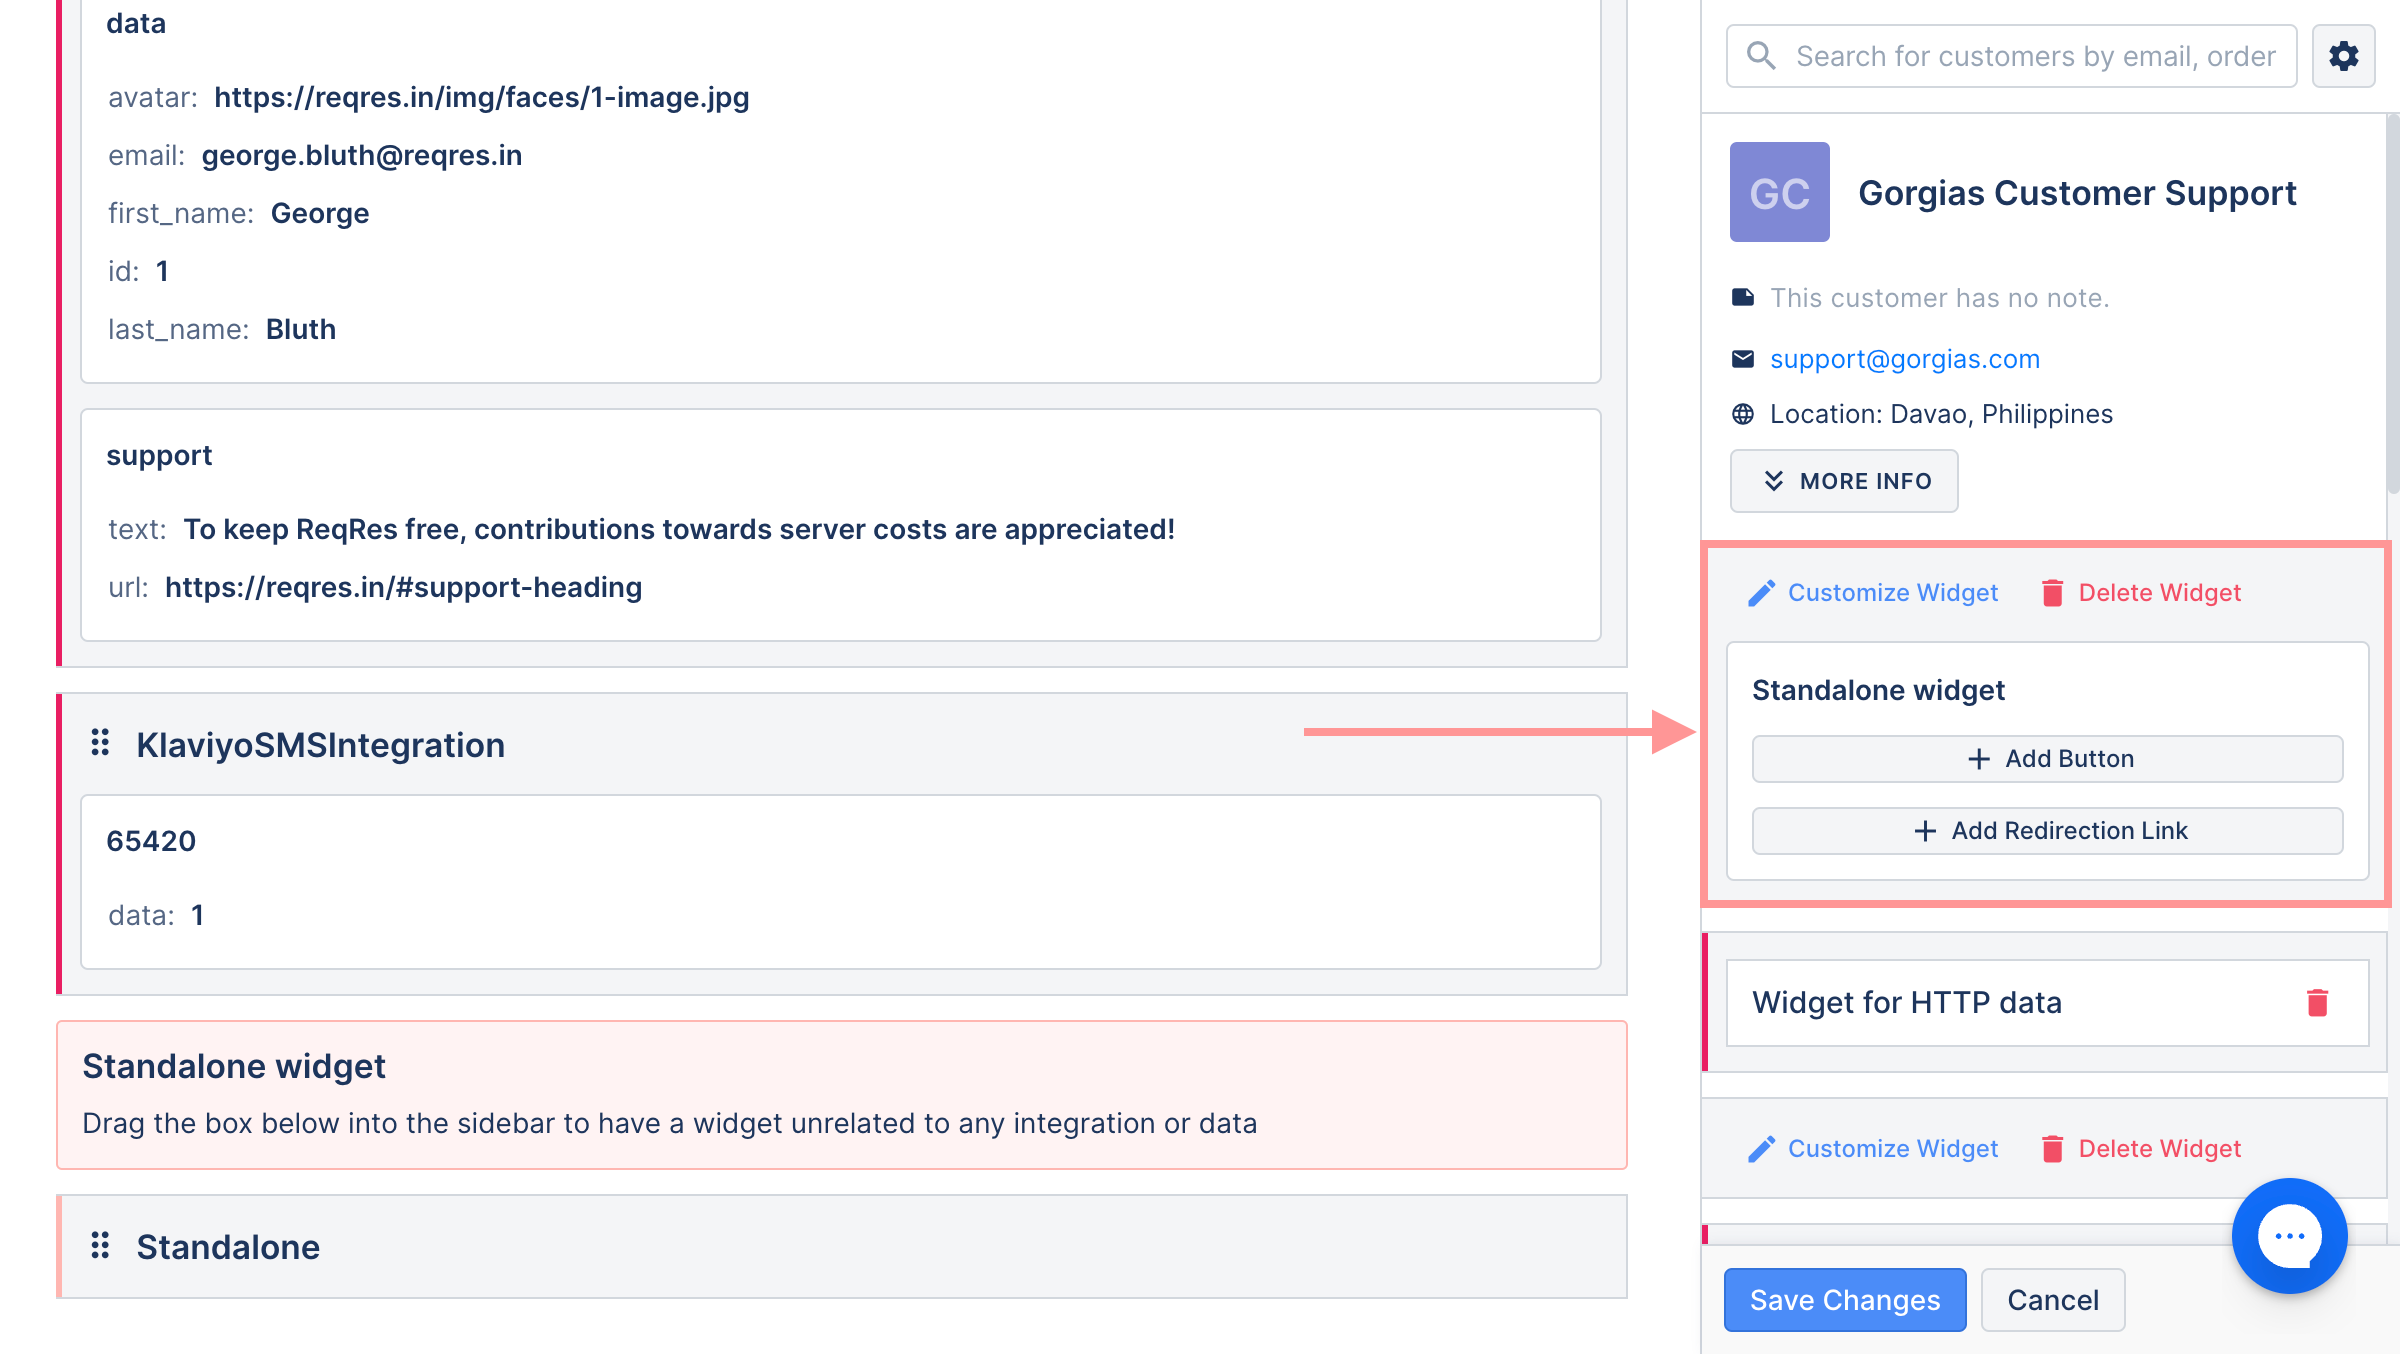
1. Access the edit mode of your widgets by clicking on the cog in the top right corner of any ticket and you'll see two new buttons: Add Button and Add Redirection Link.
2. By clicking on Add Redirection Link, you'll be prompted to provide a Title and a Link, then click Save.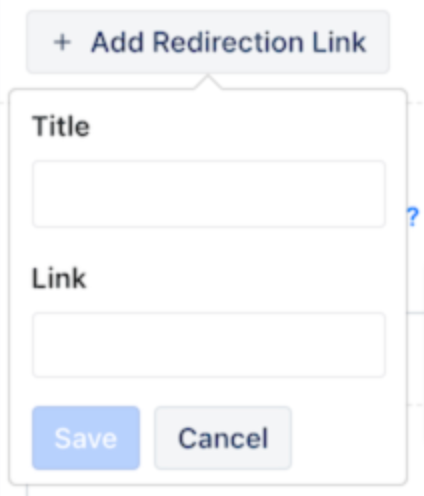
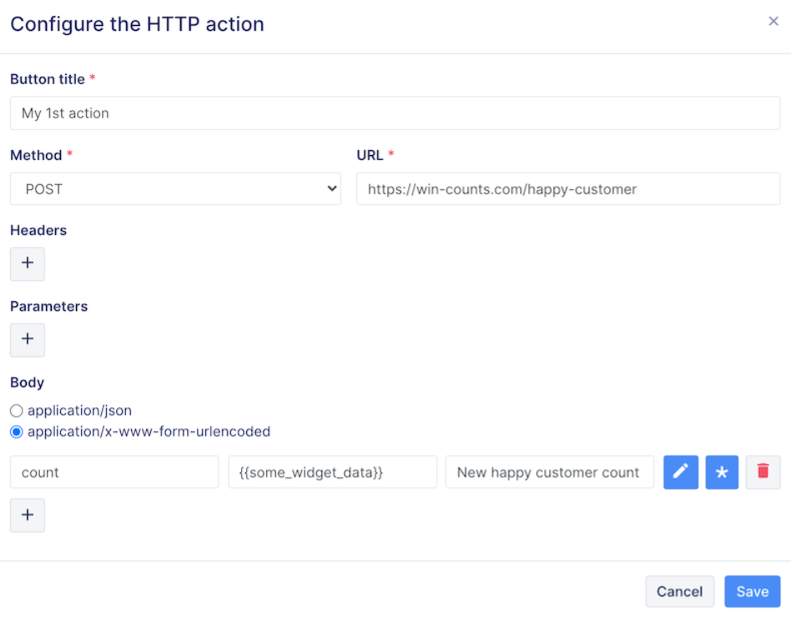
3. By clicking on Add Button, you'll be prompted a modal asking you to configure an HTTP call - you can set as many headers and parameters as you want. We allow 4 HTTP methods: GET, PUT, POST, and DELETE. With PUT and POST methods you can also choose the content type you want and set the body value.
4. Once you are done, click Save.
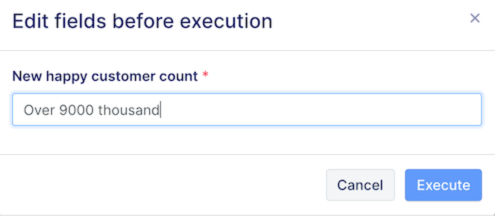
Once an action is set, when clicking on it, you can still edit its editable fields before executing the action. The pen button makes the field editable and the asterisk button enforces the value to be defined before executing the action.
Standalone widgets
This type of widget will allow the use of the custom actions mechanism without requiring any sort of integration or 3rd-party data. Drag it from the list of available widgets into your ticket sidebar on the right-hand side, then start adding your buttons and links there.
You'll find this widget at the bottom of the widgets page and you can drag and drop it into a spot that you see fit on the right, modify it, and Save Changes.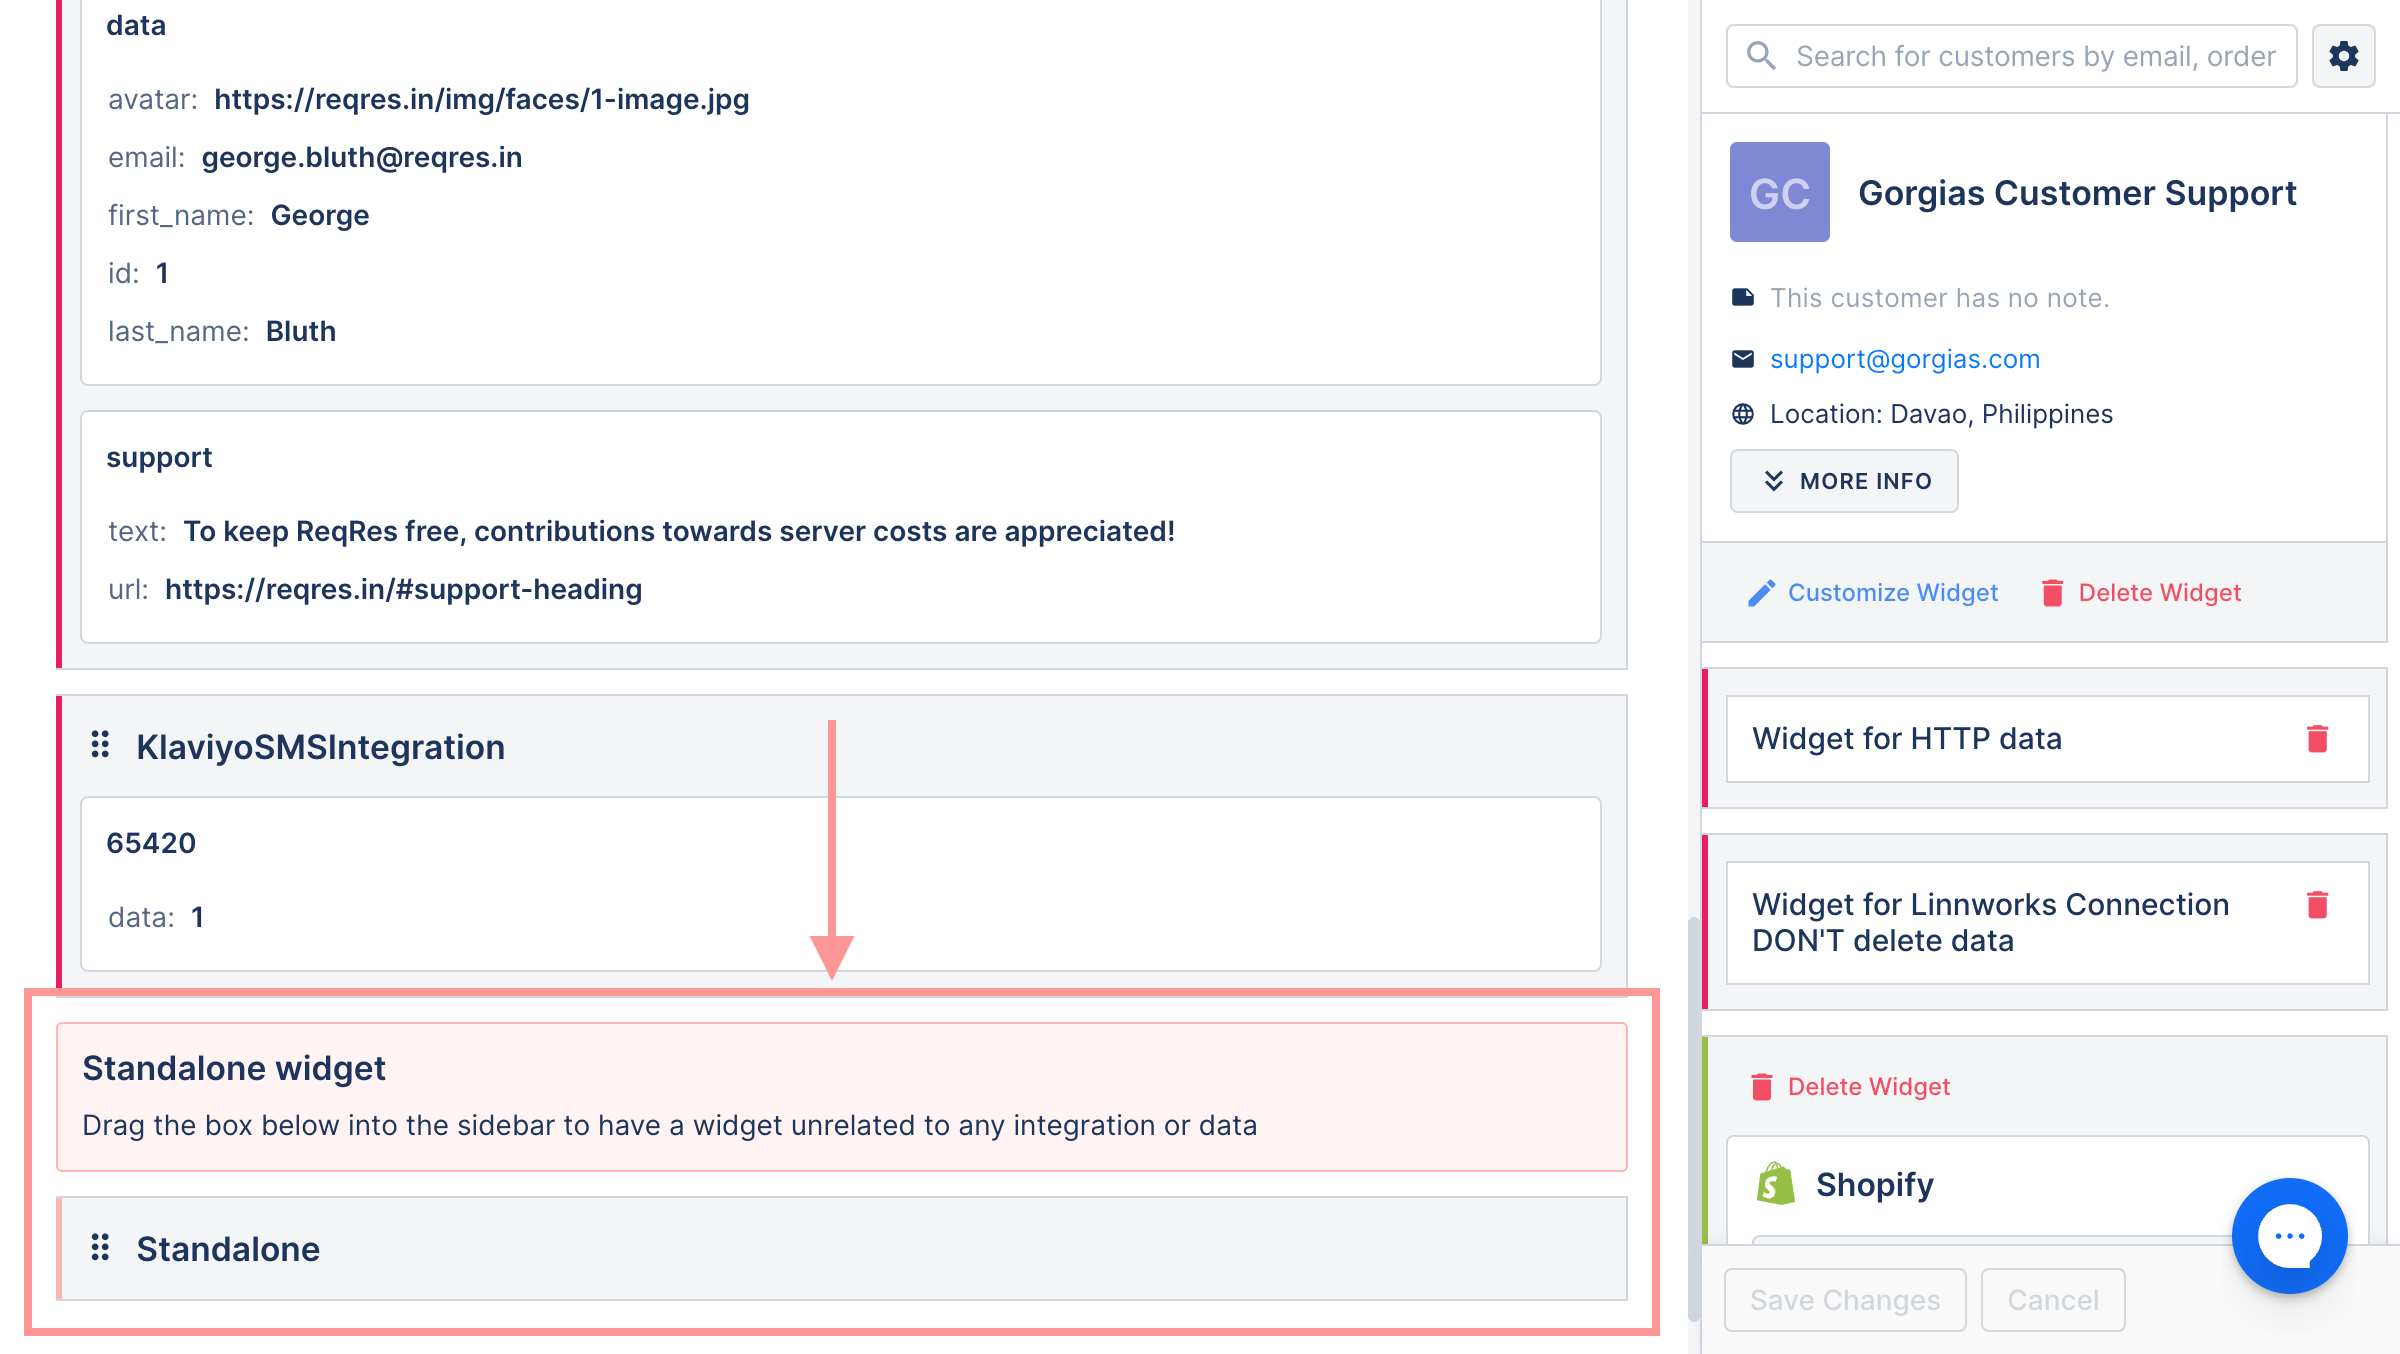
Customizing the buttons for list items with $listIndex and $integrationId
We also offer the option to use data from list objects per list item. When using Macro variables to select data from a listed object, you can use the [$listIndex] parameter in order to obtain the required data for the list item to which each button is going to appear, as well as $integrationId in order to obtain data from the connected integration.
To configure this variable, you need to update it to consist of [$integrationId], name of the listed object with the [$listIndex] parameter, and value of the item within the list {{ticket.customer.integrations[$integrationId].list_object_name[$listIndex].item_name}}.
You can use the shorter path as well {{list_object_name[$listIndex].item_name}}, since the data used is part of the existing integration.
Button configuration set-up example:
If you're trying to use data from a different integration, you'd need to use static values as the $listIndex and $integrationId can't access the data from outside the widget and the integration of which that widget is a part of.
For using these parameter values, you'd need to send the entire variable path with static values
{{ticket.customer.integrations[integration_id].list_object_name[index_number].item_name}}.
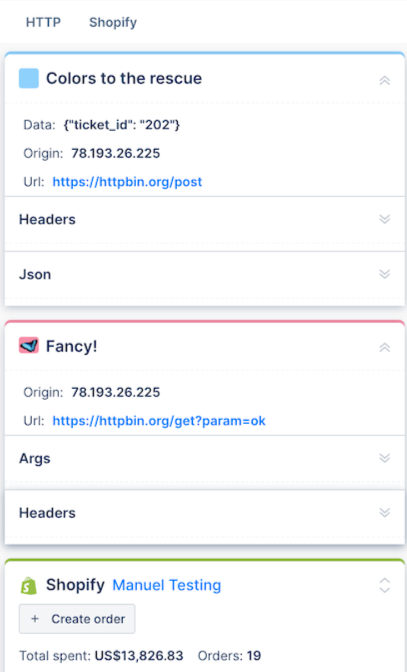
Custom styling
As you add more custom widgets to your Gorgias account, it can become hard to distinguish them. Adding a specific title to each widget is great but when you have a lot of them it might not be enough customization.
1. Click on the cog icon for each of the parts of the HTTP widget you wish to style.

2. Add emojis and colours to have a much clearer layout.
Templating mechanism
You may have noticed the {{value}} syntax - it's the same templating mechanism you may be familiar with that's used in several other places in the helpdesk. The values that you have at your disposal are the ones described in a ticket context or a customer context. Whatever context you're in, you can also access the widget data.
In edit mode, the widget data are the fields displayed at the left of the widget panel.
Once you're done, don’t forget to click on the Save Changes button at the bottom of the widget panel before exiting the edit mode to save your changes.
To use your new custom links and widgets, click on the link title and a new tab will open at the address you provided previously in the link field. As for custom action buttons, when clicking on them you will be optionally prompted to edit some fields if you decided so in your setup.
For example:
A message will be appended to the conversation so you have a clear overview of what happened on the ticket and when:

Use cases
Loyalty and rewards integrations
- Manually add loyalty points (and choose the amount of points)
- Manually attribute a discount code (and choose discount amount)
- Manually credit customer with a reward
- Update or set a birthday or anniversary date
Reviews and Q&A integrations
- Request a review from the shopper
- Approve or reject a new review coming into Gorgias
- Answer question in Q&A via email
Shipping and returns integrations
- Mark an item as lost / damaged
- Start a return request
- Generate a return label for a customer
Shopify
- Create discount codes
- Create a gift card (Shopify Plus only)
Magento and BigCommerce
- Cancel an order
- Create a refund
Email marketing and CRM integrations
- Update a customer field
- Add shopper to an email list / segment / etc.
- Remove shopper from an email list
