Rule TemplatesUpdated a month ago
You can select some premade Rules (with matching Views) to set up instantly - these are curated to fit some of the most common workflows and are proven to automate a big portion of your customer interactions.
If you just joined Gorgias, you already have two default Rules enabled in the Rules section. From there, you can enable more from the Rule Library or create new ones on your own.
Steps
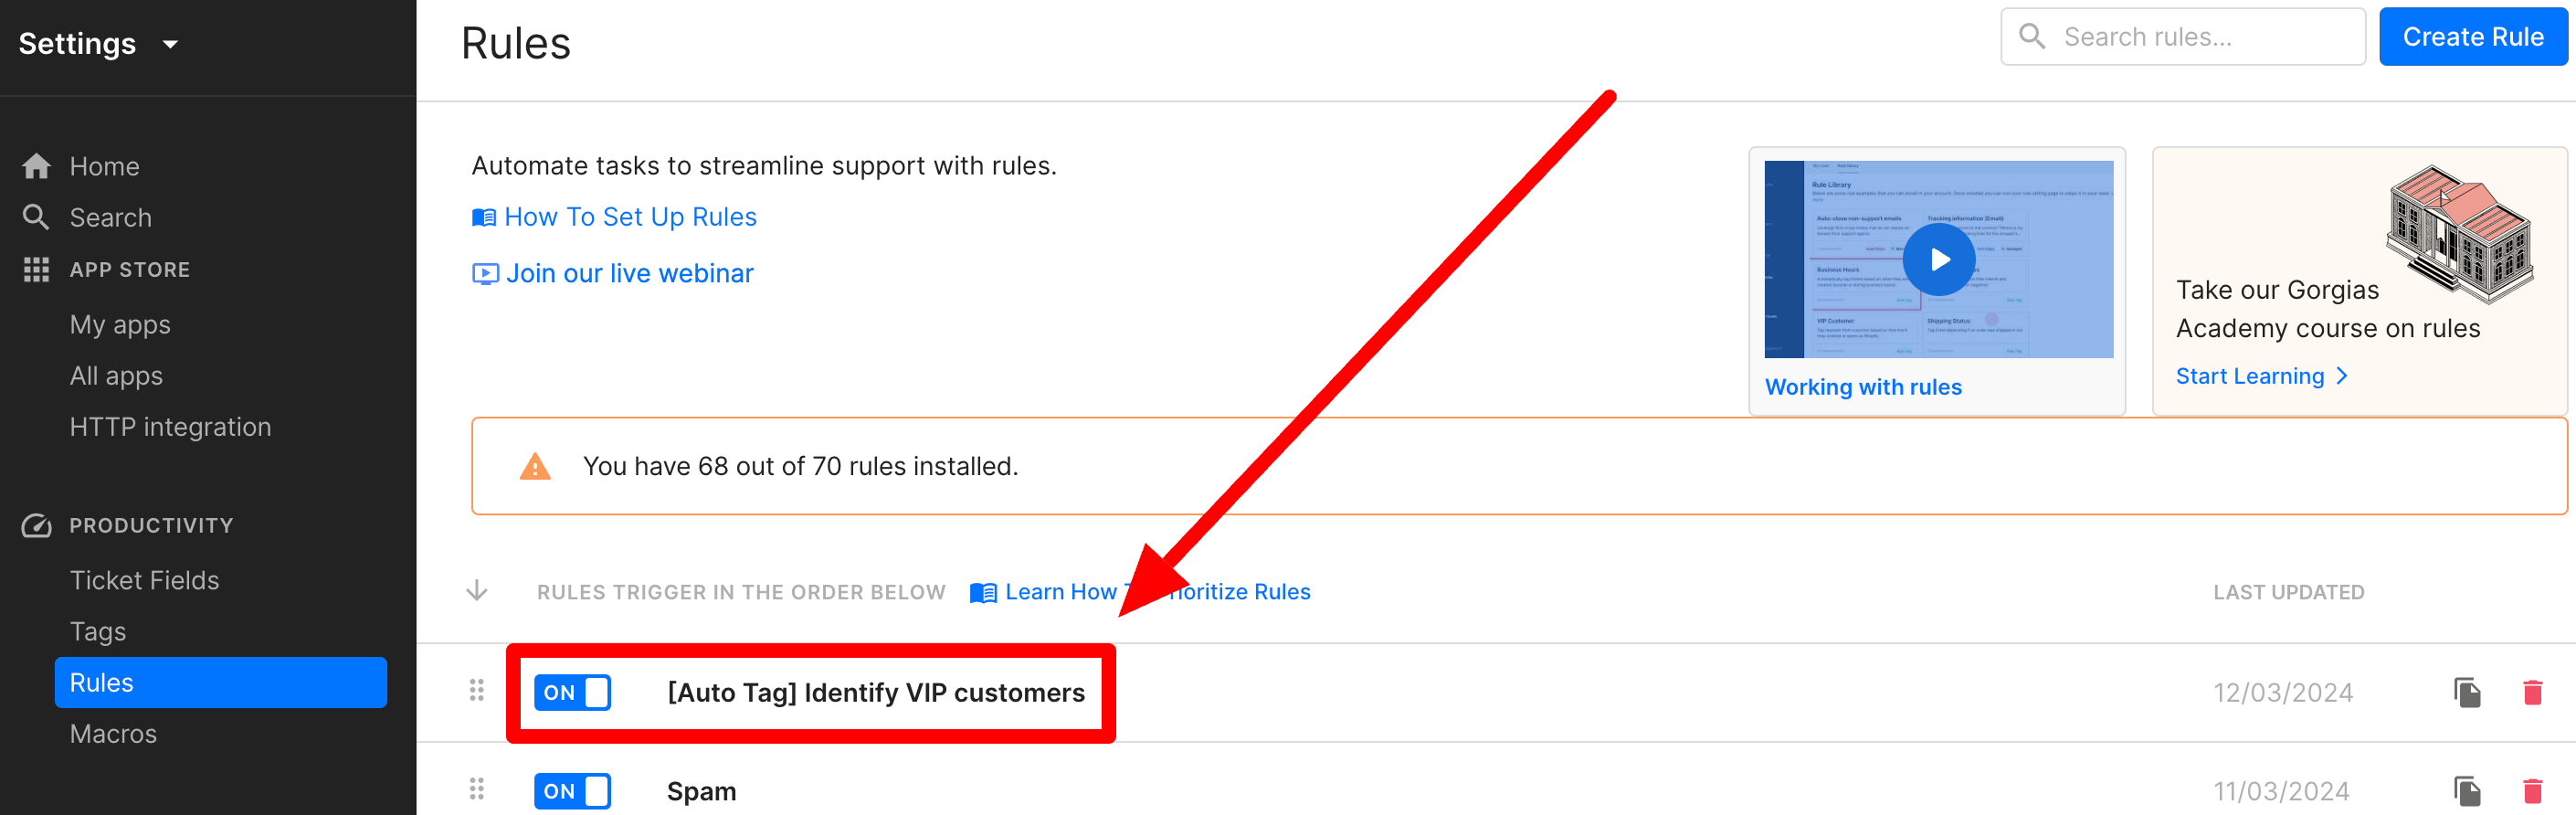
1. Navigate to Settings -> Productivity -> Rules.
2. Click on Create Rule in the top right corner.
3. Under Rule Templates, choose one of our pre-made Auto-tag or Auto-close Rules.
4. Once you've one, click on it to see a preview - you can also check the box next to the Create the ticket view option to automatically create a View matching the Rule.
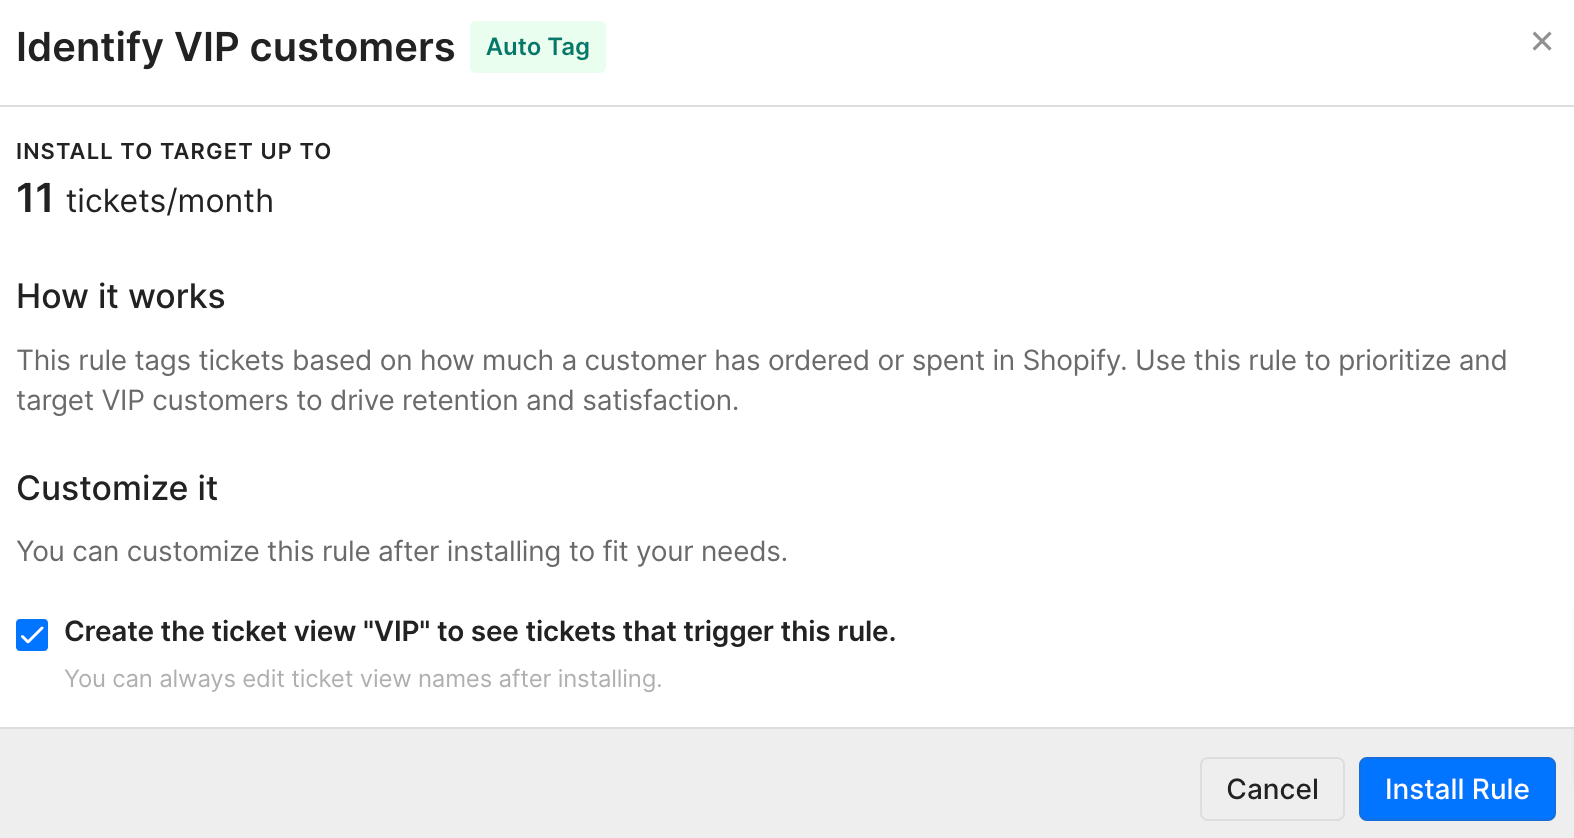
4. After you click on Install Rule, you'll have a chance to review the setup.
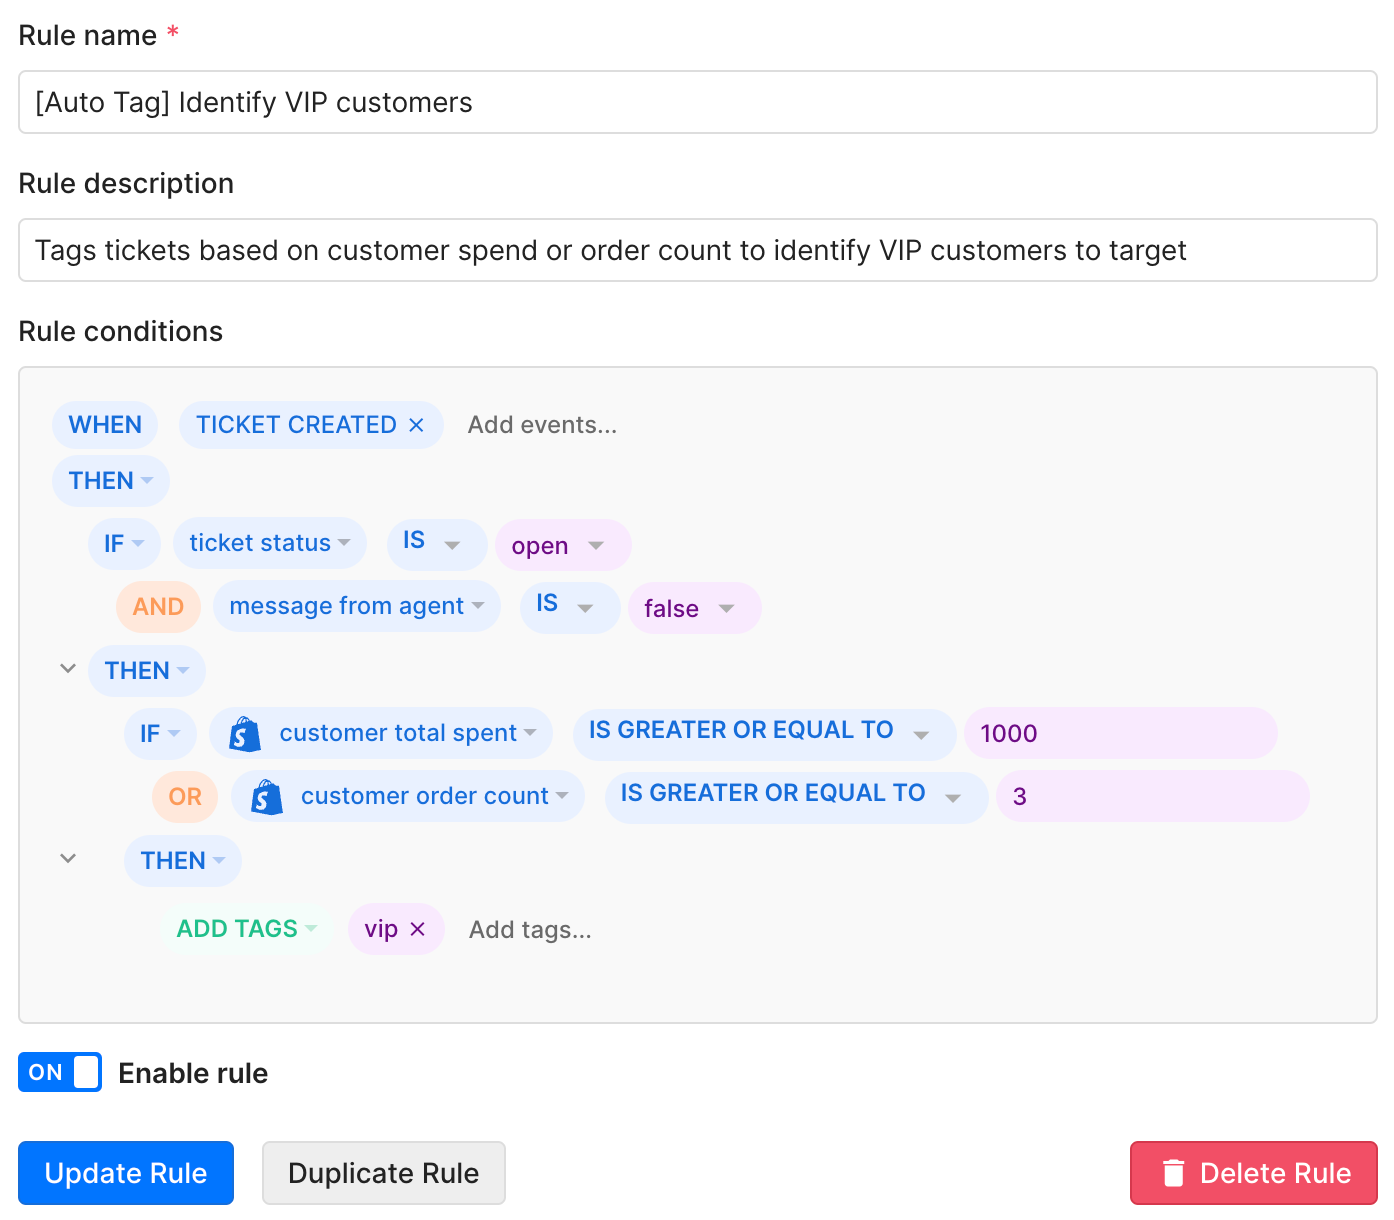 5. Once you click on Update Rule, you'll find it installed under Rules where you can also modify it later if needed to better suit your business needs.
6. Under Tickets, you'll also find a new View matching the Rule setup - you can also adjust the View further there.

