
Your profileUpdated 2 months ago
Each Gorgias user has a section specific to them titled Your profile - you can access it by clicking on your name in the bottom left and choosing Your profile or navigating to Settings -> You -> Your profile.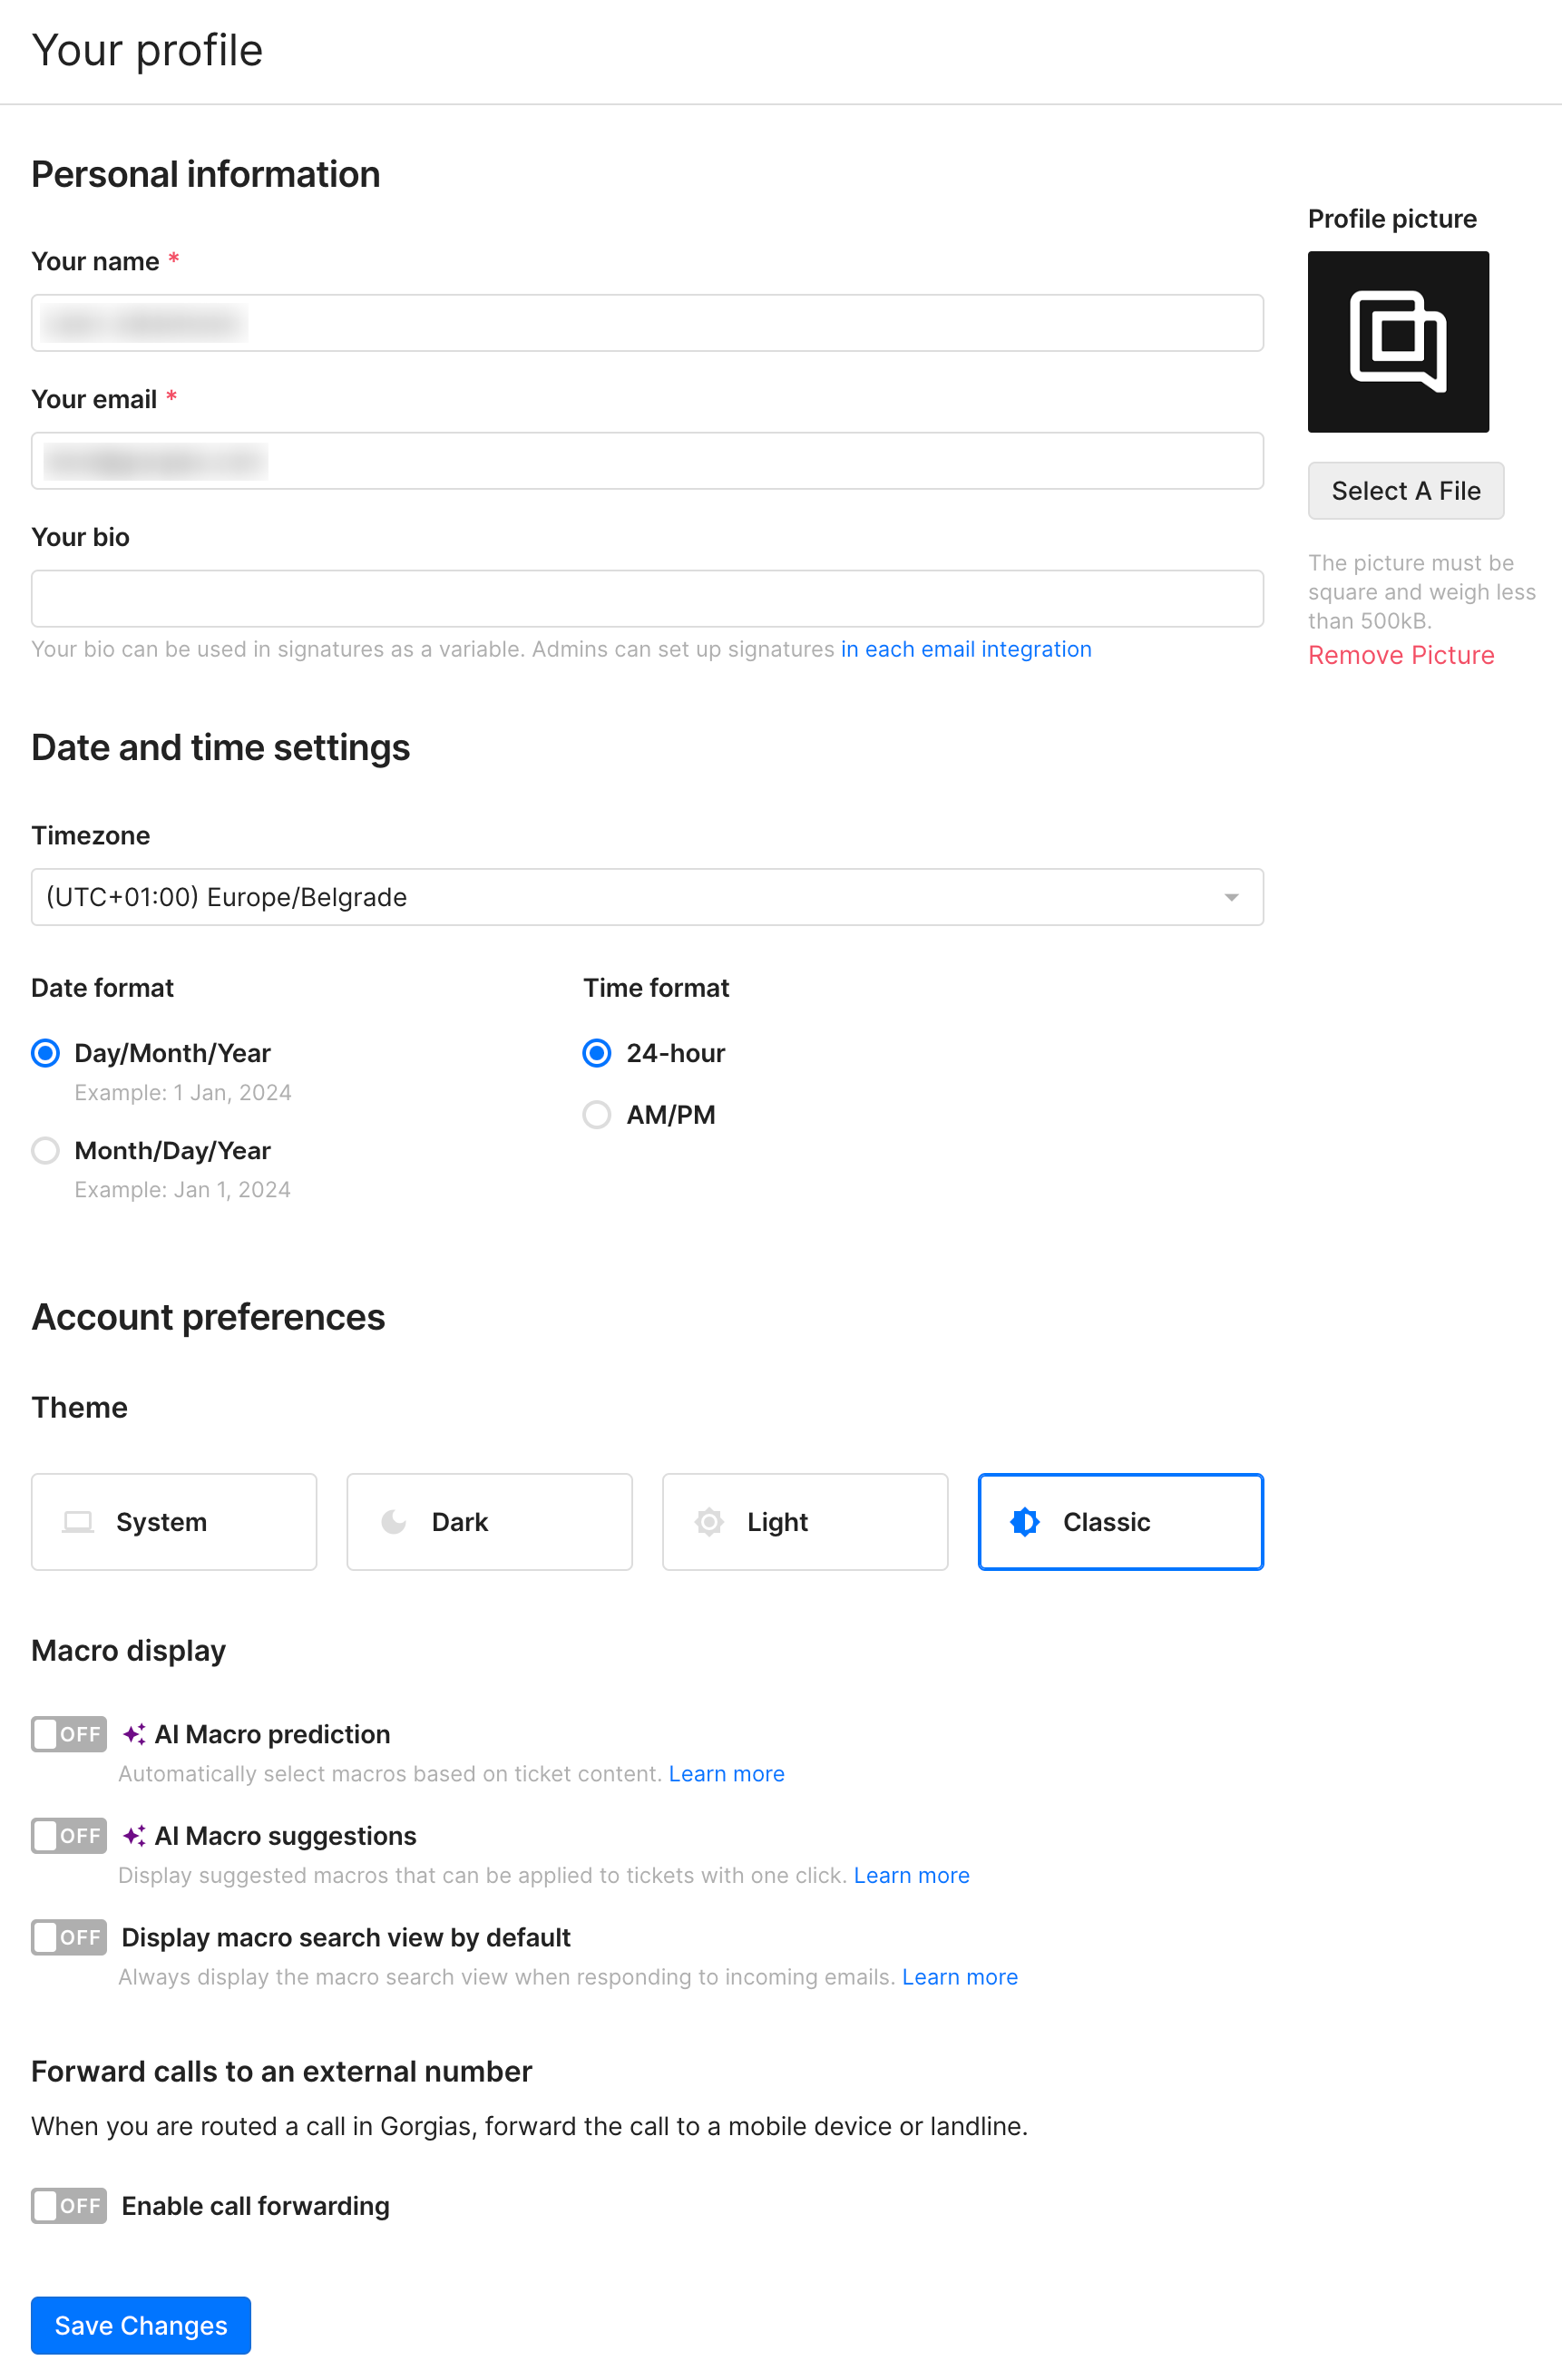
Profile information and settings
Personal information
| Your name | Your full name - it can be used as a variable, in Chat, in statistics, and the helpdesk in general. |
| Your email | Your email address and the email you use to log in as a user - it can be used as a variable, in Chat, statistics, and the helpdesk in general. |
| Your bio | Your bio or role in the helpdesk - it can be used as a variable. |
| Profile picture | You can upload a 500 KB square picture as your profile picture here. |
| Timezone | Your timezone - it controls the timezone and time/date format for you as a user and determines which timezone you see statistics in. |
| Date format | You can choose between the MM/DD/YYYY and DD/MM/YYYY date formats and the 24-hour or 12-hour (AM/PM) time format. |
| Theme | You can choose between the System, Dark, Light, and Classic helpdesk themes here or by clicking on your name in the bottom left and then on Theme. |
Macro display
| AI Macro prediction | This can help pre-fill the typing field with a relevant Macro when the system predicts you'll use a certain type of Macro on a ticket you're replying to. |
| AI Macro suggestions | This will display the top 3 suggested Macros for a specific ticket you're replying to based on our own machine learning-powered recommendation engine. |
| Display macro search view by default | This will automatically open up the Macros panel every time you open a ticket. |
Forward calls to an external number
| Enable call forwarding | This will forward calls routed to you in the helpdesk to an external phone number. |
Was this article helpful?
Yes
No
