Ada AI ChatbotUpdated 5 months ago
Ada AI chatbot can be used by non-technical CX teams and can power personalized interactions for every customer using Ada’s codeless platform.
You can avoid WISMO questions, as Ada and Gorgias will provide instant, real-time responses using no-code integrations to your order management system including Shopify, Magento, and more.
You can also use Gorgias and Ada to make the first move - reach out to customers on your site proactively with personalized information or offers - and hand off a customer to a Gorgias live agent when needed.
Steps
Install Ada on your website
1. First, configure your Gorgias Chat integration and copy the Javascript code from the Installation tab, under Manual installation.
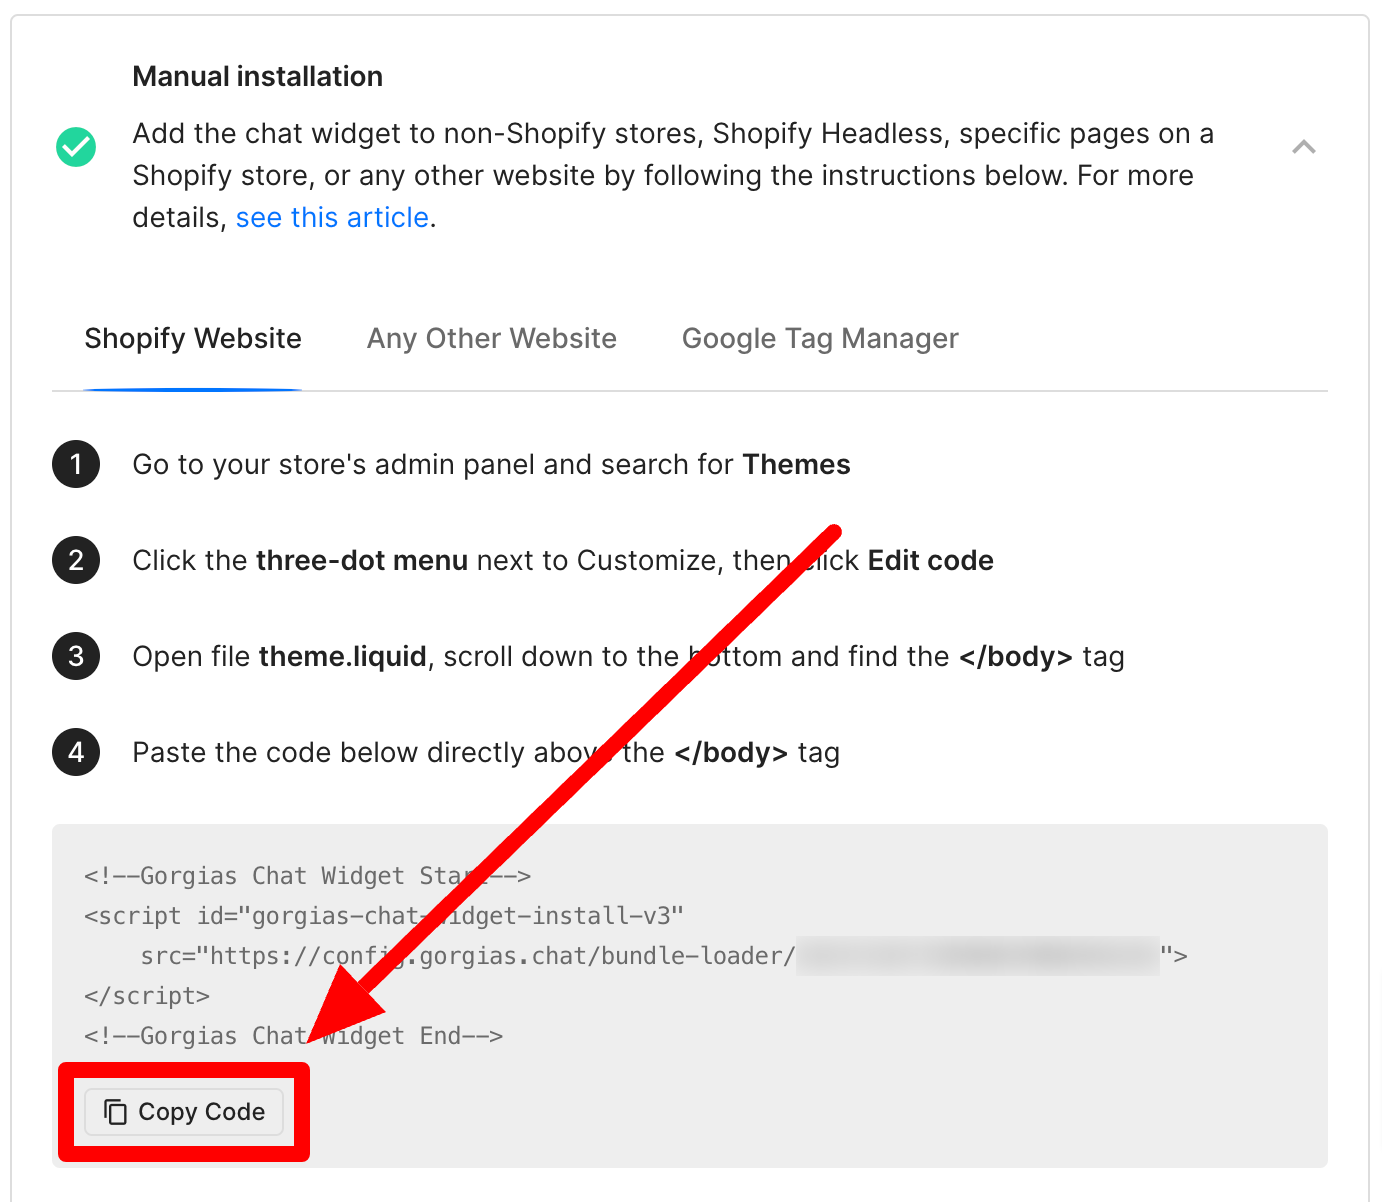 2. Next, embed Ada and Gorgias on each web page where you'd like both to be implemented (sample code).
3. To do this, add the style tag section from the above-linked sample code to the <head> section of your page or add the recommended styles to your CSS style sheet - these styles will help display the appropriate Chat buttons.
4. Add the first two script tag sections from the above-linked sample code to the bottom of your page (similar to how it's placed in the sample), and replace ADA_BOT_HANDLE with the handle of your Ada bot - this code will add Ada to your page, and display and hide the appropriate Chat widget elements when needed.
5. Replace the below comment with your Javascript snippet from step 1:
<!-- <Gorgias Chat Widget Javascript snippet goes here> -->
(Optional) Add this CSS to your page, to align Gorgias’ button with Ada’s:
1#gorgias-chat-container iframe#chat-button {2 height: 64px !important;3 width: 64px !important;4 margin-bottom: 12px !important;5}
Configure the handoff in Ada
1. Navigate to the answer flow in your Ada bot dashboard where you’d like to hand off to Gorgias Chat and add each of the blocks below in the following order to build out this answer.
2. Add any message about handing the chatter off to an agent.
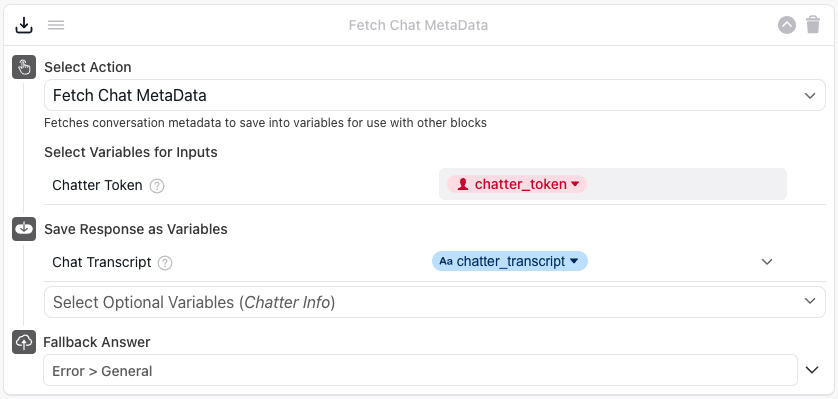
3. Add a Request block to retrieve the chatter transcript from Ada and store it in a variable, with the following parameters:
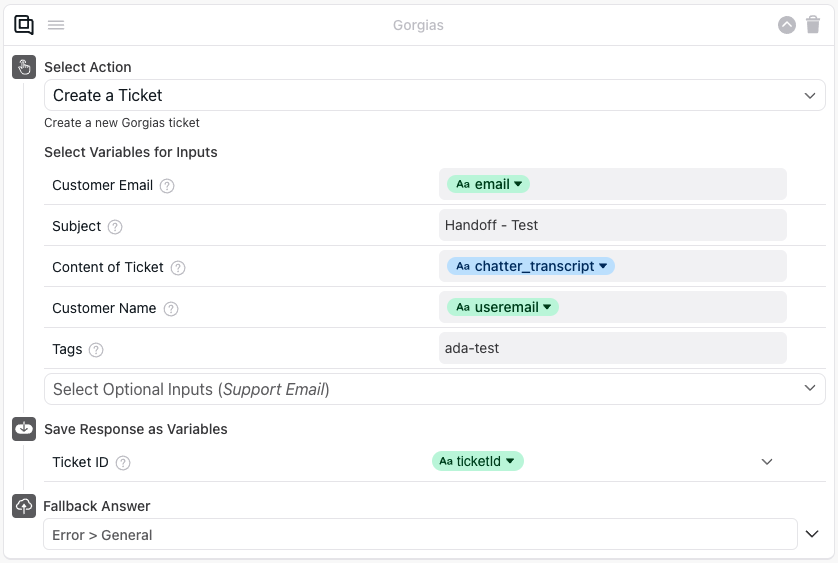
4. Following the above Request block, add a second Request block to pass the chatter transcript as an Email Ticket in Gorgias, with the following parameters:

5. Add any messages and quick replies welcoming the chatter back, after their session with the Gorgias Agent is complete.
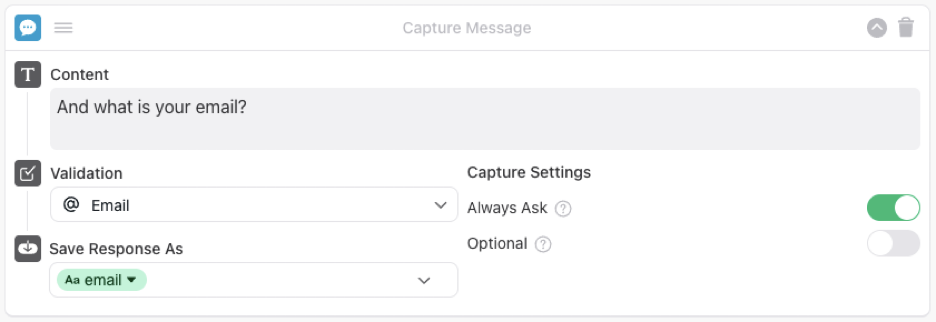
6. If you'd like, add Capture Message blocks to capture chatter information like the customer's email address.
7. Following your Capture Message blocks, add a Custom Handoff block. This will trigger the custom_handoff event that we added the callback for in the embed script (there aren't any settings to configure for this block within Ada).

8. Add any messages and quick replies welcoming the chatter back, after their session with the Gorgias Agent is complete.

Configure Gorgias Ticket creation in Ada
1. Navigate to the answer flow in your Ada bot dashboard where you’d like to create a ticket. Then, add each of the below blocks in the following order to build out this answer.
2. Add any messages about creating the support ticket, and if you haven’t done so already, ask the user for ticket details, including their email address, issue description, etc.
3. Add a Request block to retrieve the chatter transcript from Ada and store it in a variable, with the following parameters - it'll be passed to Gorgias and included in the Email Ticket.

4. Following the above Request block, add a second Request block to create the ticket in Gorgias, with the following parameters:
5. Add any messages and quick replies to let them know their ticket has been created and let them continue the conversation with Ada in the meantime.
Limitations
The Gorgias AI Agent will not work with ADA email tickets because it doesn’t respond to tickets made via the API, as of right now. Even though tickets transferred from the ADA chatbot are created as email-channel tickets in Gorgias, they are still created via our API and cannot be responded to by the AI Agent.
