
NetsuiteUpdated 7 days ago
NetSuite ERP is an all-in-one cloud business management solution that helps organizations operate more effectively.
How it works
By integrating NetSuite and Gorgias, you can automate core processes and have real-time visibility into operational and financial performance, as well as manage accounting, inventory, operations, etc.
Setup
Enable Token Based Authentication (TBA)
- Go to Netsuite dashboard
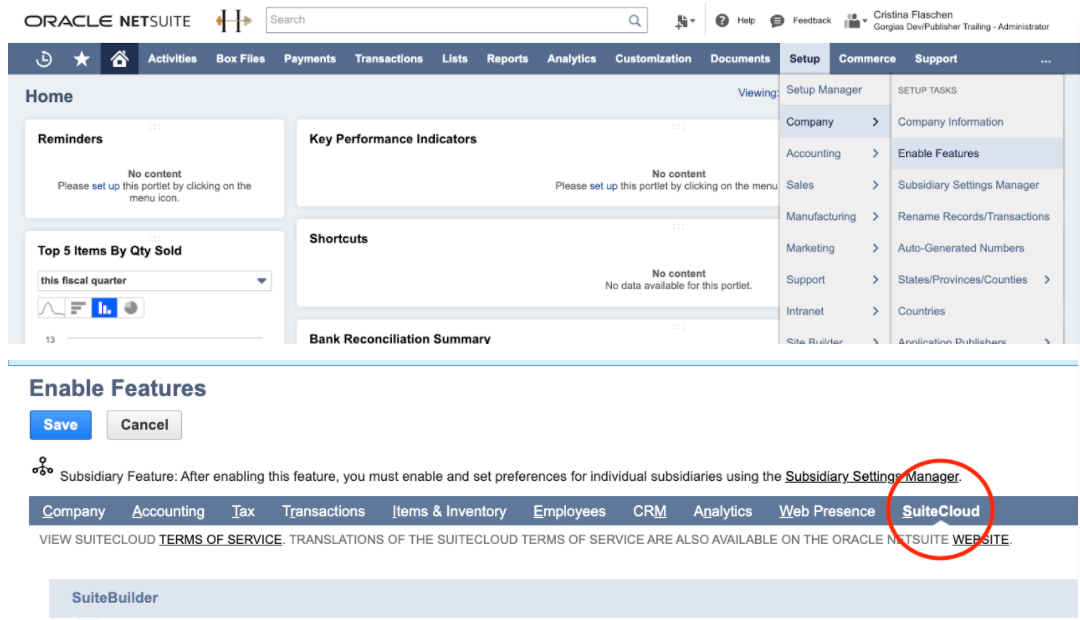
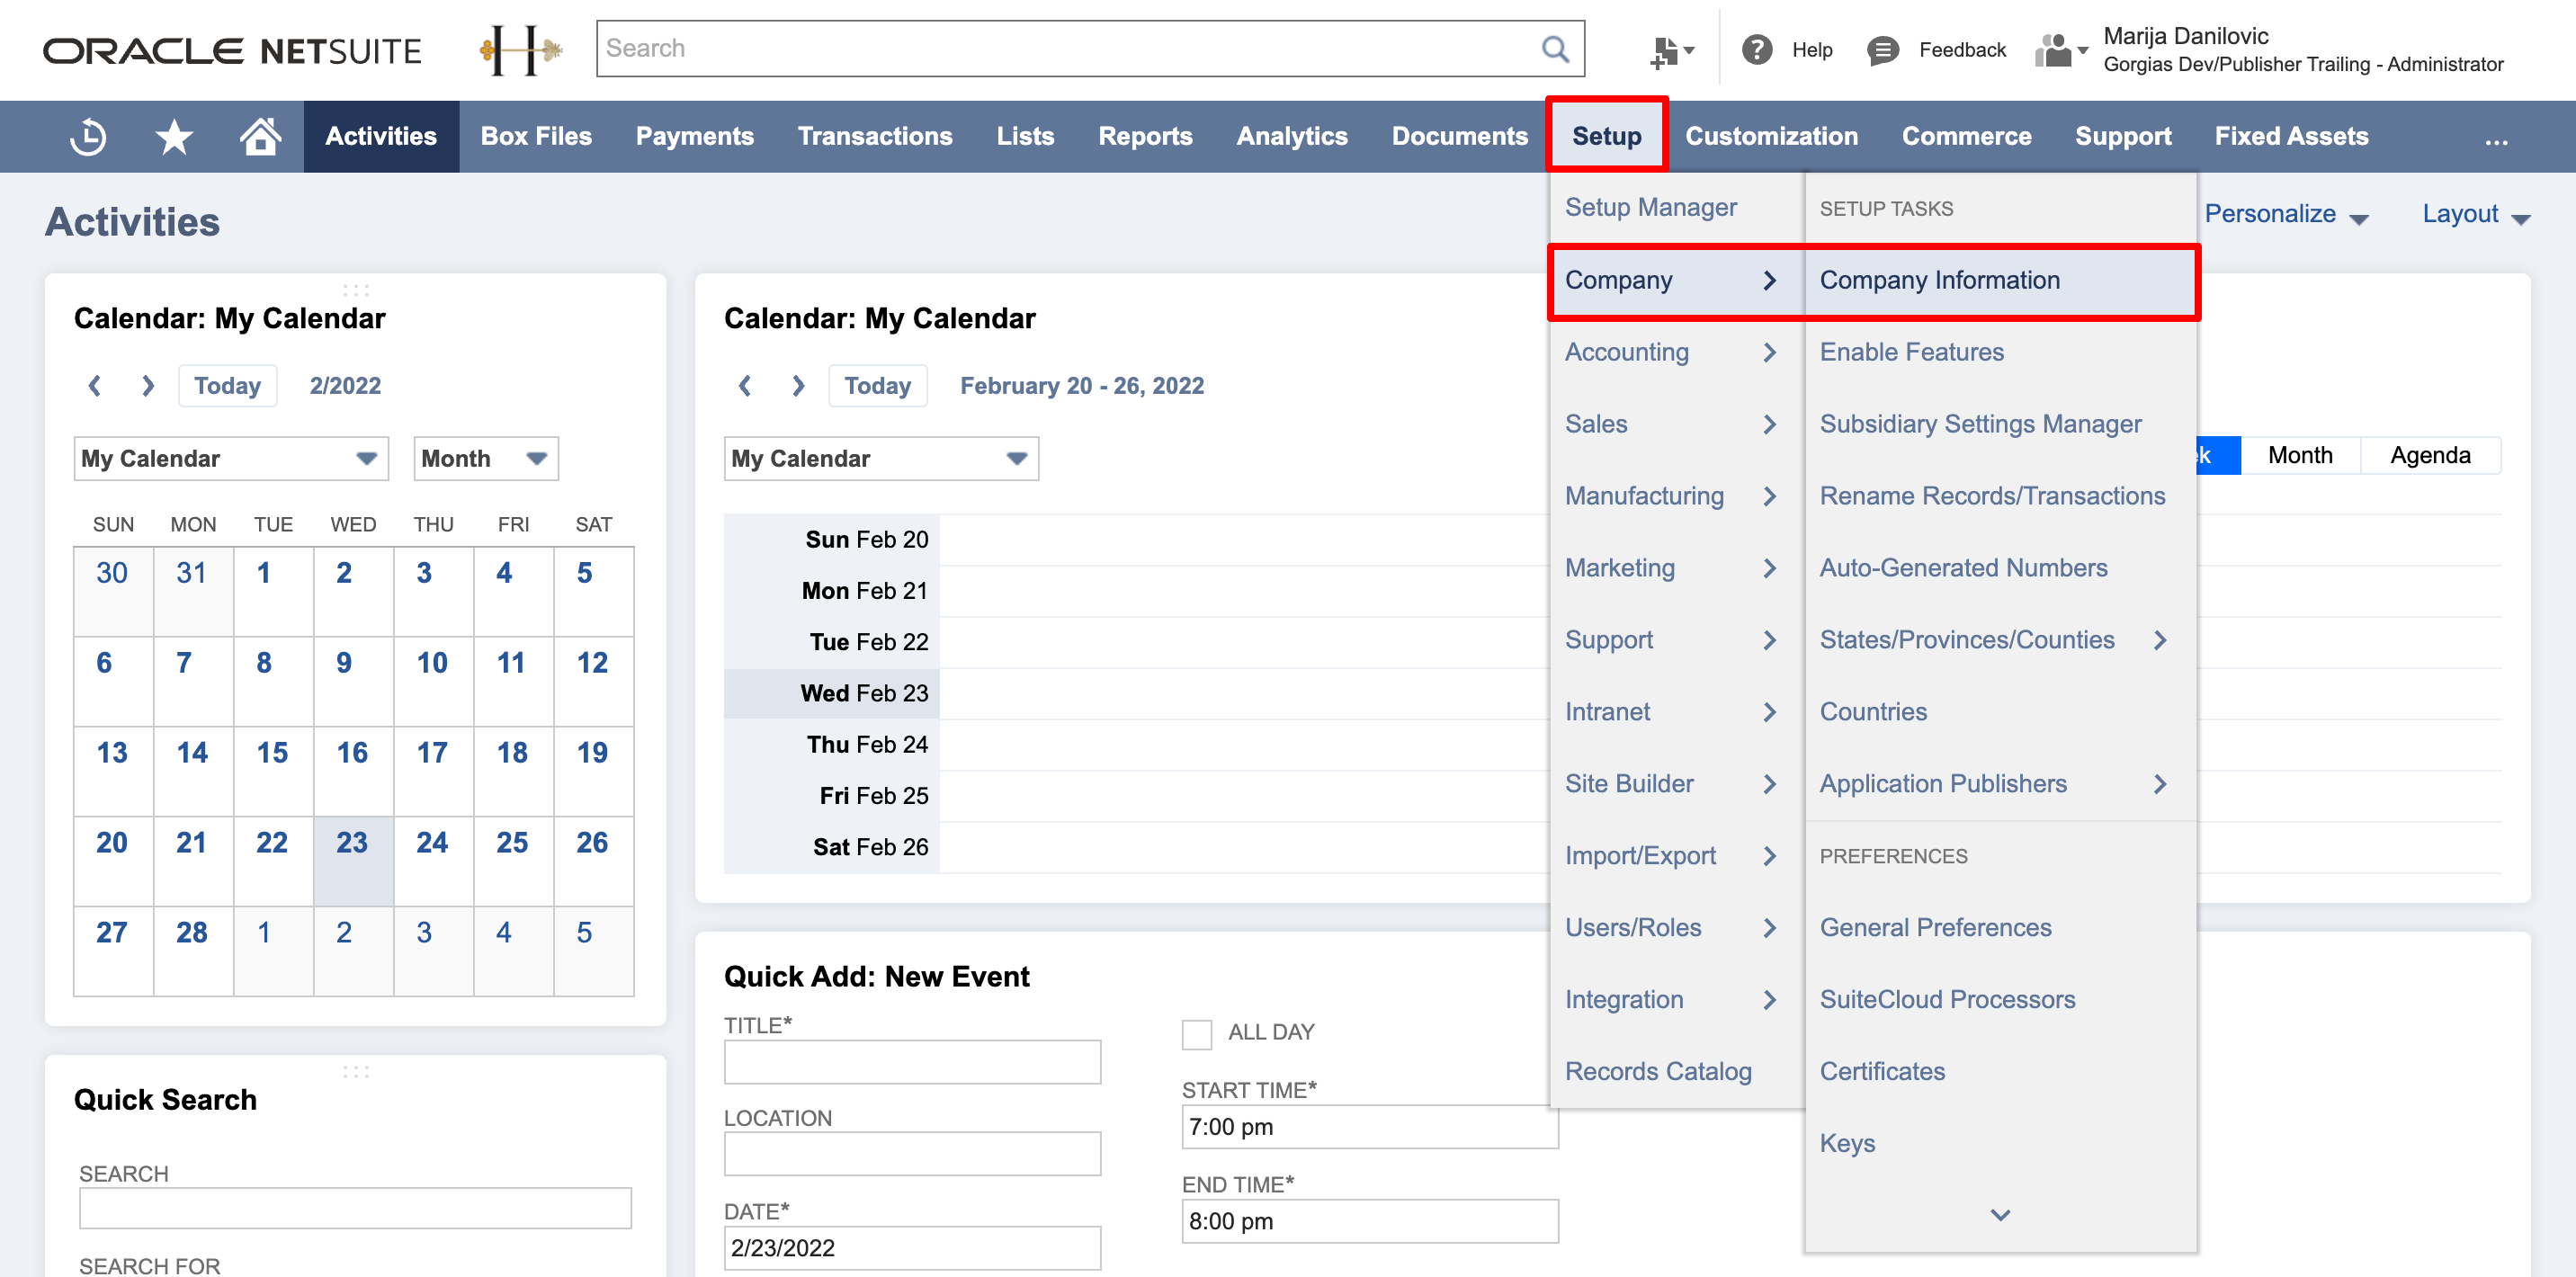
- Setup > Company > Enable Features > Suite Cloud > Manage Authentication:
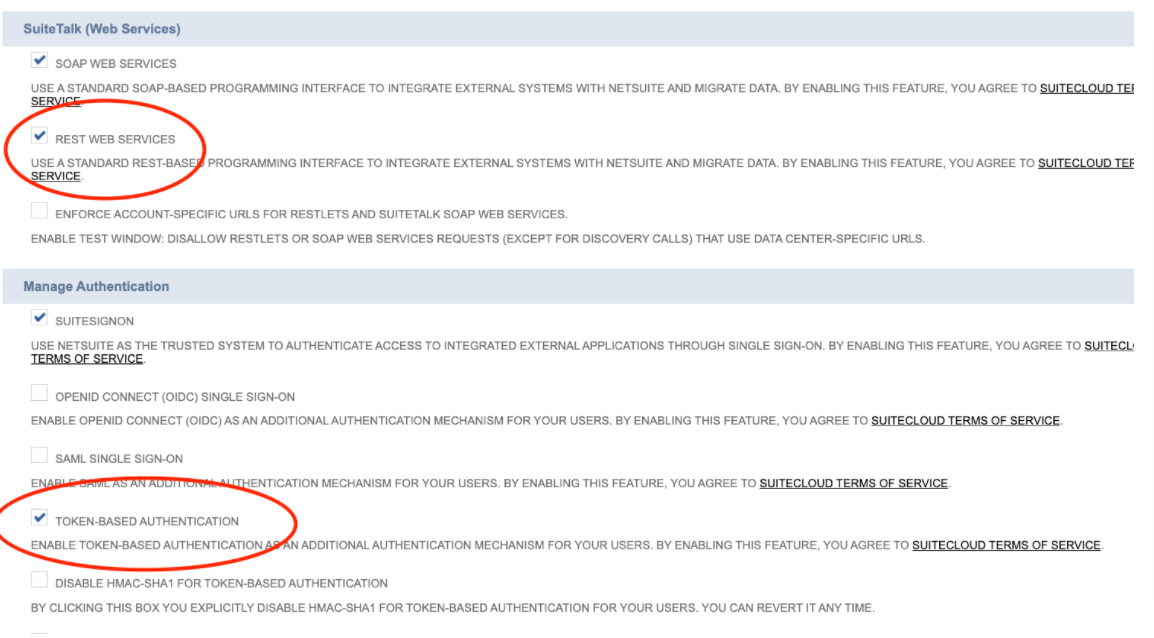
- Check Enable Token-Based Authentication and Rest Web Services:
Create Integration Record
Go to Netsuite dashboard
Setup > Integrations > Manage Integrations:
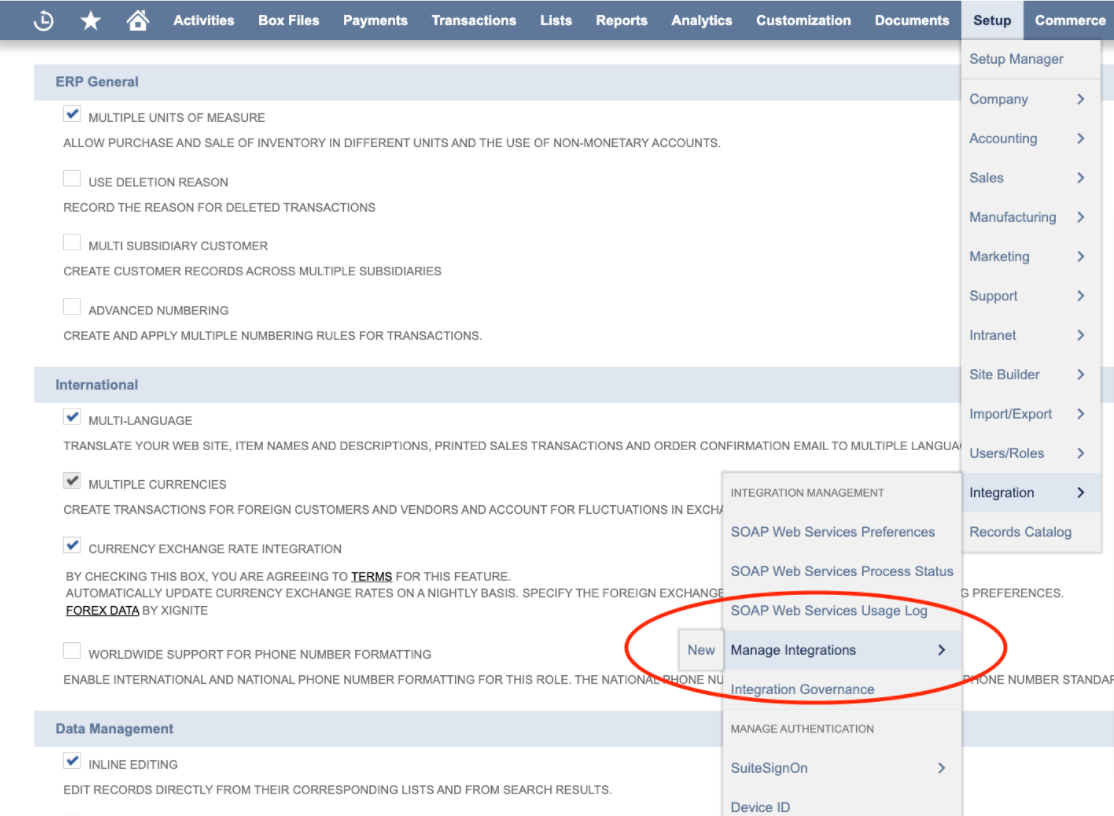
Click New
Name it anything - GORGIAS, etc.
Have the options below selected/filled then save:
- Token-Based Authentication TBA: Authorization Flow Callback URL: https://api.pandium.io/v0/author/callback/netsuite
- OAuth 2.0 Authorization Code Grant Public Client Redirect URL: https://api.pandium.io/v0/author/callback/netsuite Restlets Rest Web Services
Copy Consumer Key and Consumer secret.
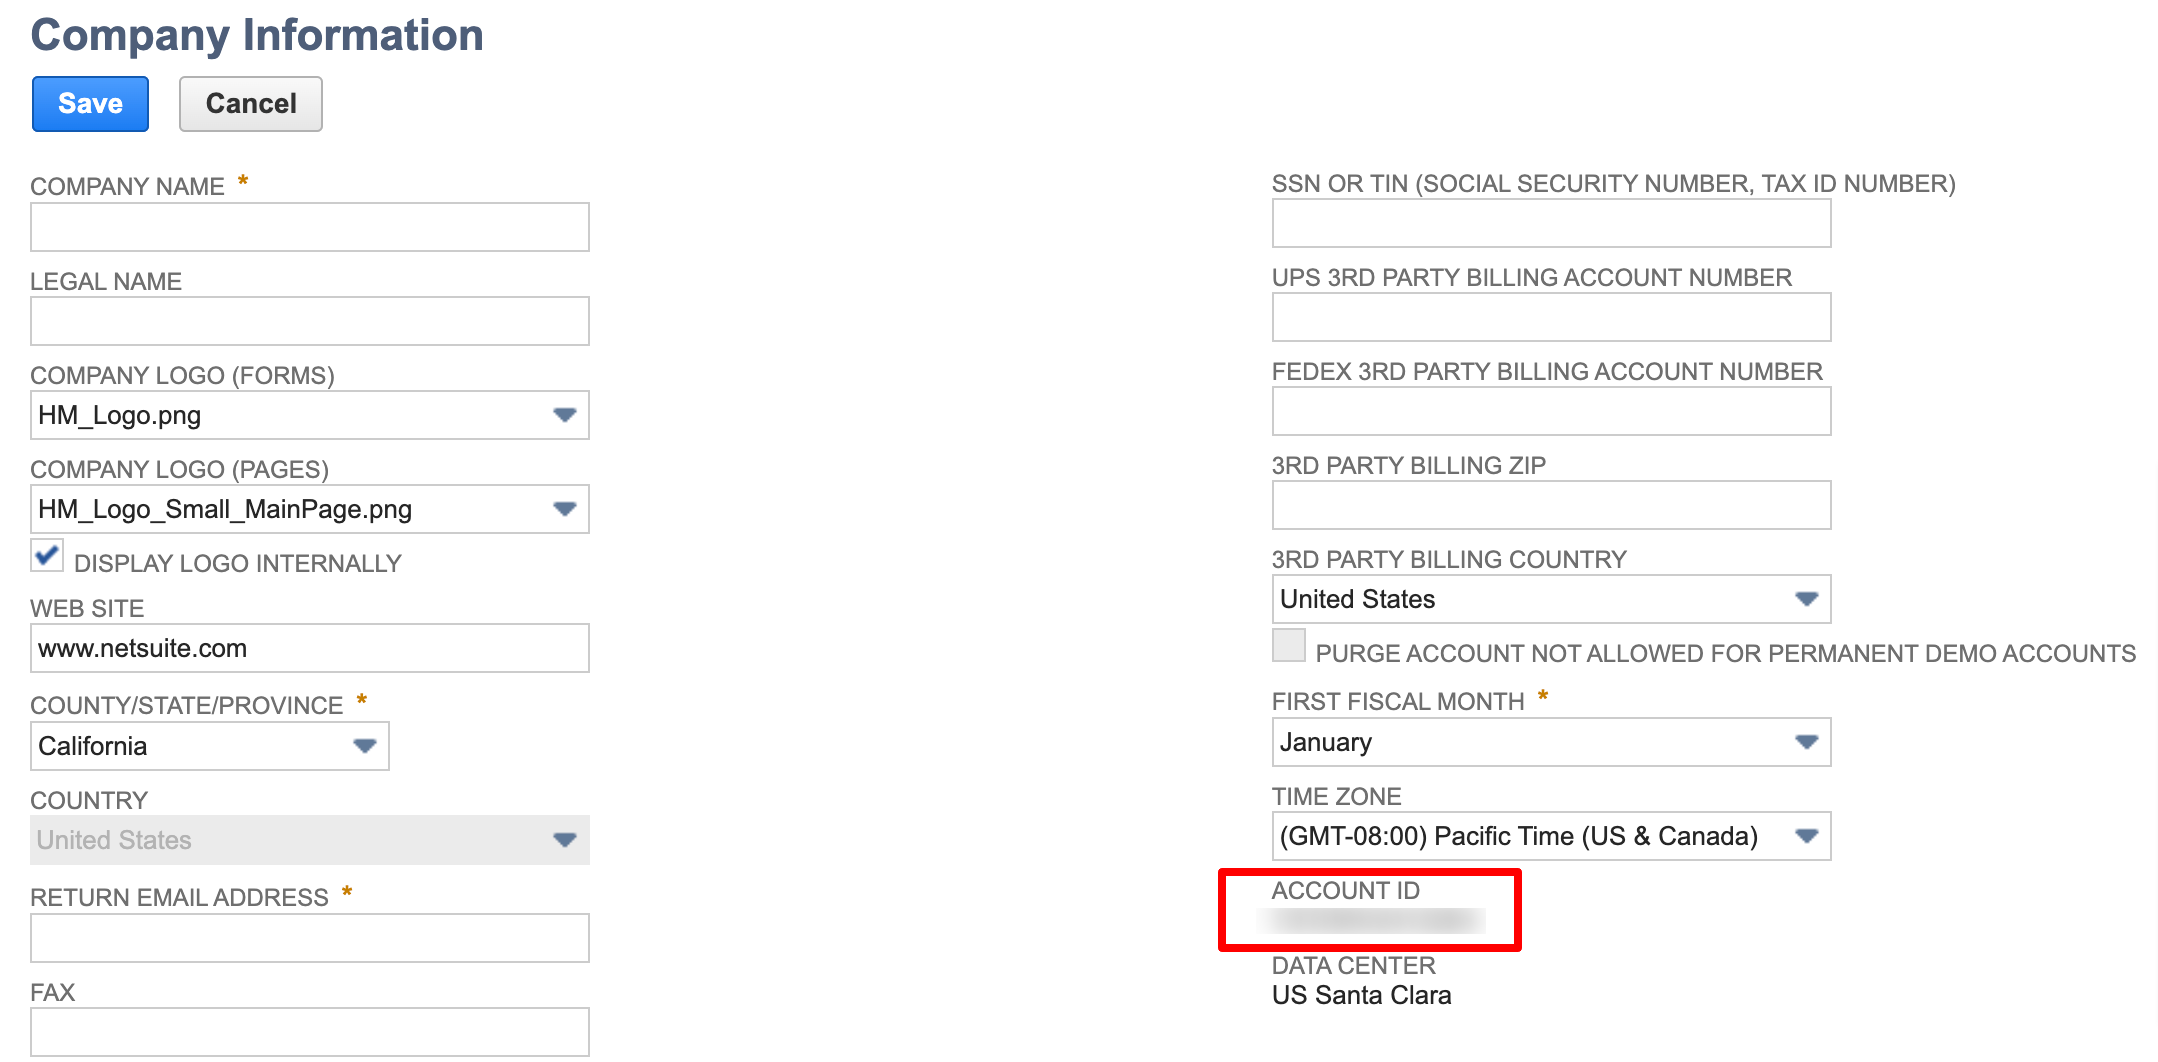
This is only displayed ONCE so please copy them before leaving the page- You can find the Company ID/Account ID in Setup > Company > Company Information.Company ID will be needed in the further setup steps, please make sure to copy it as well.
Create a Role and assign it to a User
- Go to Netsuite dashboard, Setup > Users/Roles > Manage Roles > New
- Create a role and assign these permissions:
Manage Roles > Edit > Permissions > Transactions:
Find Transaction
Sales Order
Manage Roles > Edit > Permissions > Setup:
Log in using Access Tokens
REST Web Services
Manage Roles > Edit > Permissions > Reports:
SuiteAnalytics Workbook
THEN: 1. On the Role under Permissions Tab, navigate to “Lists” (just beside the Reports subtab)
Add “Items”
2. Manage Roles > Edit > Permissions > Lists
Add “Customer”
THEN: Setup > Users/Roles > Manage Roles and select the custom role. On the Permission Tabs, under the Lists, Subtab, add the "Perform Search" and make it "Full".
- Add these permissions as well, if they haven't been added already:

- Assign the role to the user that will be used for the integration:
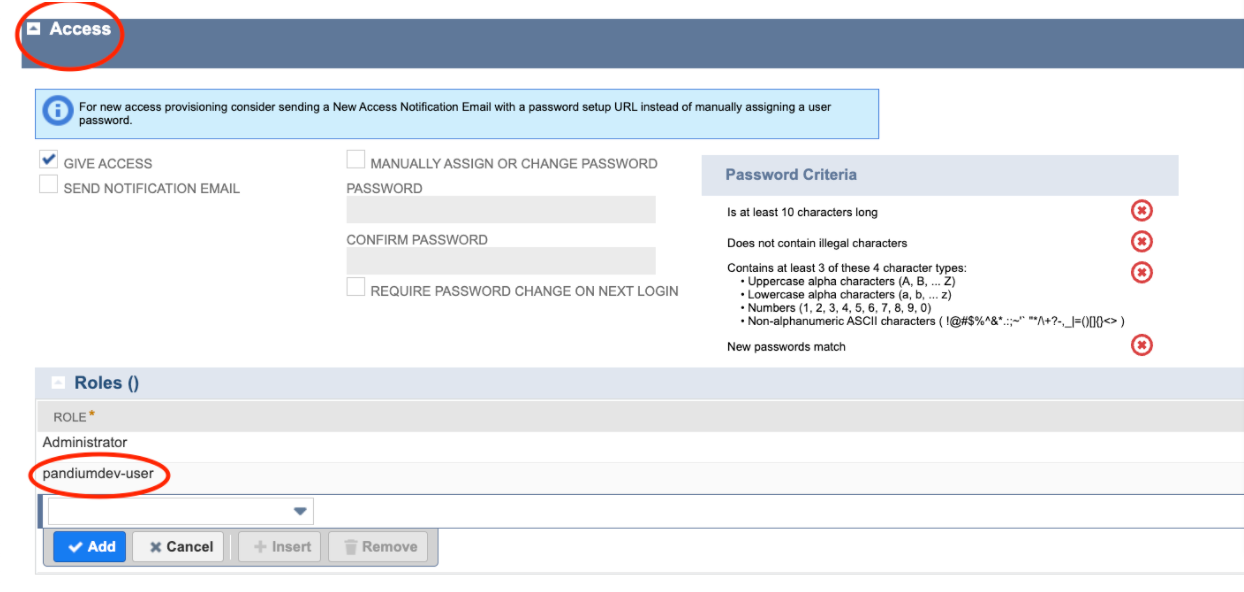
- Go to Lists > Employees > edit user > Scroll down to Access section > Roles sub-tab
- Add the role you just created to this user that will be used for the integration
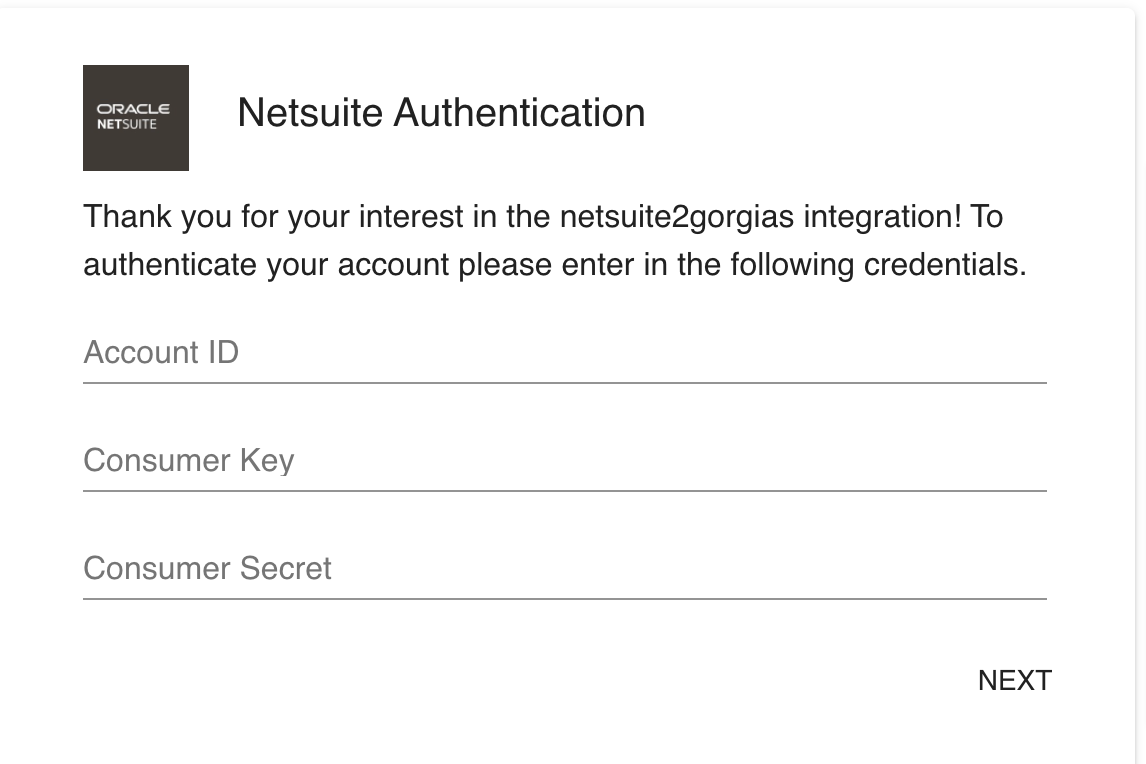
 To finish authenticating your Netsuite account, you will receive a link to a from your Gorgias Support Representative (please reach out to us either via email [email protected] or via chat). You will want to have this form open as you are creating an integration within your Netsuite account following the above instructions. This form will prompt you to enter your Netsuite Account ID, Consumer Key, and Consumer Secret. Please note that the Consumer Key and Consumer Secret are only displayed once when you create your integration within Netsuite. After entering these credentials and hitting 'next', a new tab will automatically open that will prompt you to confirm the authorization to your Netsuite account. You can find the Company ID/Account ID in Setup > Company > Company Information:
- Below is the page you should see once you follow the link provided from our end:
- Once you have completed the authentication, if the setup was successful you will see a confirmation stating that:

Widget fields
List of fields that will be pulled inside the customer's sidebar in Gorgias:
| Widget title | Fields |
|---|---|
| [Person Emoji] Netsuite - {First Name} {Last Name} | Email Address Netsuite customer id Phone Number Balance Days overdue |
| Netsuite Orders: [Package Emoji] Order {Order #} - {Order Status} | Transaction Id Id Date created Transaction date Sales effective date Ship Date Shipping method Shipping Address Status Currency Total Subtotal Estimated gross profit Total cost estimate Handling cost Ship complete Ship is residential Location Sales rep Billing address |
| Purchased Product - {Item name} | Name Amount Expected Ship Date Item Type Line po Rate Rate Quantity Quantity Available Quantity back ordered Quantity Billed Quantity Committed Quantity Fulfilled |
| Netsuite RMAs: [Package Emoji] RMA {RMA #} | RMA ID RMA Transaction Date Status name Customer Body 15 Customer Body 16 Created date Customer promise date |
| RMA Product - {Product Name} | Cleared Item Item ID Line last modified date Memo Description Purchased description Quantity Rate Est gross profit |
Limitations
- Due to API constraints, every time the integration is executed, it incrementally syncs orders in 2-day intervals until it reaches the current date.
- Currently, historical syncs are not fully supported but may be used to sync back a few days.
- Syncing multiple Netsuite accounts to one Gorgias account is not possible as of now.
- The data field limit for customer data is 250kB
