
ShipupUpdated a year ago
Shipup helps you follow packages to create a seamless, transparent, and branded delivery experience. With Shipup, you can send notifications to your customers, redirect them to branded tracking pages and proactively manage potential delivery incidents with their customer service integration.
With the Shipup and Gorgias integration, you can facilitate the sharing of information with your customer support - it allows you to see your customers’ delivery information directly in Gorgias, get notified when an incident occurs, and receive feedback.
The helpdesk doesn't update the information provided by the API until the ticket is updated (when you open a ticket that didn't have any actions executed after the last change was done in Shipup, the status displayed by the widget won't be updated in the helpdesk).
A temporary solution is to create an internal note to update the ticket so the ticket can update the order information such as the package status.
Steps
Connect the integration
1. In Shipup, navigate to Integrations.
2. Click on Add an integration, and find the Gorgias app.
3. Fill in the requested information which can be found in your Gorgias account by going to Settings -> You -> REST API.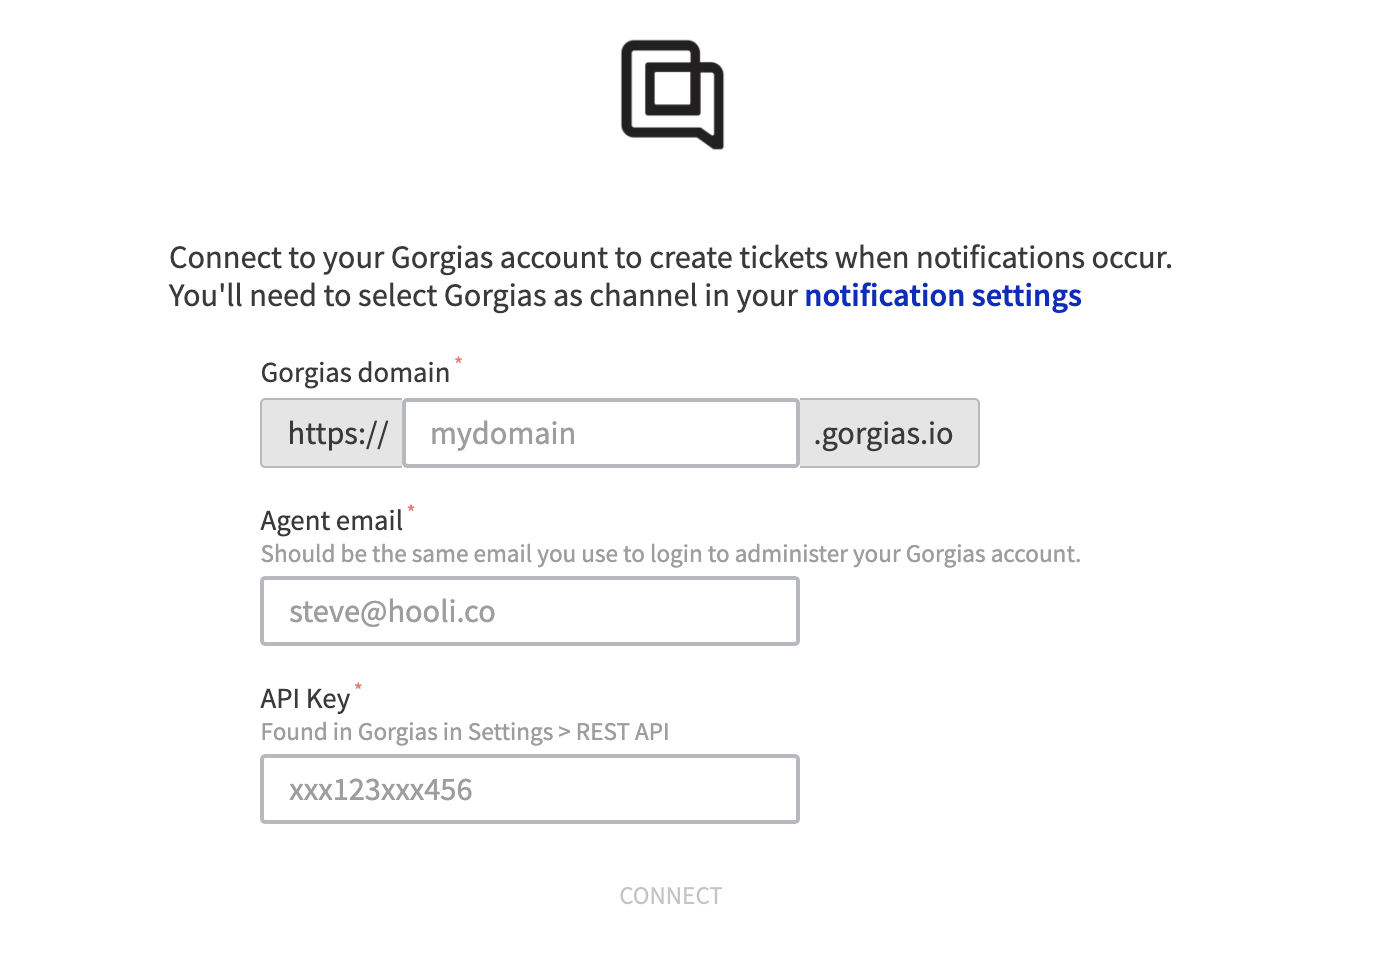
Generate Shipup alerts in Gorgias
When you connect your Gorgias app in Shipup, you can set events for which you want to receive an alert in Gorgias:
1. In Shipup, navigate to Notification settings and click on Editor.
2. Choose the events and add Gorgias as a channel.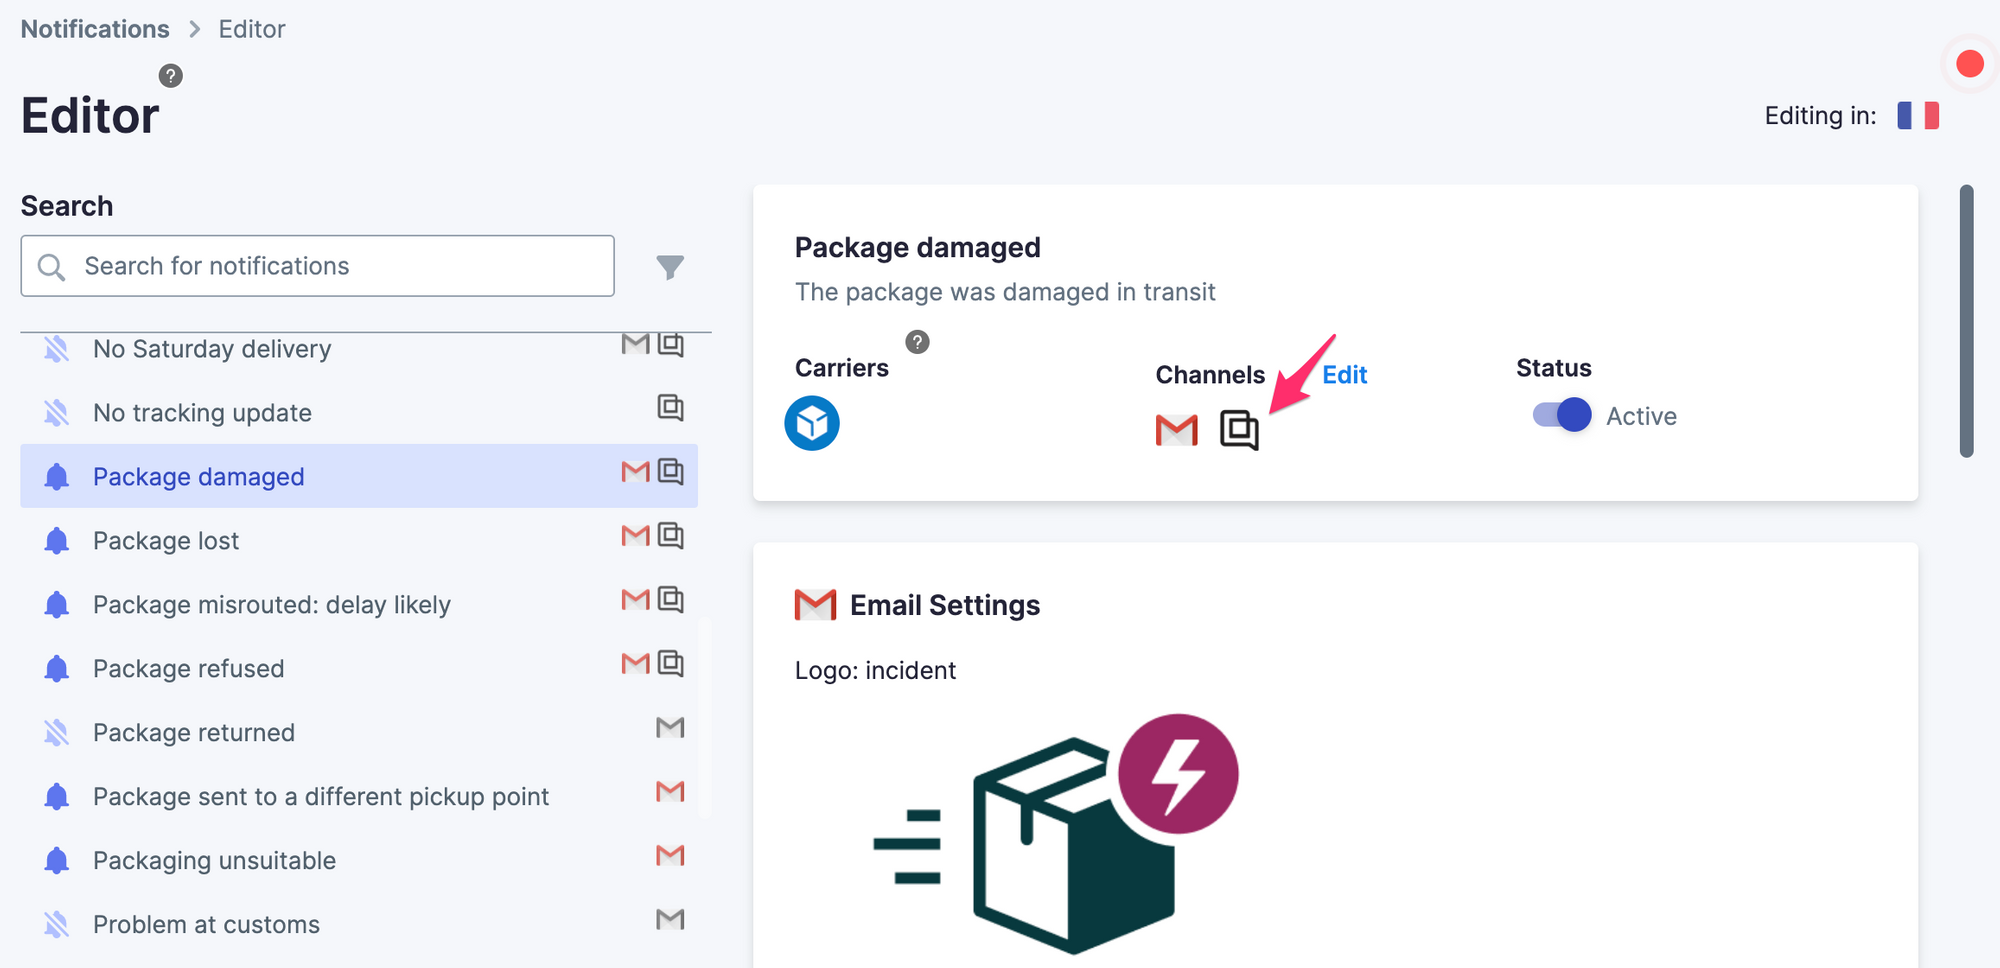
3. When you decide to receive an alert in Gorgias, adapt the alert you set by editing your Notification settings. You can change Tags, Assignee, Ticket subject, and Internal note content: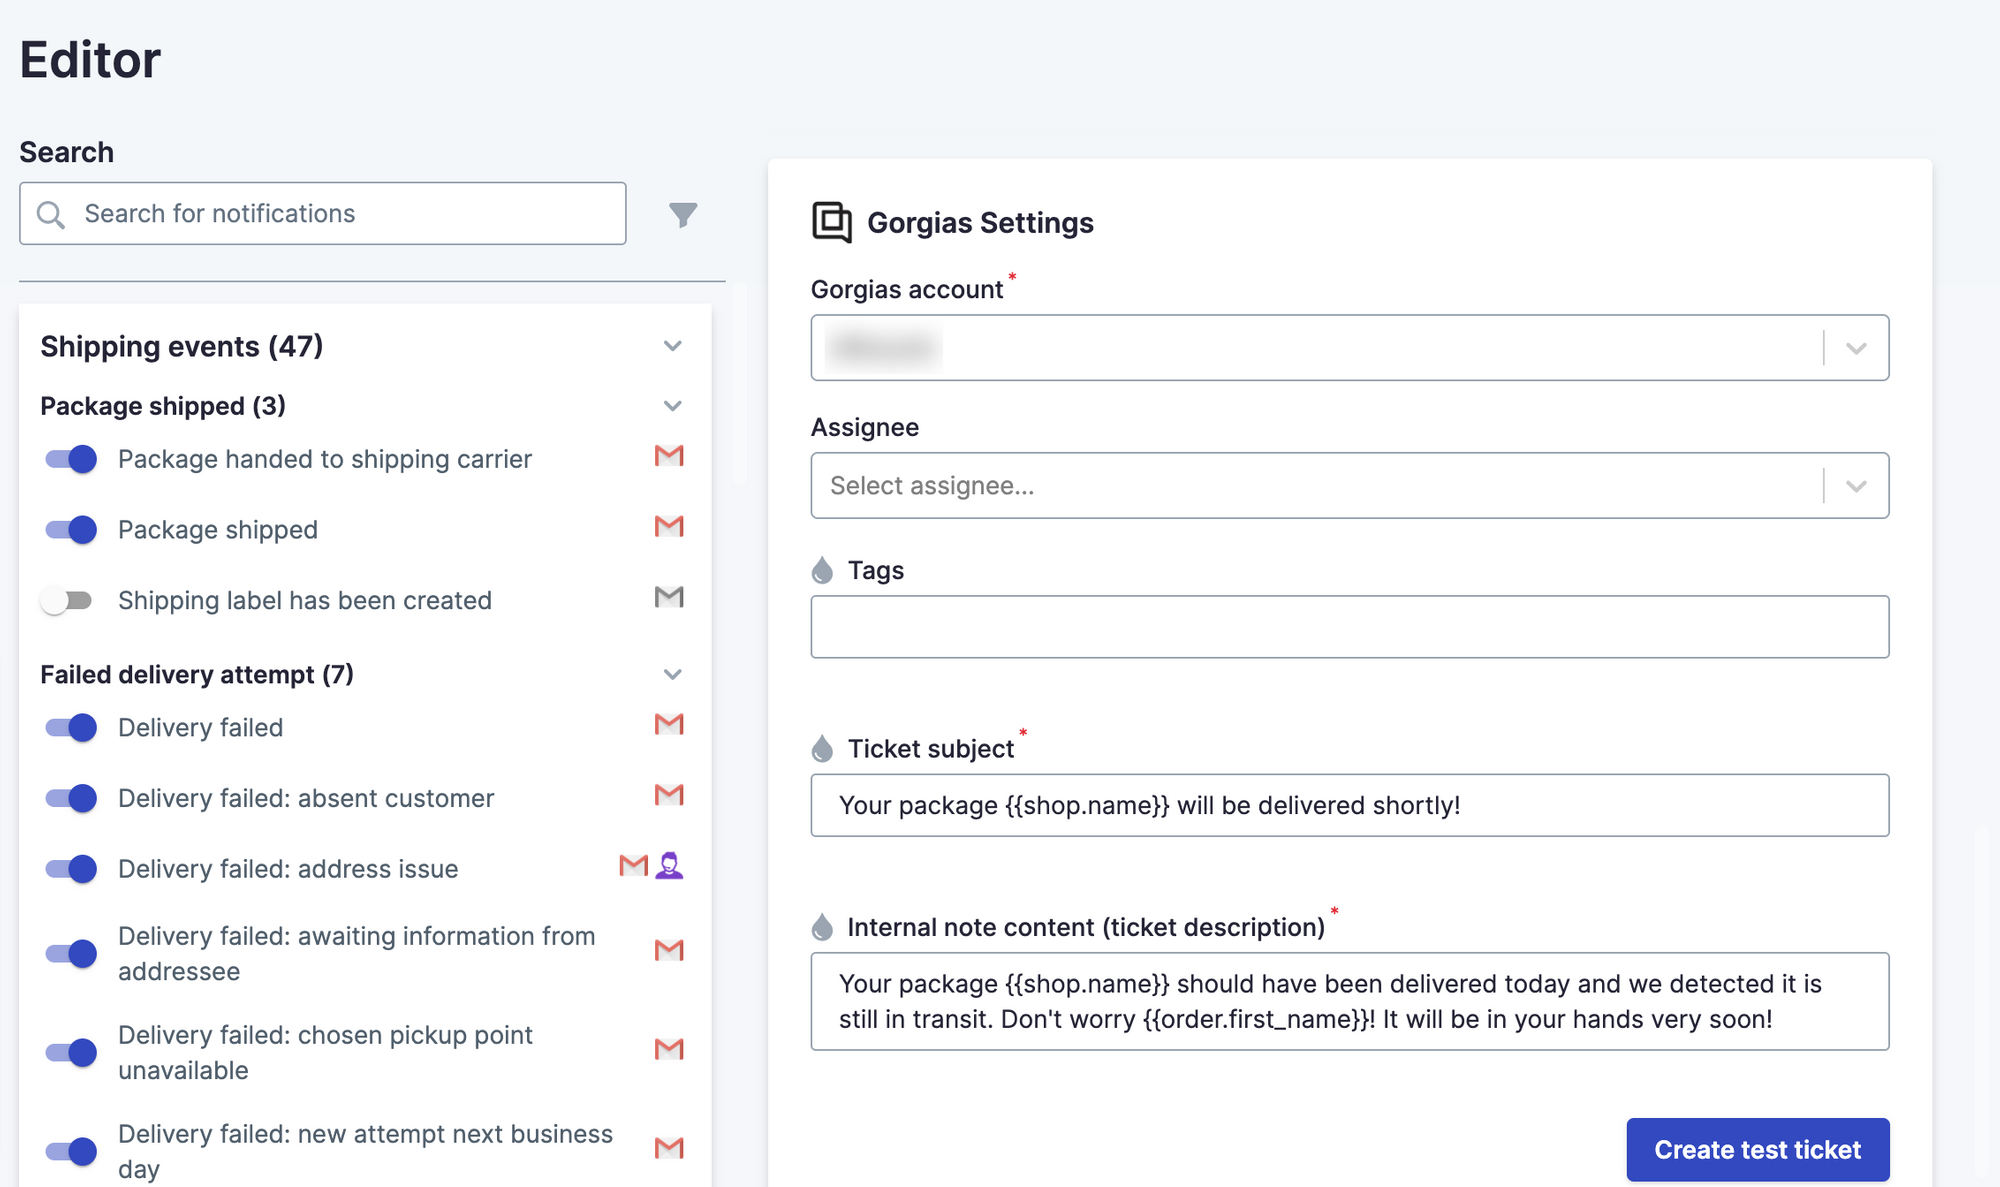
You can determine a Tag to be added to Shipup notification tickets when they're pulled into Gorgias so you can group them into a separate View for easier handling.
Receive feedback in Gorgias
1. Navigate to Feedback -> Feedback settings in your Shipup Admin.
2. Under Alert channel select Gorgias ticket.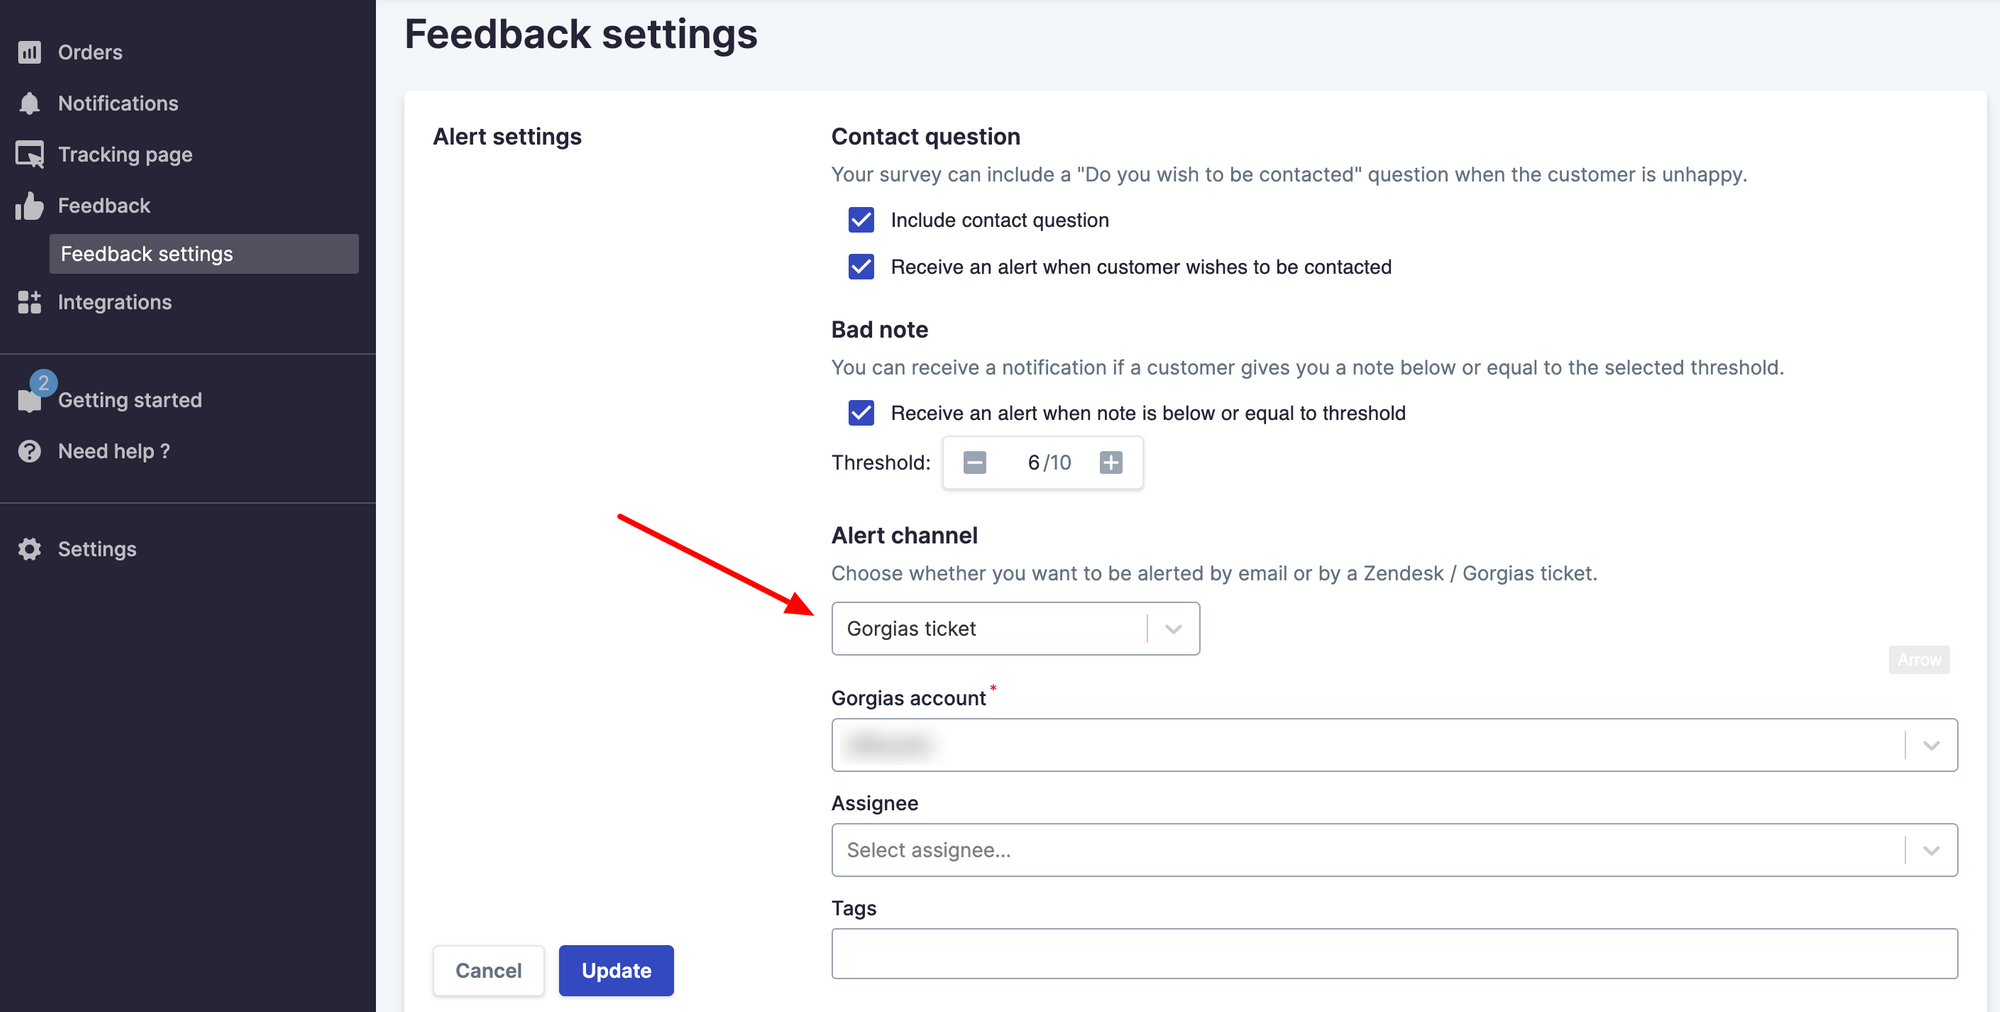
3. Click Update.
Shipup widget in Gorgias
1. Go to Settings -> App Store -> HTTP Integration.
2. Click on Add HTTP integration.
3. Enter the name of the integration "Shipup" and select all triggers.
4. Use the GET method and paste this API URL: https://api.shipup.co/v1/trackers/zendesk_trackers?filter[search]={{ticket.customer.email}}.
5. Click Add header and use Authorization as key.
6. Add your Shipup private API key as a value - you can get it from your General settings (scroll down).
Once done, the setup should look like this: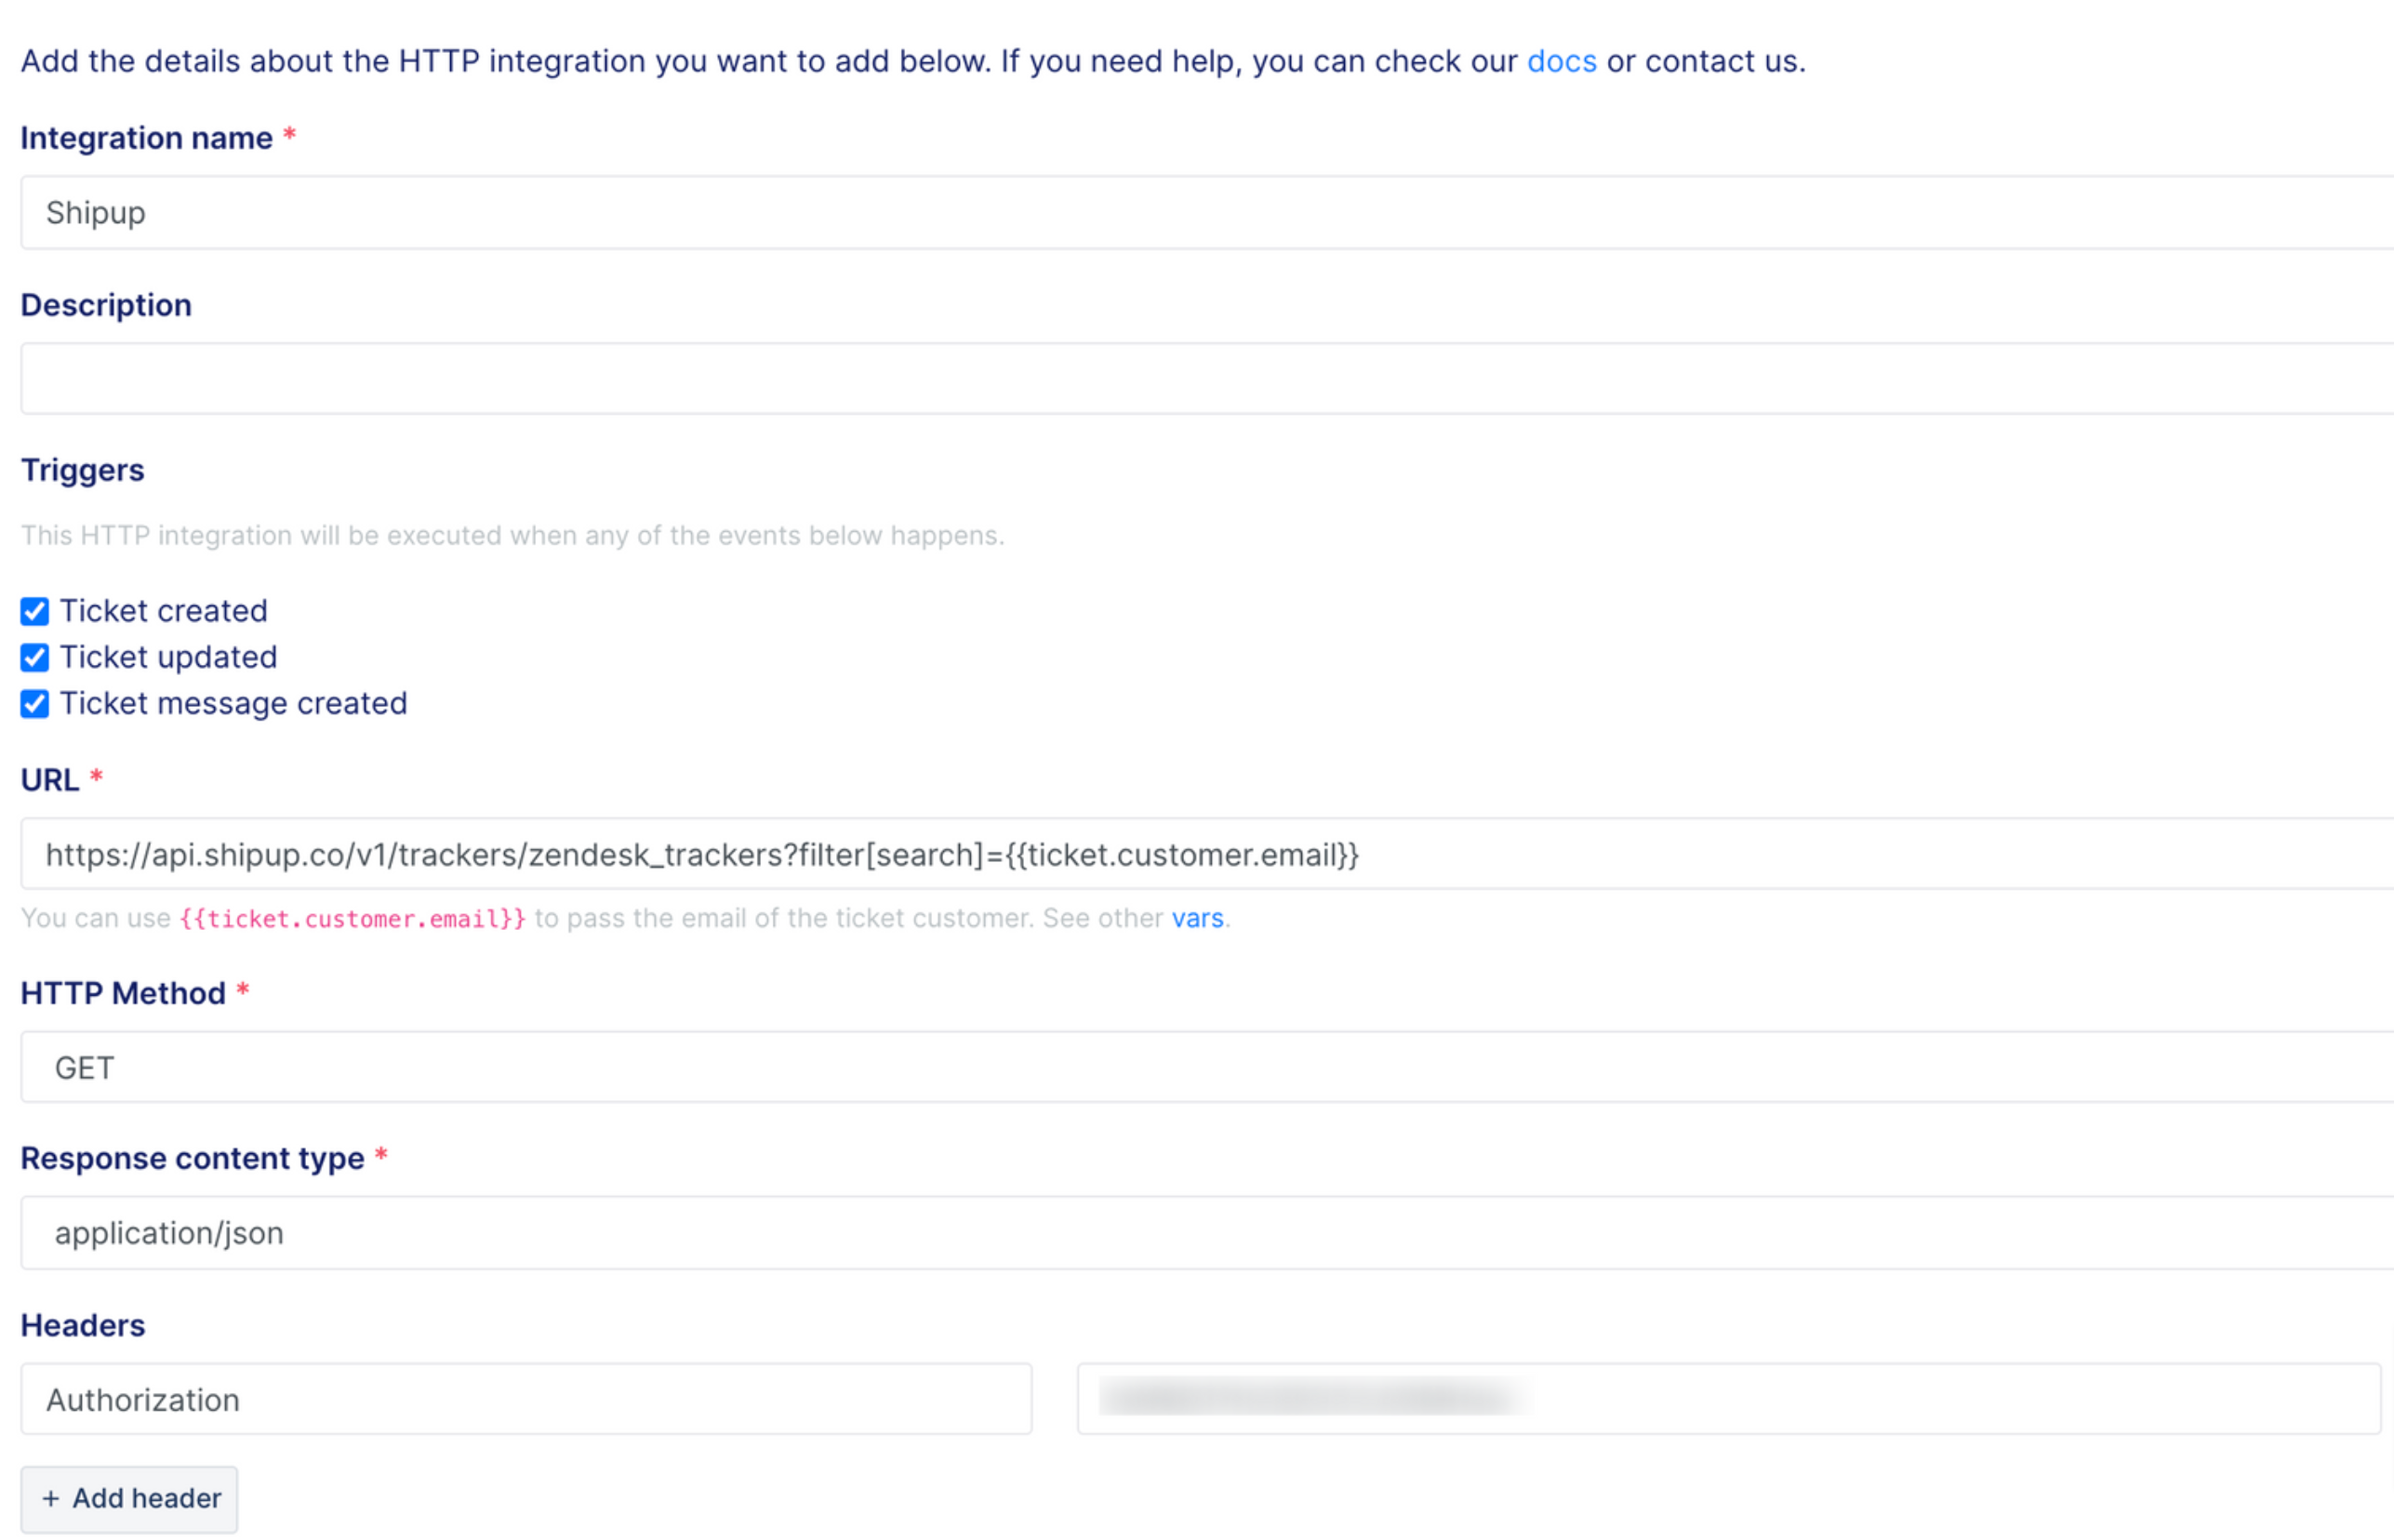
7. Save the integration by clicking on the Add integration at the bottom of the page.
Add the widget to your sidebar
1. To make sure Shipup data is pulled into Gorgias, go to your Shipup Dashboard and find a customer with available tracking information.
2. Copy the customer's email address and use the search option in your helpdesk on the left to locate this customer.
3. Use an existing ticket or create a new one with just an internal note - this will ensure that the ticket is updated and all data pulled.
4. Click on the cog button in the top right corner.
5. Find the Shipup HTTP data block and drag it by its title to the top-right corner of the widget bar (you’ll see the bar highlight an area where it can be dropped).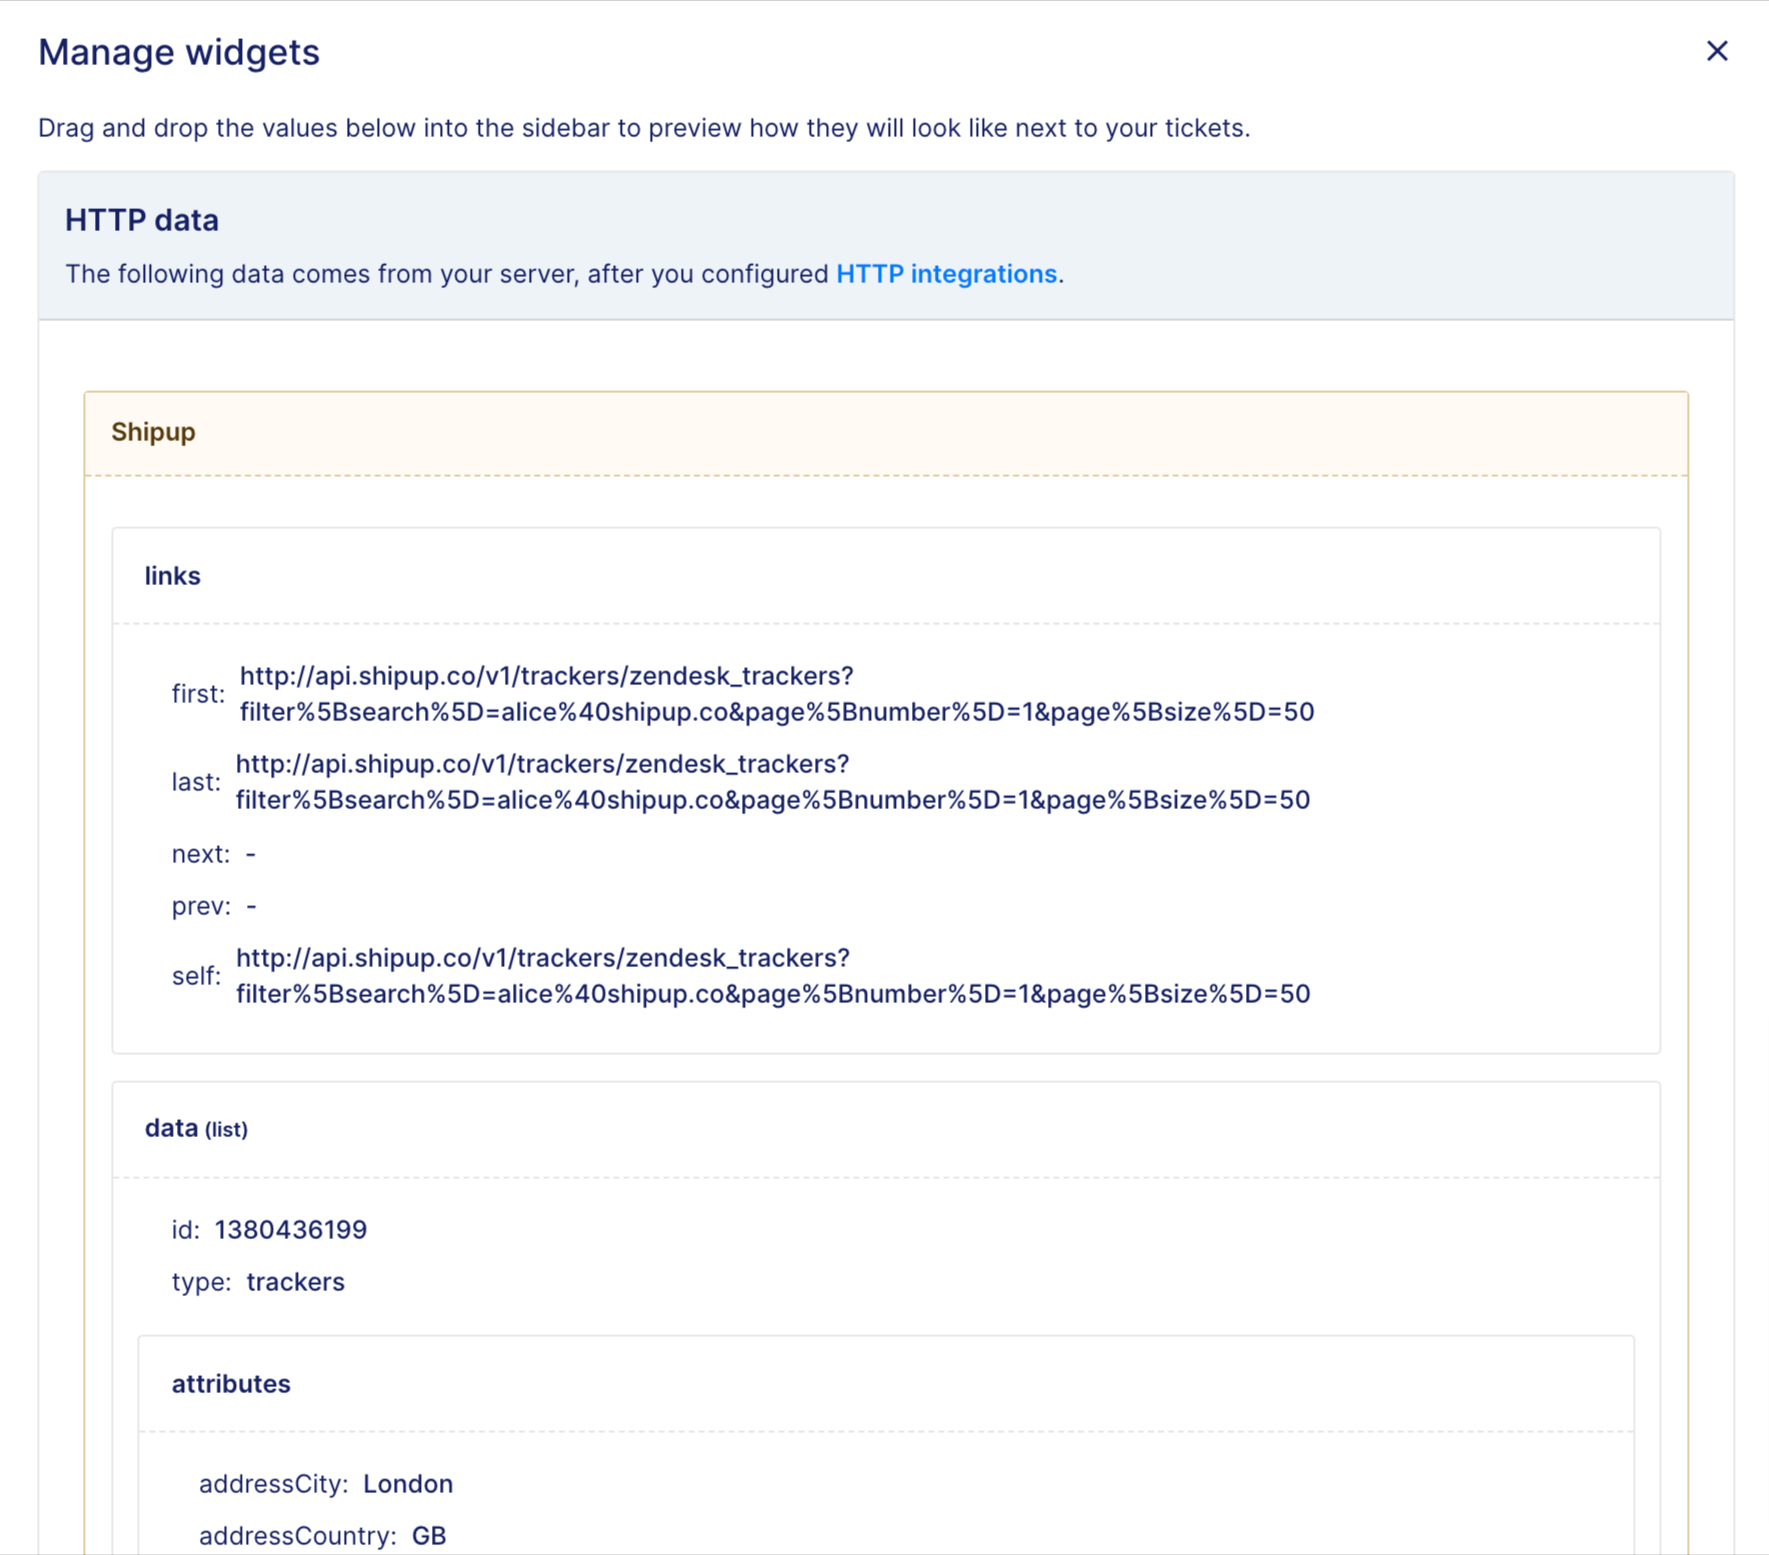
6. Remove the sections that have no added value such as the Relationship section:
- Remove useless fields by clicking the x
- Edit the section name and link by clicking the gear icon
7. Change Data (list) by:
- Title: {{attributes.trackingNumber}} | {{attributes.deliveryStatusCode}}
- Link: https://app.shipup.co/packages/{{id}}
8. By doing that, it'll redirect to the Shipup Order page. You can also decide to use the {{trackingLink}} variable to redirect to the carrier website:
Change attributes by:
- Title: Details Order{{orderNumber}} | {{carrierCode}}
- Link: https://app.shipup.co/packages/{{id}} | {{carrierCode}}
Here are the results: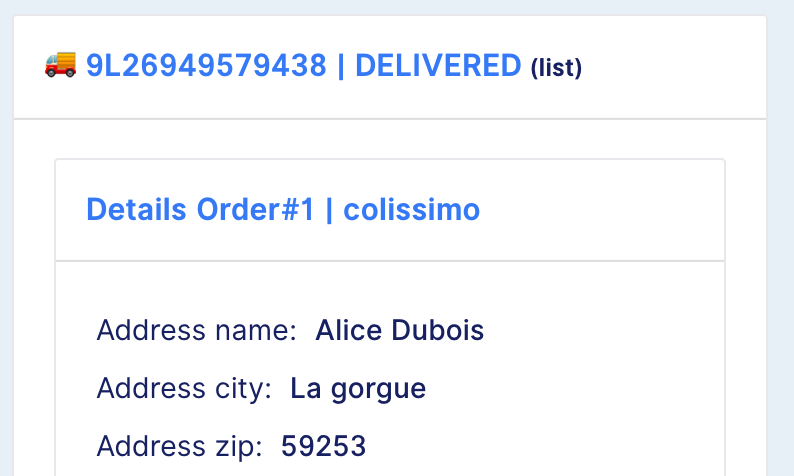
9. Click the Save button and your new widget bar will appear, populated with data as tickets are created or updated. This data will be shown for other customers that reach out to you and have Shipup data available.
