Help Desk MigrationUpdated 11 days ago
This integration was built by our partners, and the wait time in case of any technical issues might be a bit longer than for a regular support request.
Help Desk Migration helps eCommerce brands easily migrate data to Gorgias from other help desk platforms. Handle large data volumes and complex scenarios with the automated Help Desk Migration tool, keeping all relationships intact.
Integration benefits
- Automated migration between Gorgias and 80+ other help desk platforms
- Preserves relationships between tickets, agents, customers, and related records
- Free test migrations to try different settings and mappings
- Out-of-the-box field mapping for tickets, agents, and customers
- Quick and knowledgeable support to assist with setup, testing, and migration review
- Built-in customizations:
- Automatically tag newly migrated tickets
- Skip attachments or exclude files older than 6, 12, or 24 months
- Transfer inline images and call recordings
- Migrate content language versions of the knowledge base
- Prioritize the newest records first
- Expanded support for additional Ticket Types and Channels, preserving your Gorgias data structure
- High-level security: SOC2 type II and type III compliance, AWS infrastructure, and other industry-standard measures.
Steps
- From your Gorgias account, head to Settings → App Store → All Apps
- Find Help Desk Migration on the list
- After selecting the app, click on the Connect App button
- Log in to the app and click on Start a new migration:

- Choose the ‘from’ and ‘to’ platforms, initiate the process, then authorize the app:
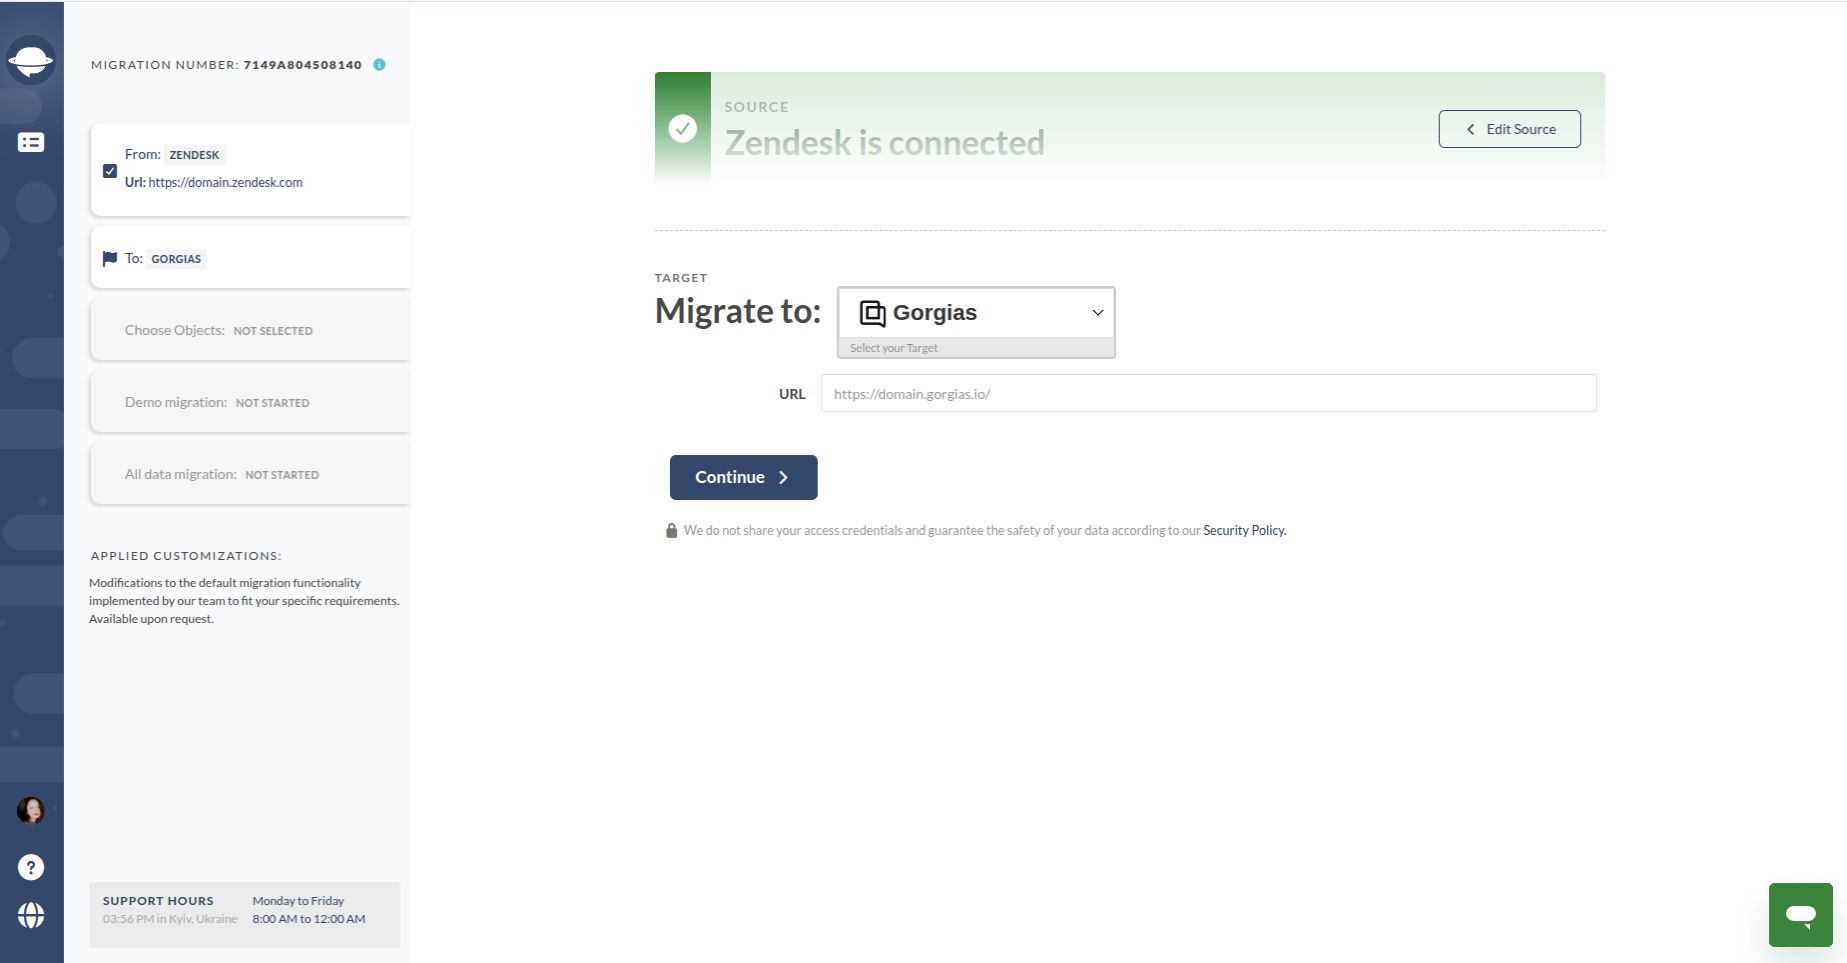
- When the installation is completed, there will be no HTTP integration created!
To complete the setup, select the Migration Objects. Specify which objects to migrate (tickets, agents, customers, knowledge base articles, etc.). Apply optional customizations: ticket tagging, skipping attachments, transferring inline images, migrating call recordings, migrating KB content versions, and prioritizing newest records first: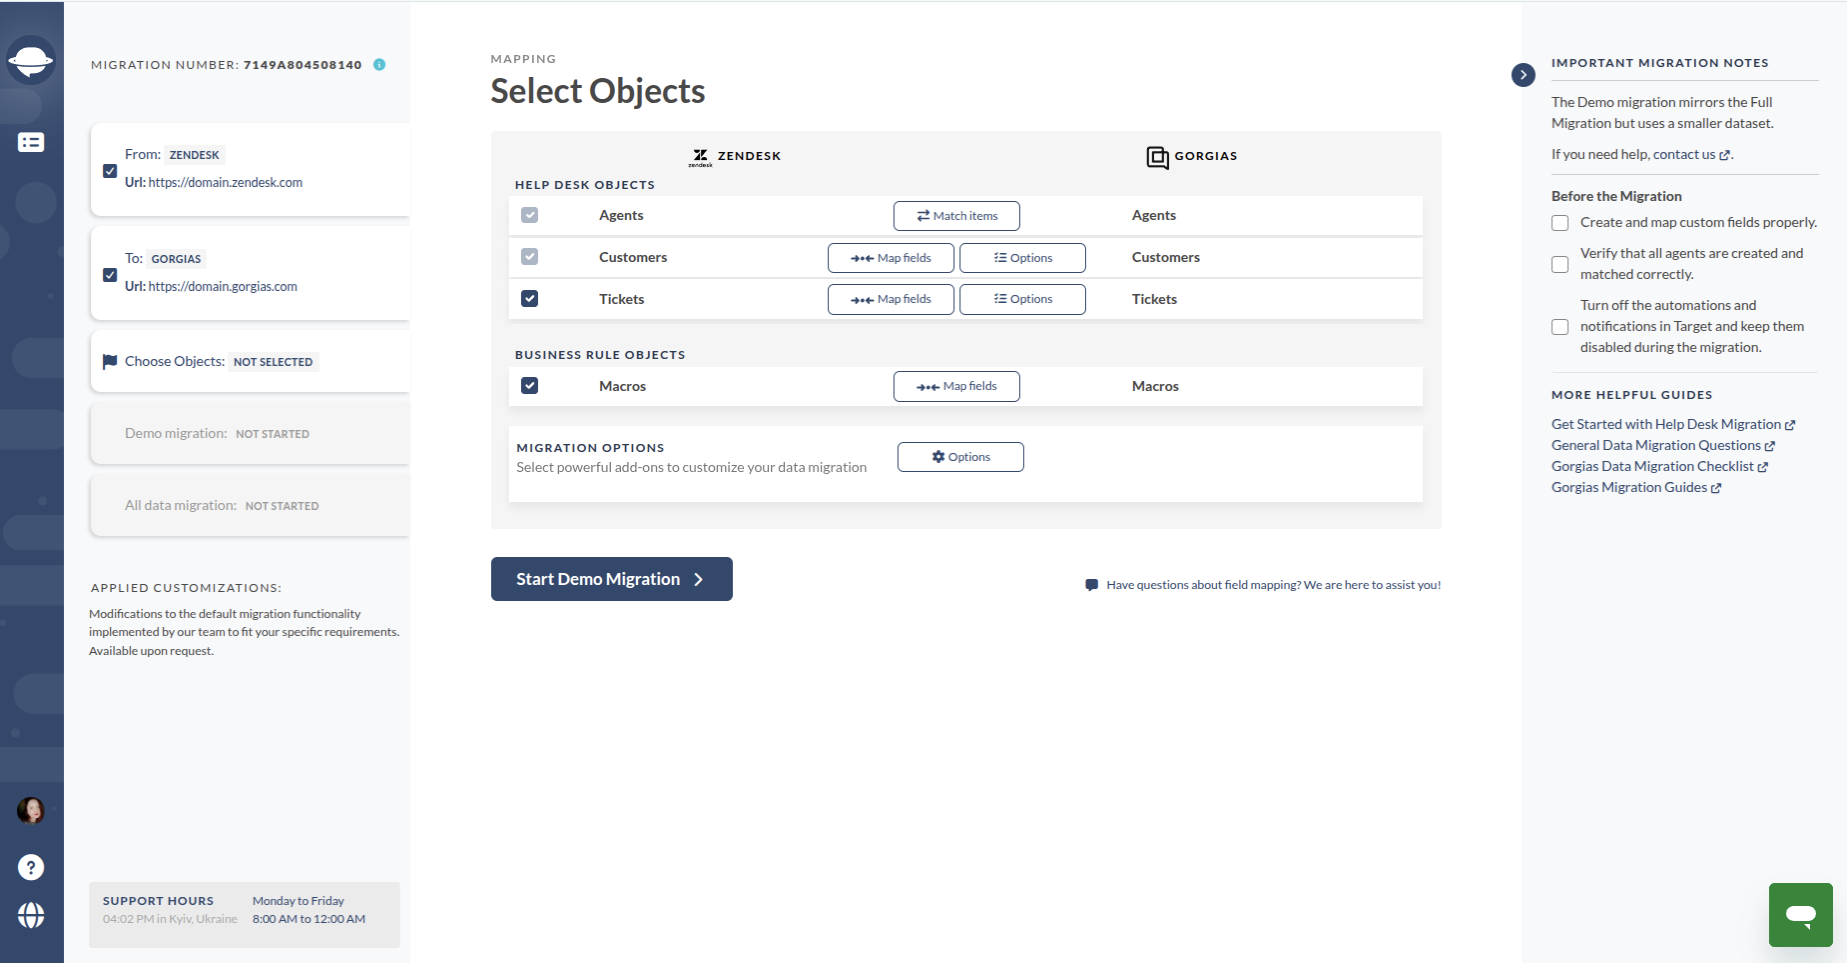
Match Agents: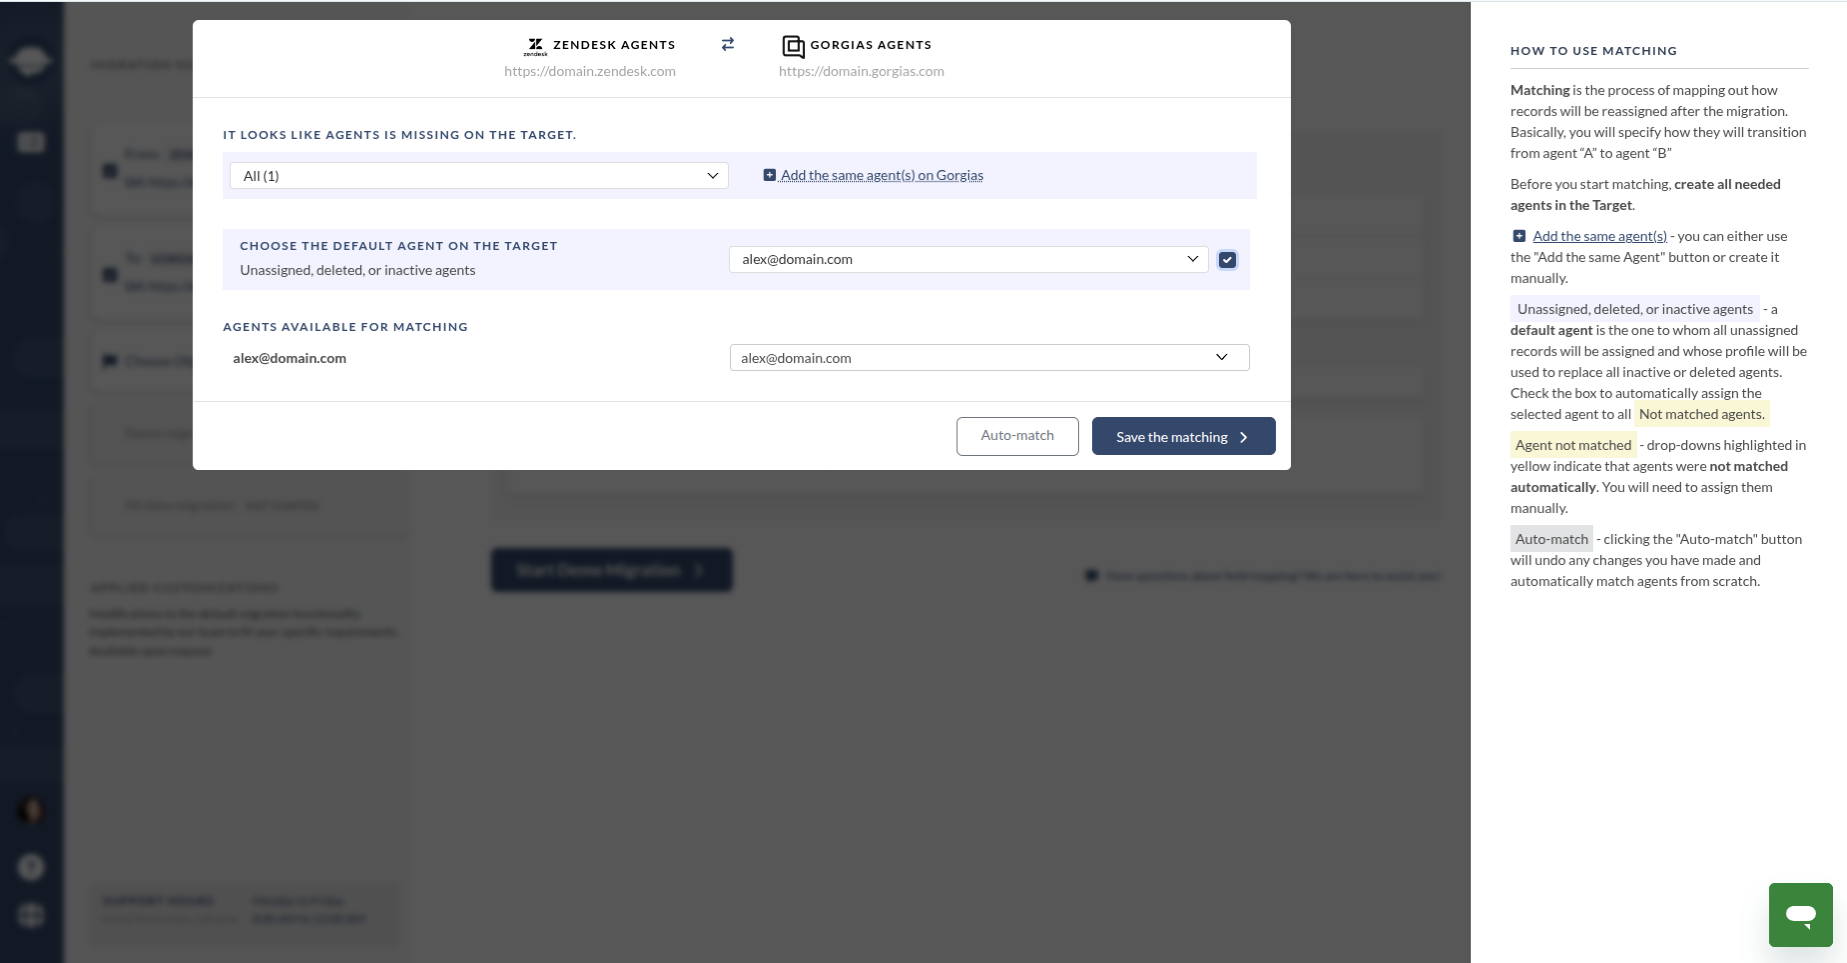
- Match your source agents with their counterparts in Gorgias.
- Assign a default agent for tickets from deleted or unassigned users.
- Agents with identical profiles on both platforms are matched automatically.
Map Fields: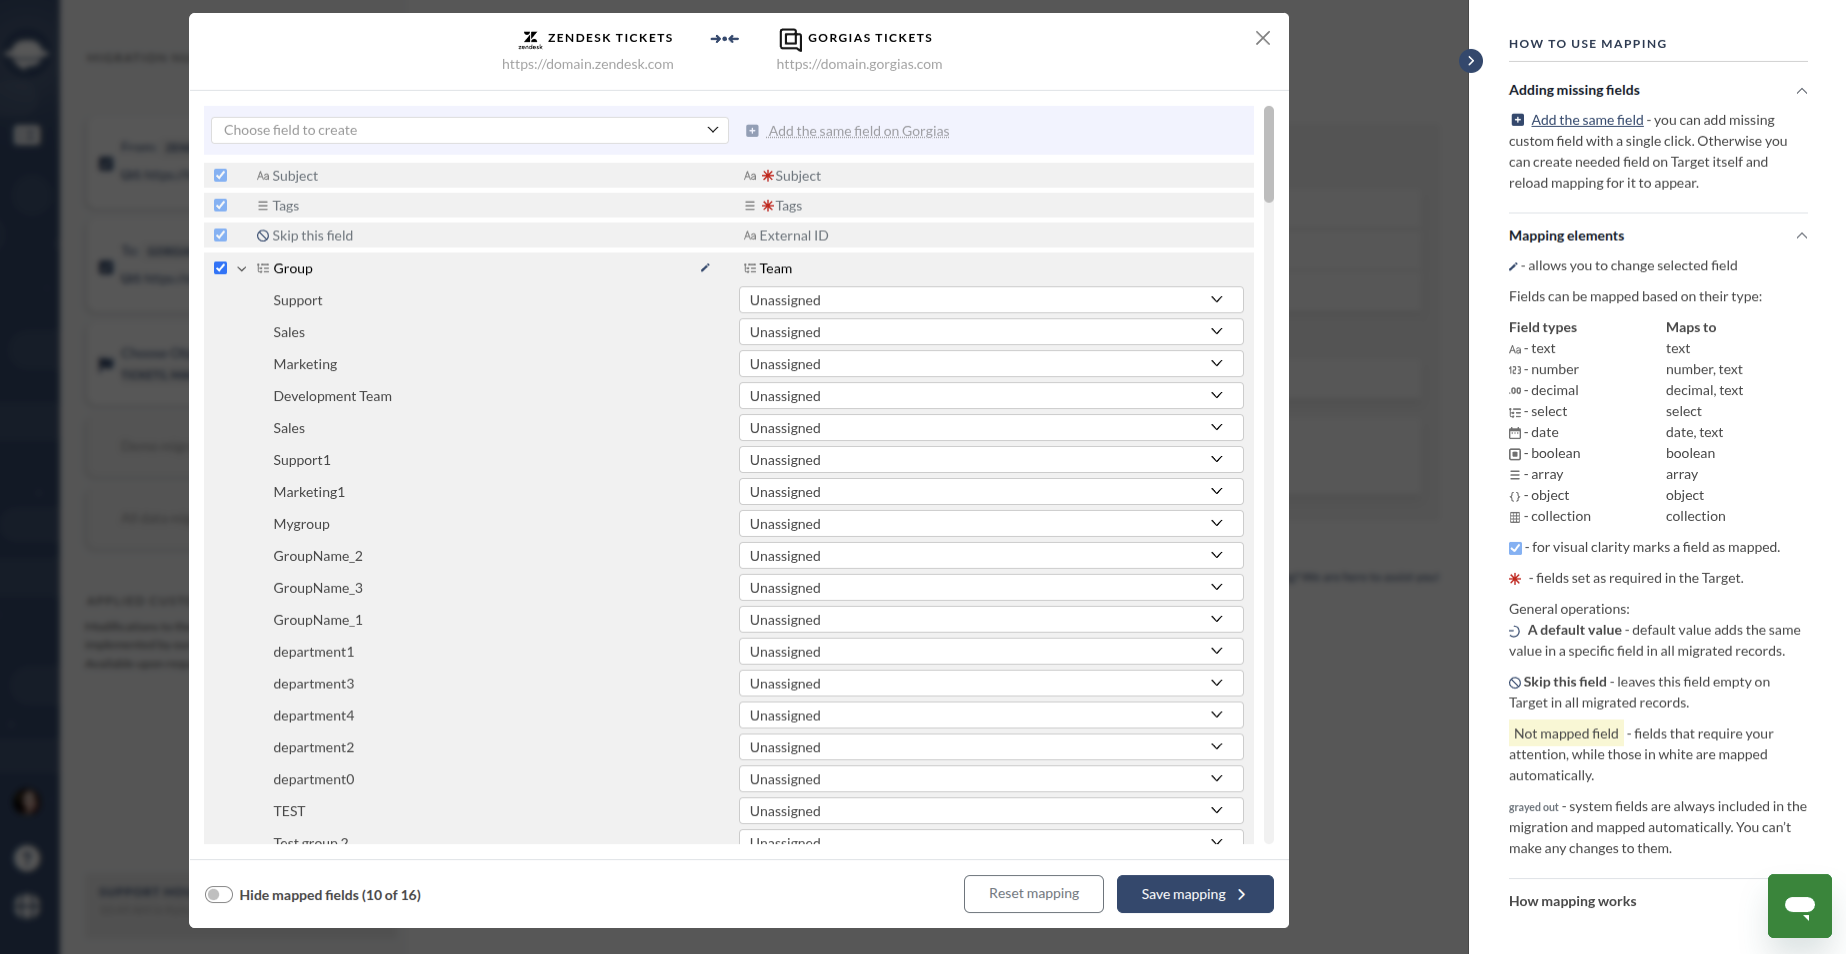
- Open the pop-up modal to map default and custom ticket fields.
- System fields are matched automatically.
- Click 'Continue' to proceed with migration setup.
Match Macros: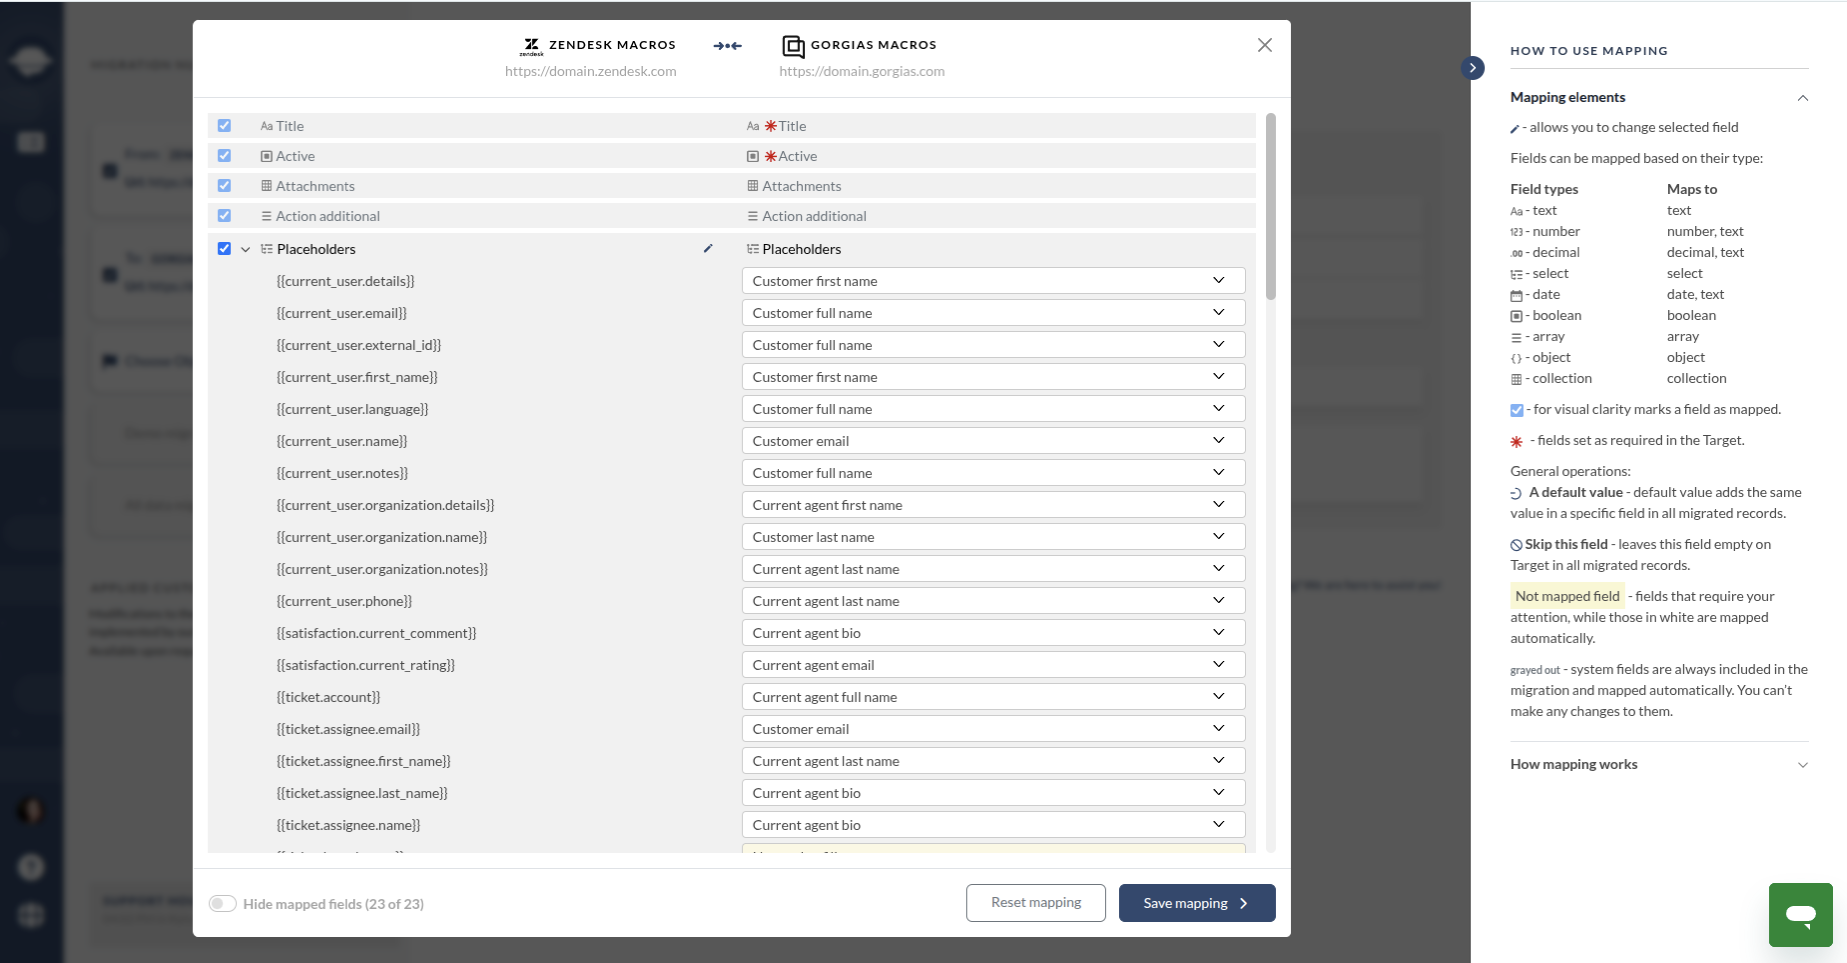
- Automatic macro transfer: Most macros, including standard actions and predefined responses, are migrated automatically.
- Preserve workflows: Your support processes continue uninterrupted in Gorgias.
- Complex macros: Macros with conditional logic, placeholders, or integrations may require minor adjustments after migration.
Run a Demo Migration: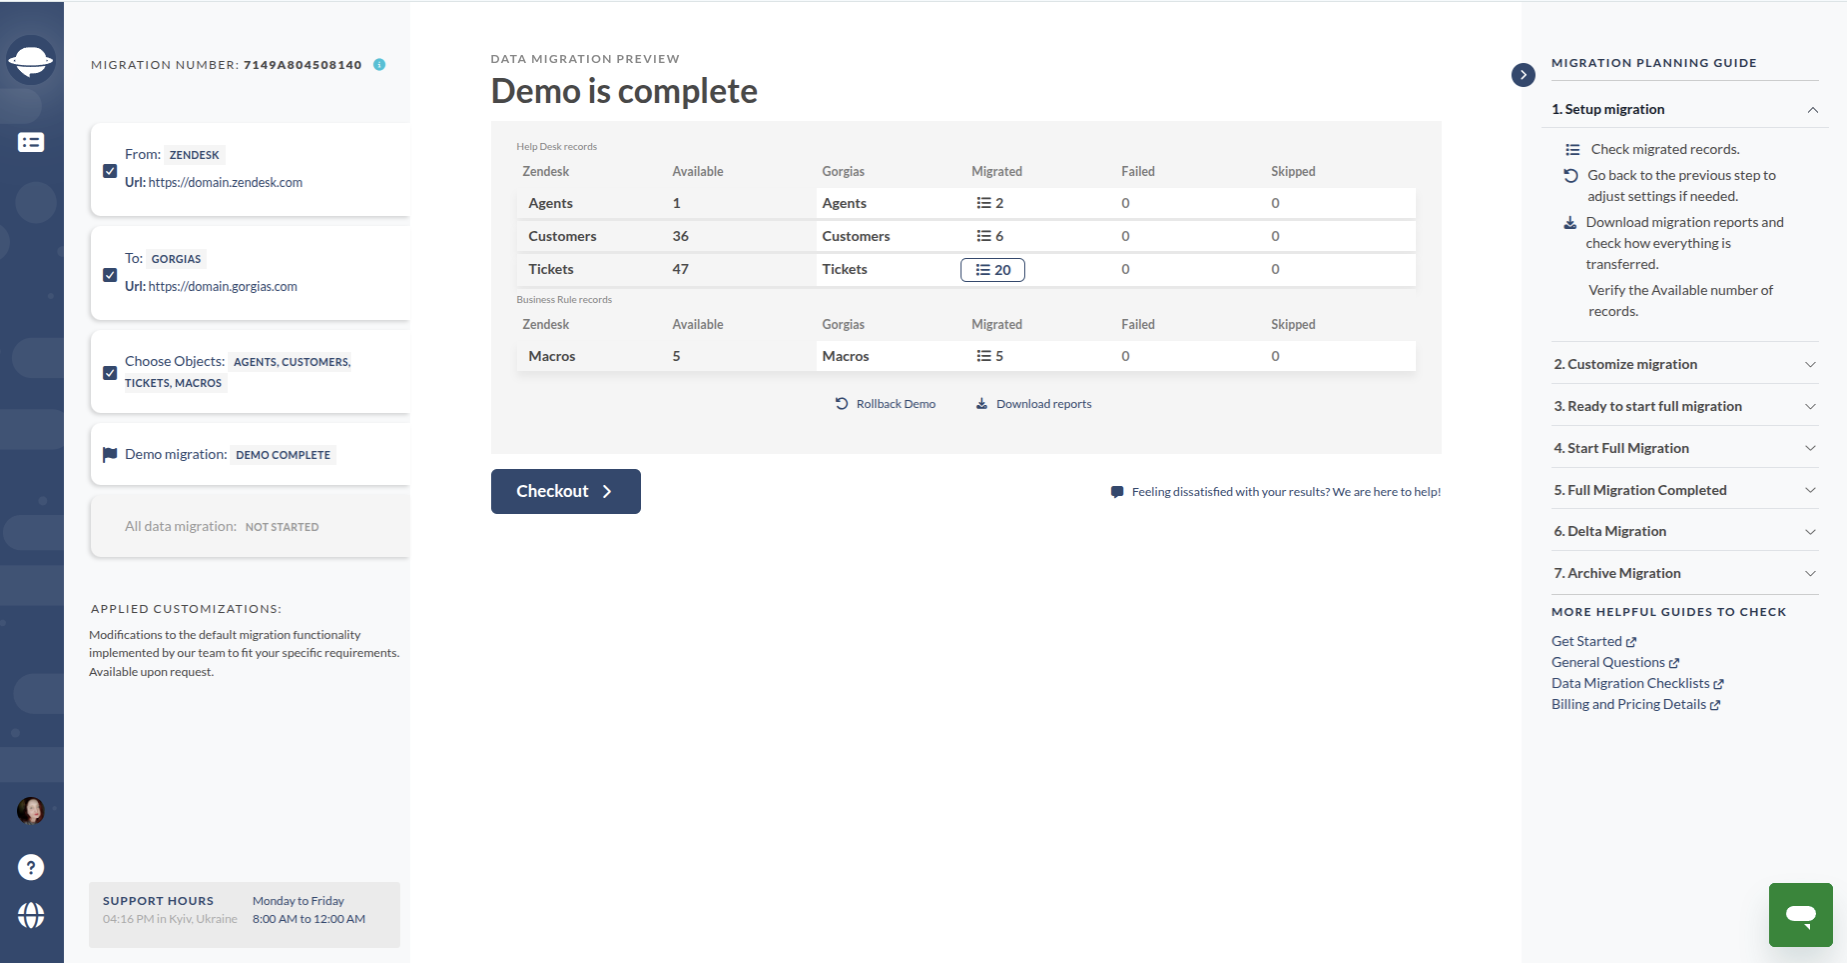
- Run unlimited Demo Migrations to preview results.
- Review the results thoroughly using the provided reports to check ticket assignments, field mappings, and data integrity.
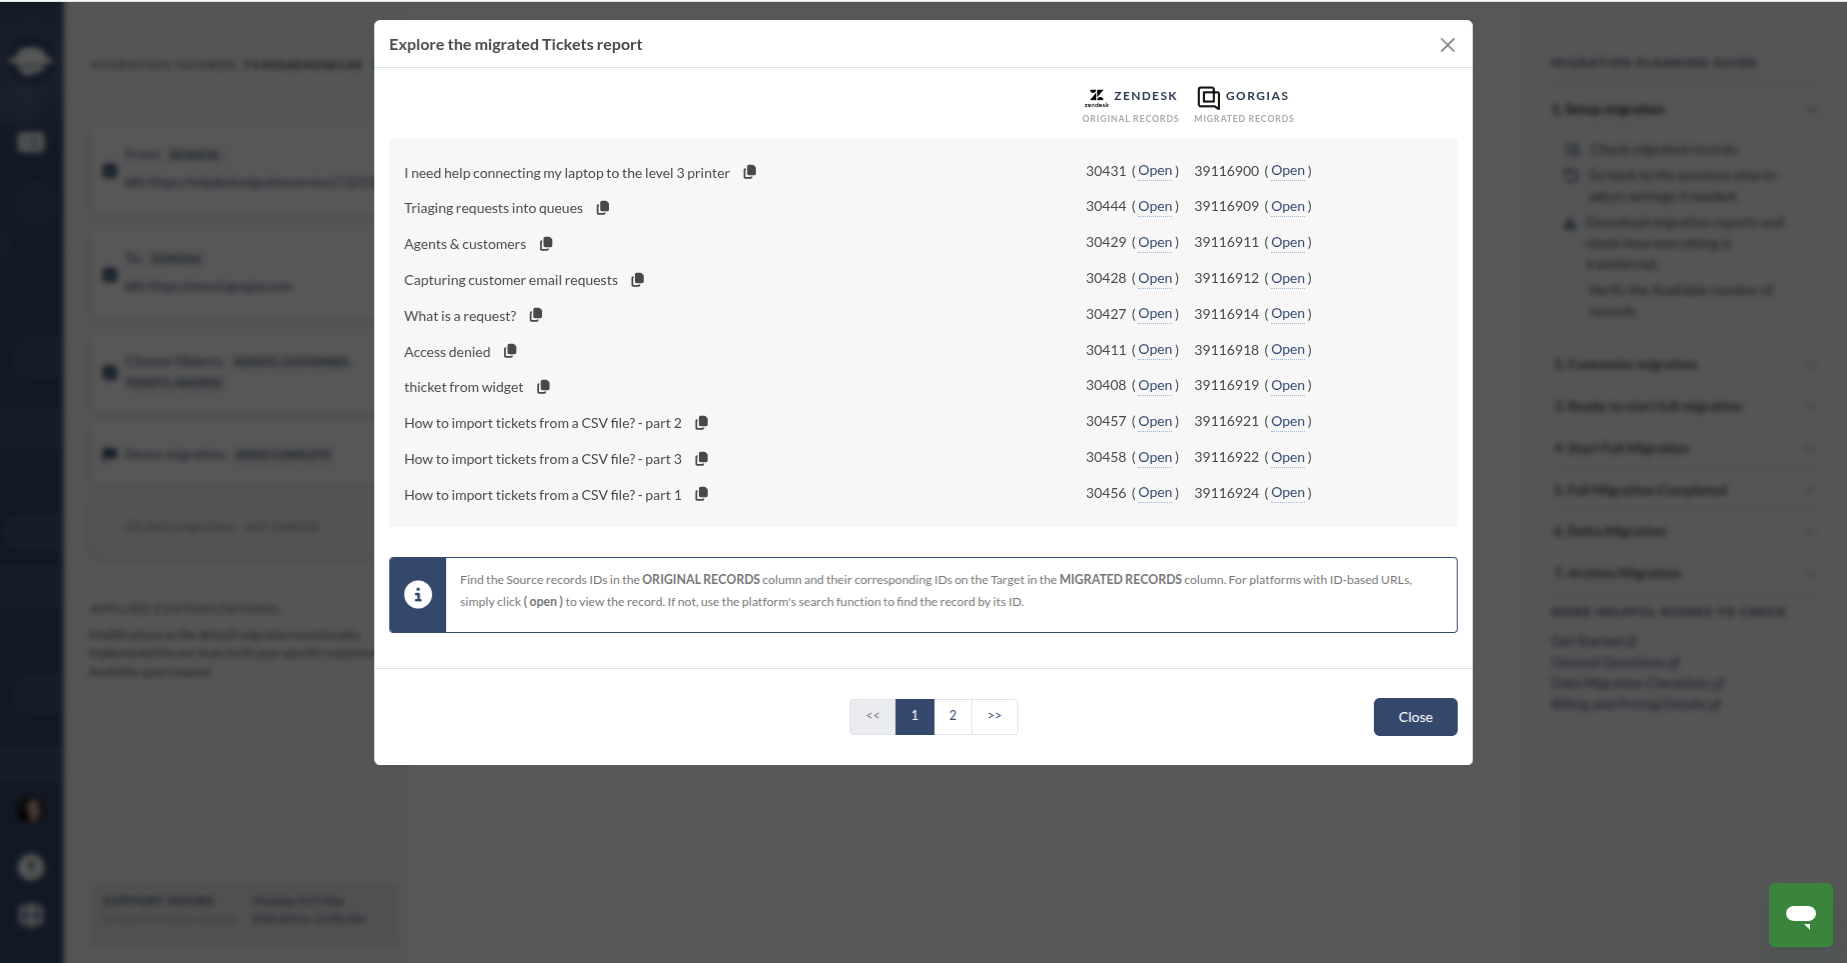
Once payment is confirmed, you can launch your Full Data Migration whenever you’re ready. You also have several options for data transfer: Delta Migration, which moves new or updated data, and Interval Migration, which enables scheduled data imports at specific times.
Start Full Migration: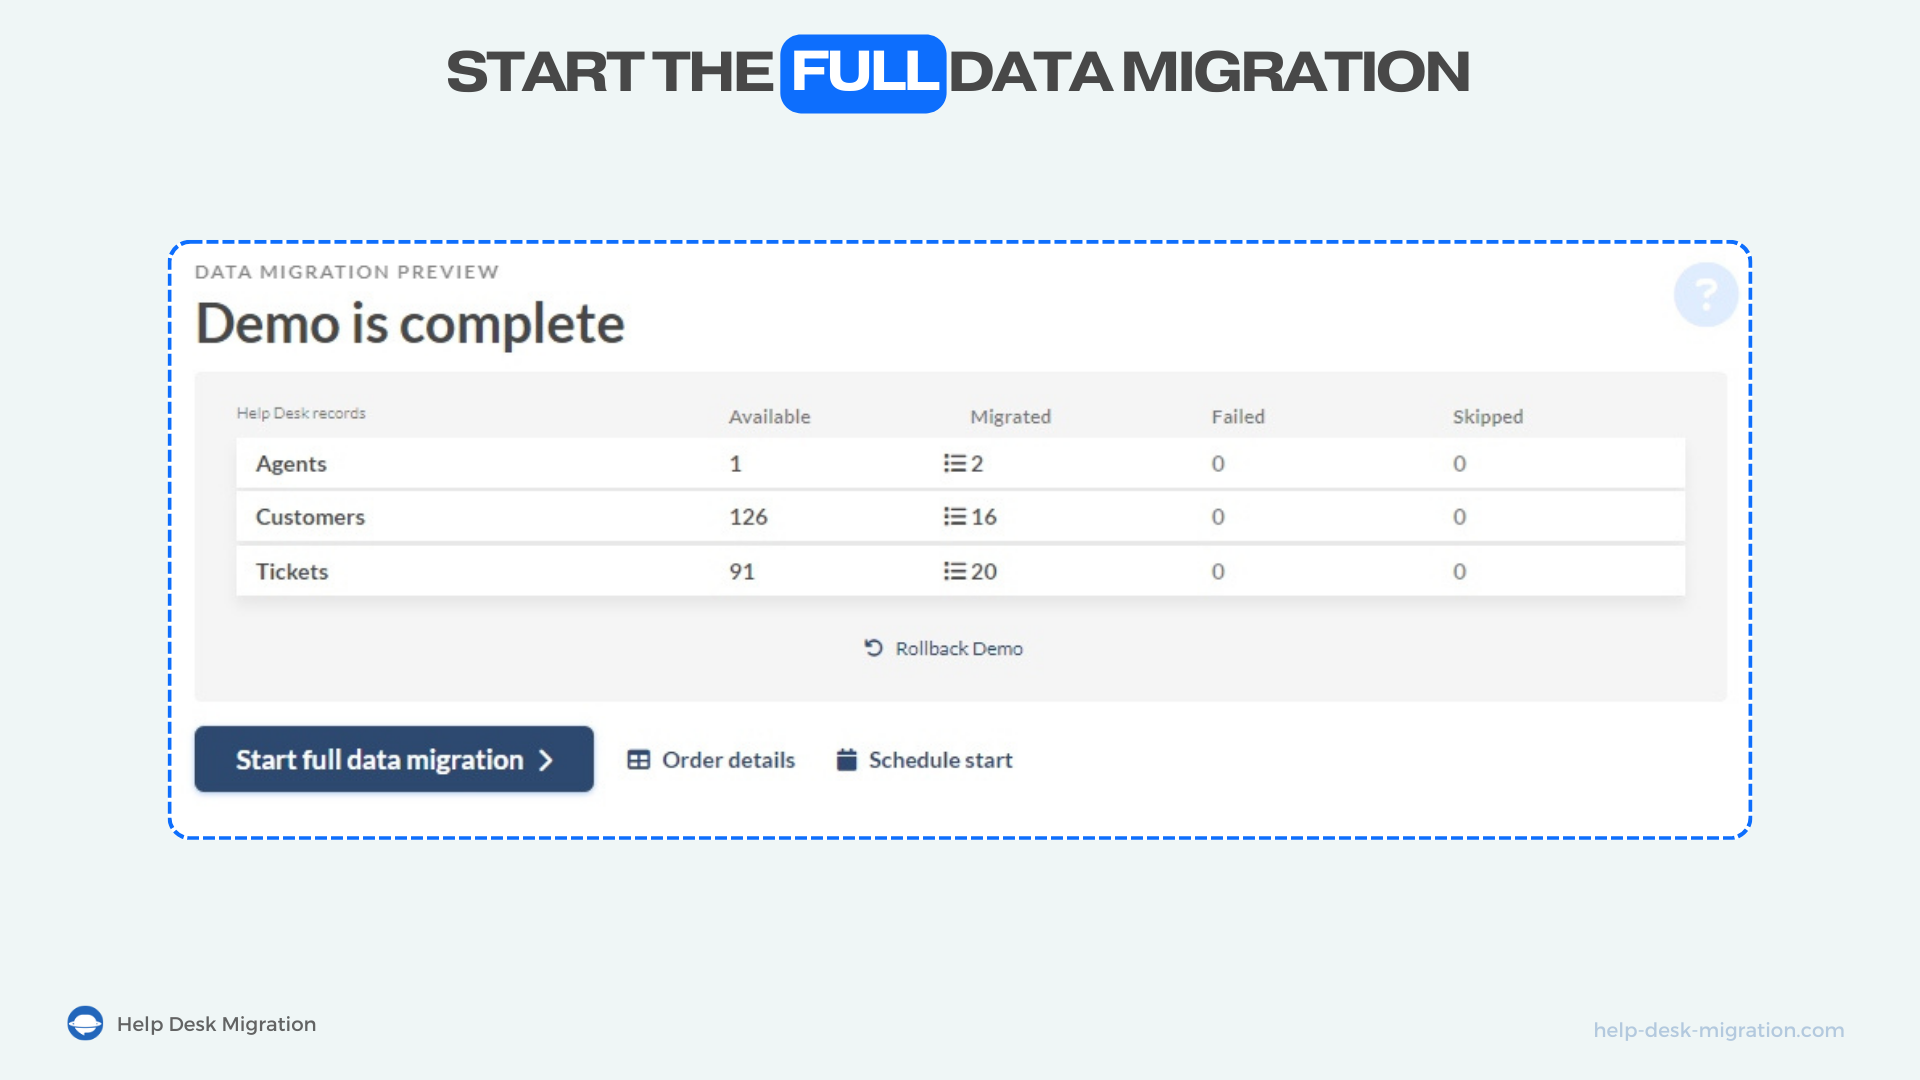
You can close the browser tab, updates will be sent automatically, or monitor progress in your Help Desk Migration account.
Note that, depending on your service package, the migration will be automatically archived either five or ten days after the Full Data Migration, in accordance with the Help Desk Migration privacy policy.