WhatsApp Phone Number MigrationUpdated 21 days ago
You can migrate your WhatsApp phone number from other platforms (Zendesk, Twilio, etc) through the Gorgias Migration Wizard.
Before you start
To determine whether you should migrate your phone number or simply connect it to Gorgias instead please check the following:
1. Is this number currently connected to WhatsApp Business or a WhatsApp account?
If the answer is no, there's no need to migrate - use the Connect WhatsApp Business button.
2. Is this number currently connected to WhatsApp via the native WhatsApp mobile or desktop app?
- If the answer is yes - delete the number from the app and use the Connect WhatsApp Business button.
- If the answer is no - proceed with the instructions below on how to migrate your number from another provider.
Step
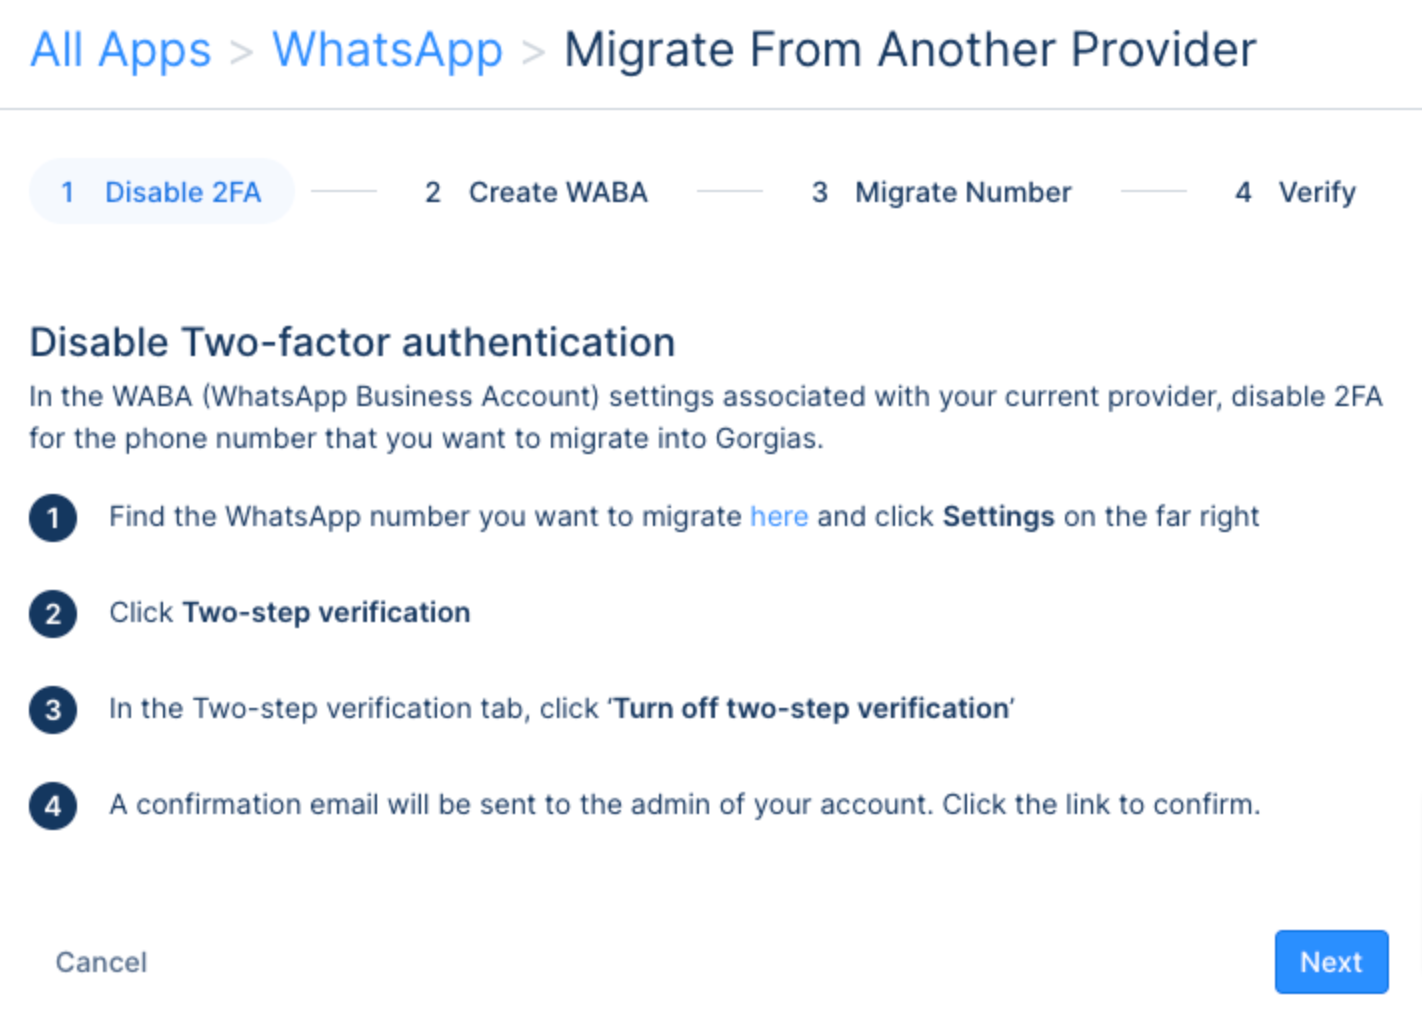
1. Go to Settings -> App Store -> All Apps -> WhatsApp.
2. Click Migrate From Another Provider.
3. Disable 2FA in the settings of the WhatsApp Business Account that had been created via your old provider.

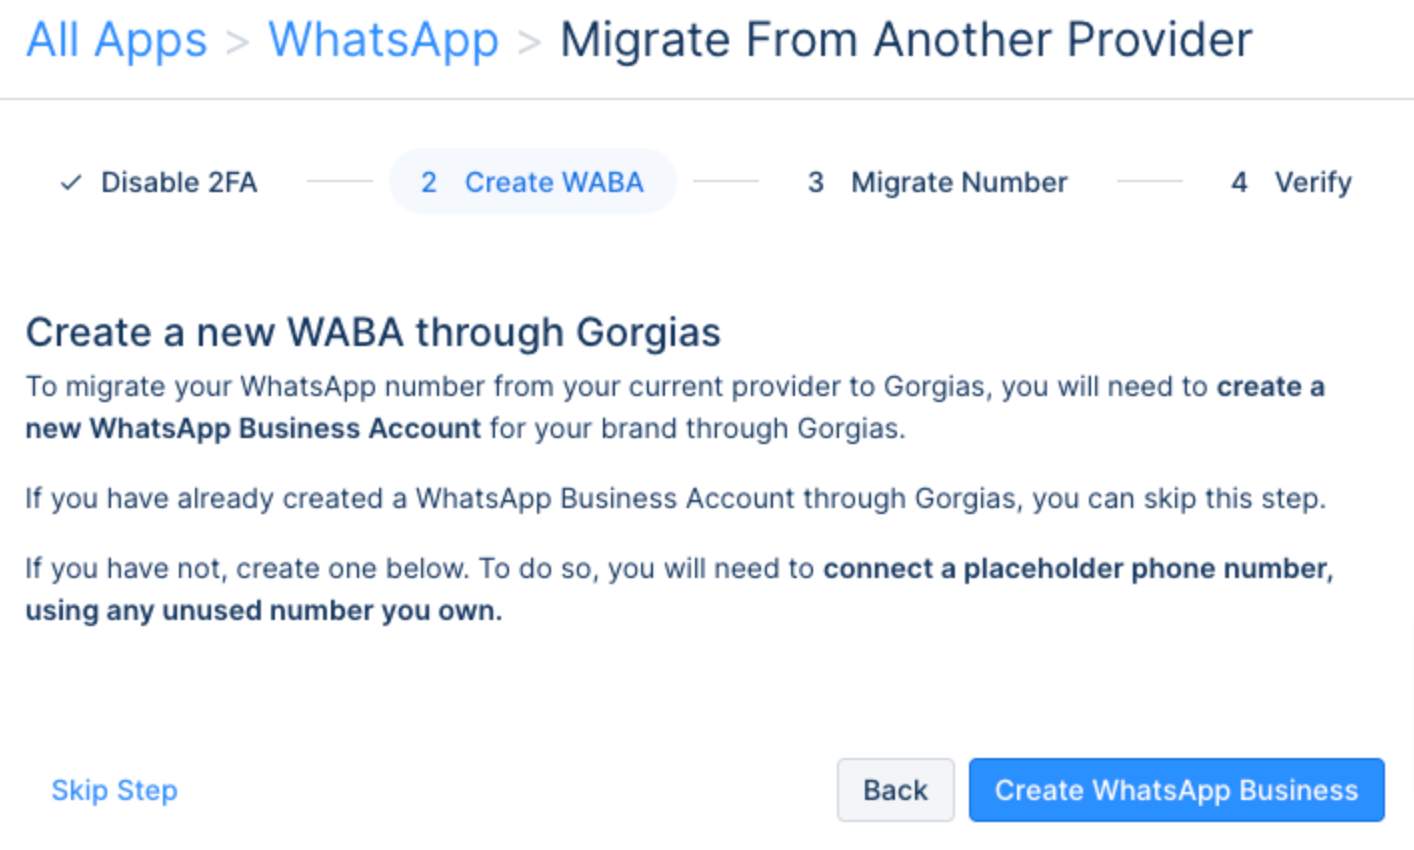
3. Create a new WhatsApp Business Account via Gorgias and connect a temporary number.
 You must create a WhatsApp Business Account integration through our Sign-up flow.
If you've never created a WABA through Gorgias, you'll need to create an integration and connect any unused number that isn't the same as the number you want to migrate (the temporary number can be deleted after the migration is over).
It's important to not skip this step as it's needed to get a payment method assigned to your newly created account: without, you will get an error when trying to migrate your phone number in the next steps.
4. Fill in the Migration Form and fill in the WhatsApp Business Account ID for the temporary number you just created.
To find the ID, go to this page and find the WABA account you connected to Gorgias.
5. After you've added the WABA ID, fill out the number that you wish to migrate into the field below.
6. Select a method of verification, and click on Next. It can take up to 5 minutes for the verification code to arrive - after you receive it, add it to the designated field.
7. Click Verify and the setup will be completed.