Custom Widgets with ZapierUpdated 6 months ago
Zapier is an easy way for non-technical users to create integrations between web applications - like creating a widget next to tickets to display any custom data you'd like.
Steps
1. Create a Zap that has the following information:
- The customer.id you want to create the widget for
- Data points you want to add to your widget (like return data)
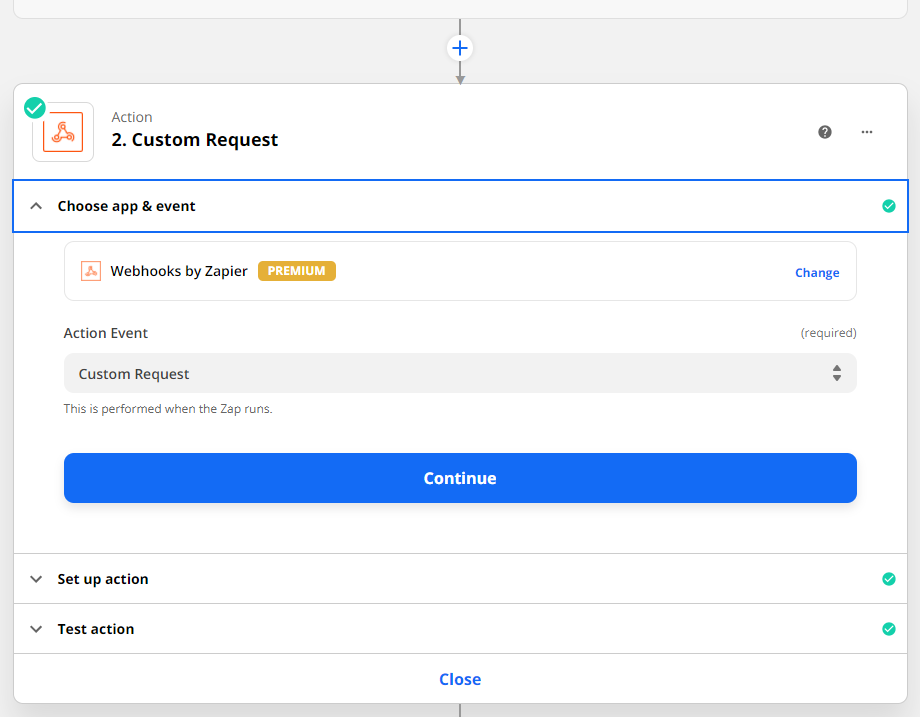
2. Create a new step with a webhook by Zapier and select a Custom Request.
3. Go to Settings -> You -> Rest API, and copy your Base API URL, Username (email), and Password (API key).
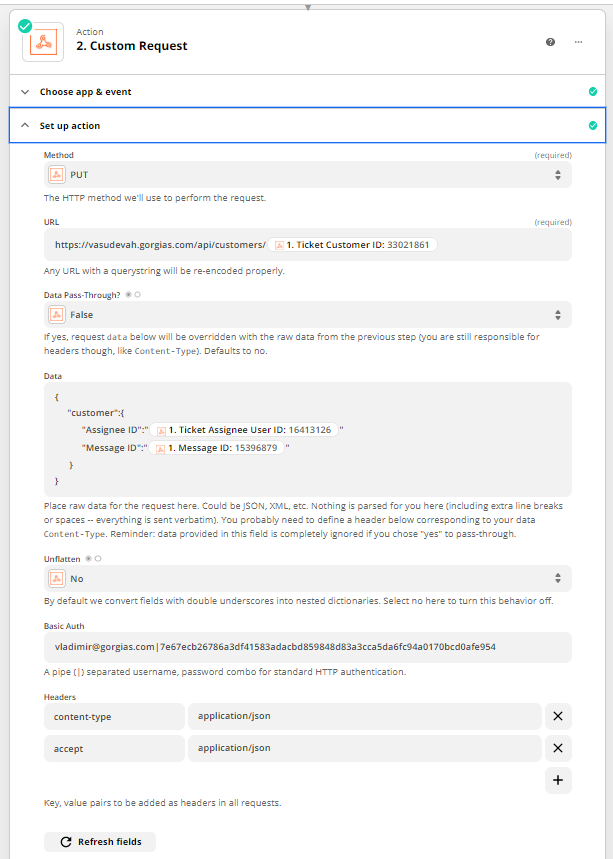
4. Insert the following data into your Zap:
Method: PUT
URL: https://{{domain_from_step_3}}.gorgias.io/api/customers/{{customer.id}}.
The {{customer.id}} is returned when you create a ticket, so if you created a ticket in the previous step, you can use it now.
Basic Auth: {{email_from_step_3}}|{{api_key_from_step_3}}
Headers: Content-Type, application/json
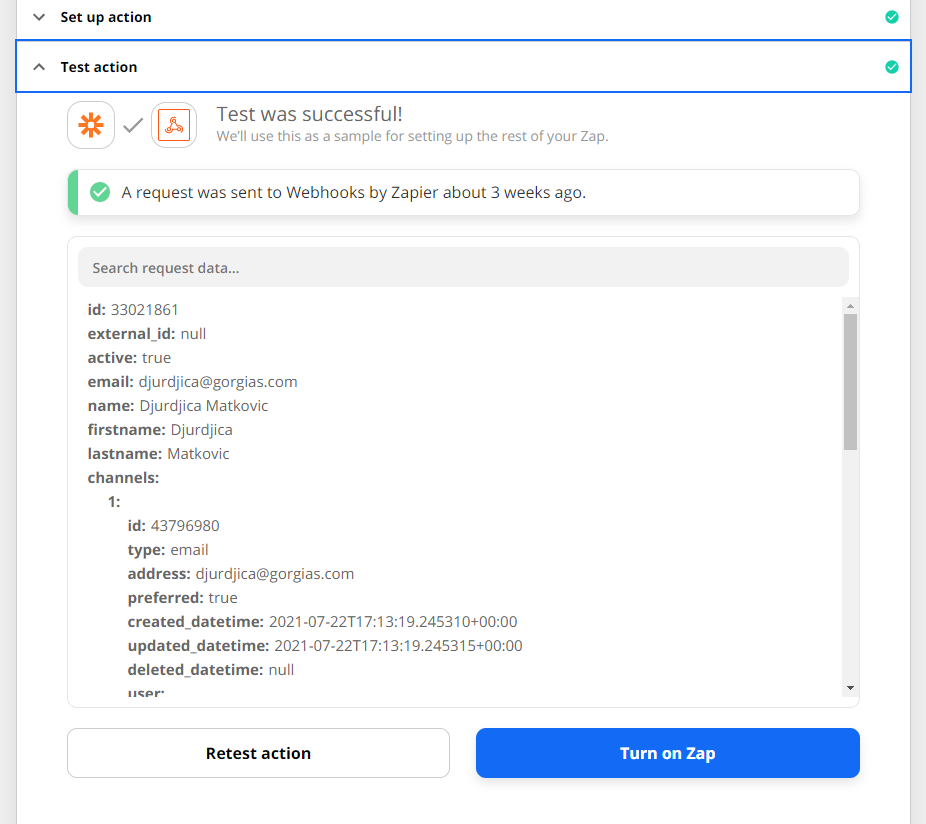
5. Test your Zap and then turn it on.
6. Display the widget in the sidebar next to your tickets by opening a ticket associated with the customer you just updated.
7. Click on the cog icon at the top right to edit widgets.
8. Find your custom data in the orange widget.
9. Drag it to the right.
10. Click Save widget.
Now the data that you add through Zapier for each customer will be displayed on the card when it's available.
