Import and export MacrosUpdated 6 months ago
Under Settings -> Productivity -> Macros, you can import and export your Macros by clicking on the dropdown arrow in the upper right corner.

You can import your Macros from a different helpdesk using the Import Macros from CSV option - just make sure to use existing tags on the import or it won't be completed.
- name
- body_text
- tags
- id
If no id is provided, a new Macro will be created for each line in the CSV. If an id is provided, the process will check if an existing Macro has the same id in your account:
- If the answer is yes, the process will update the existing Macro with the new content from the CSV.
- If the answer is no, the process will skip the line in the CSV and nothing will happen (no Macro will be created as a result).
Make sure that there are no empty spaces at the ends of the rows and name your columns exactly name, body_text, tags, and id without any capitalization (Macros that don't already exist in the helpdesk should have the id empty).
You can also export all the Macros you have on your Gorgias account with the Export Macros as CSV option - you can update groups of Macros at once by exporting, revising, and reimporting your Macros into your helpdesk.
Examples
Example #1
If you import the CSV below, the process will create a new Macro with the title: “Greet customer”, the text: "Hello dear customer" and 2 Tags: tag1 and tag2.
Example #2
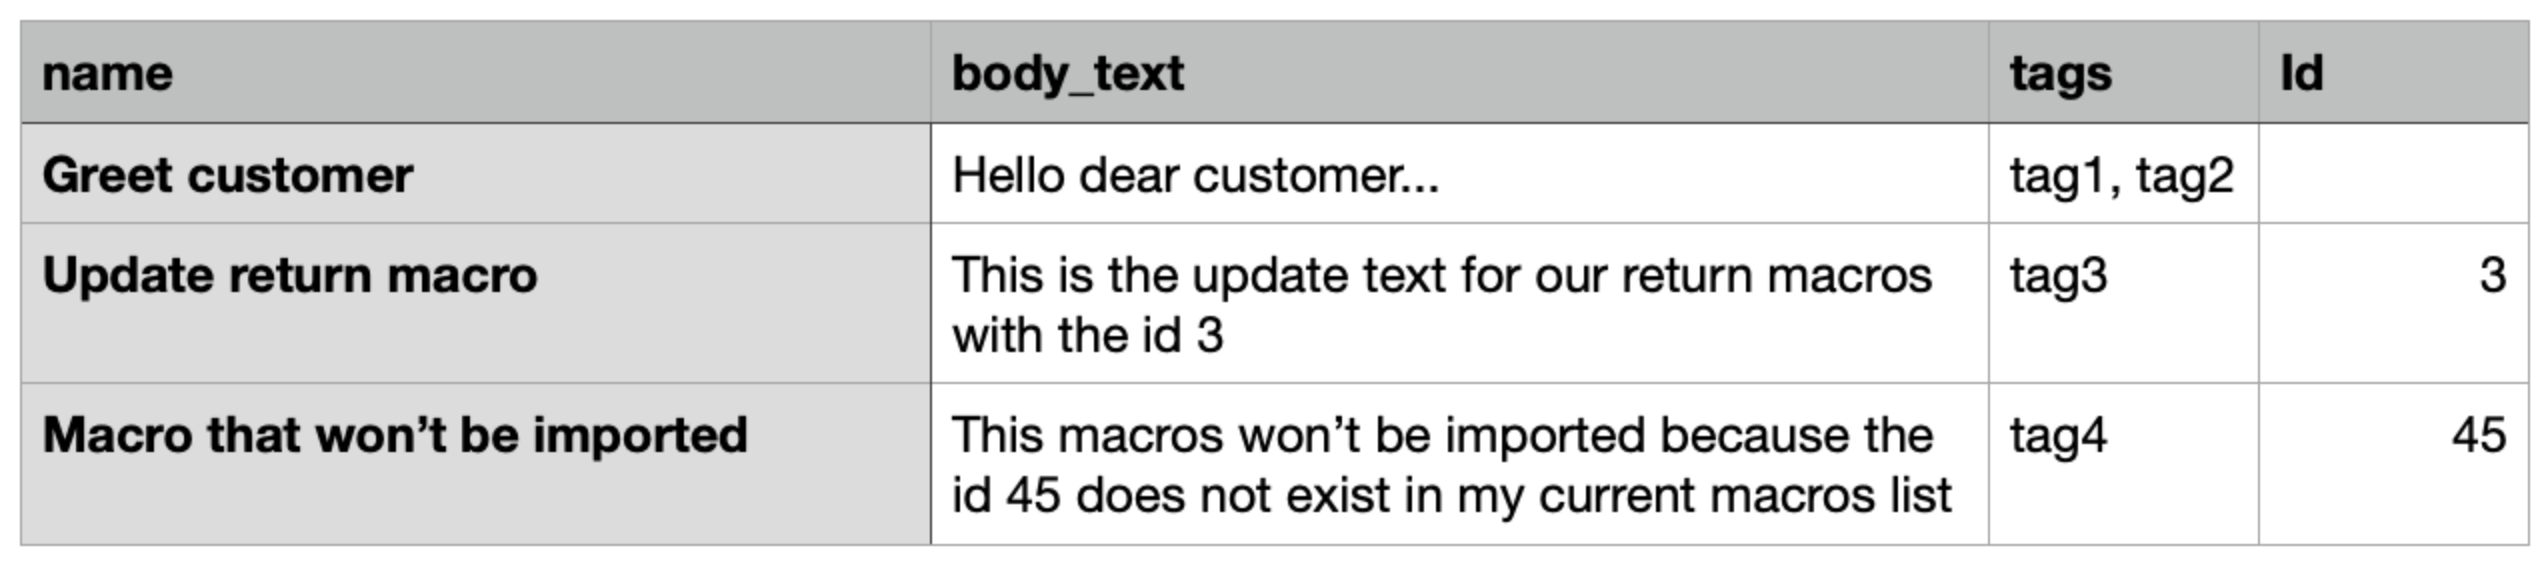
If you import the CSV below, the process will create a new "Greet customer" Macro, since no id is provided, and will update the current Macro with the current id = 3. The id=45 doesn't exist in your Gorgias account so the third line will be skipped by the importer.