WooCommerce VariablesUpdated 10 days ago
While WooCommerce variables can't be selected directly from the helpdesk, you can still manually create them for any piece of information displayed in the WooCommerce widget.
Variables
| Store display name | {{ticket.customer.ecommerce_data["uuid"].store.display_name}} |
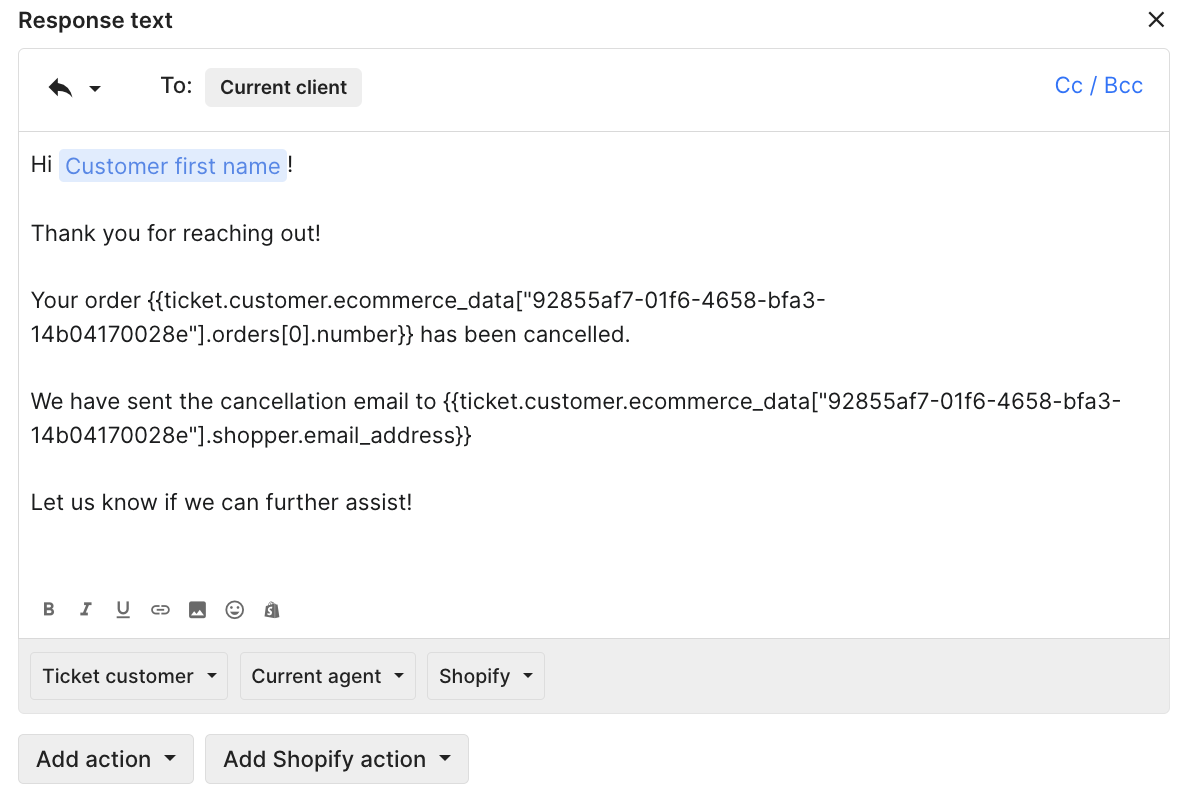
| Last order number | {{ticket.customer.ecommerce_data["uuid"].orders[0].number}} |
| Customer first name | {{ticket.customer.ecommerce_data["uuid"].shopper.first_name}} |
| Customer last name | {{ticket.customer.ecommerce_data["uuid"].shopper.last_name}} |
| Customer email address | {{ticket.customer.ecommerce_data["uuid"].shopper.email_address}} |
| Customer phone number | {{ticket.customer.ecommerce_data["uuid"].shopper.phone_number}} |
| Customer birthdate | {{ticket.customer.ecommerce_data["uuid"].shopper.birthdate}} |
| Street address (line 1) | {{ticket.customer.ecommerce_data["uuid"].addresses[0].line_1}} |
| Street address (line 2) | {{ticket.customer.ecommerce_data["uuid"].addresses[0].line_2}} |
| City | {{ticket.customer.ecommerce_data["uuid"].addresses[0].city}} |
| State | {{ticket.customer.ecommerce_data["uuid"].addresses[0].state}} |
| Zip code | {{ticket.customer.ecommerce_data["uuid"].addresses[0].zip_code}} |
| Country | {{ticket.customer.ecommerce_data["uuid"].addresses[0].country}} |
Steps
Finding the store uuid
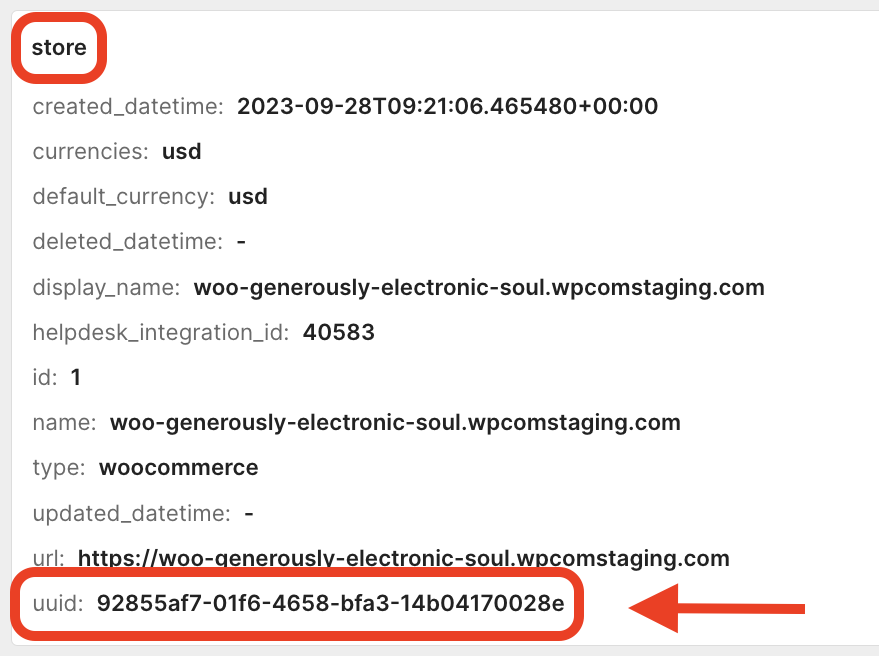
As opposed to other back-office variables, WooCommerce variables requires the use of store.uuid in the data path.
Here is how you can find your store.uuid:
1. Open any ticket with a customer profile that has a WooCommerce order.
2. Click the cog button at the top right of the customer section to open the sidebar settings menu and see all available WooCommerce data in its section.
3. Scroll to the Store section and find the field uuid.
4. Copy the value and use it in your variables by replacing the uuid part.
Using variables in Macros
1. Go to Settings -> Productivity -> Macros.
2. Click on Create macro in the upper right corner.
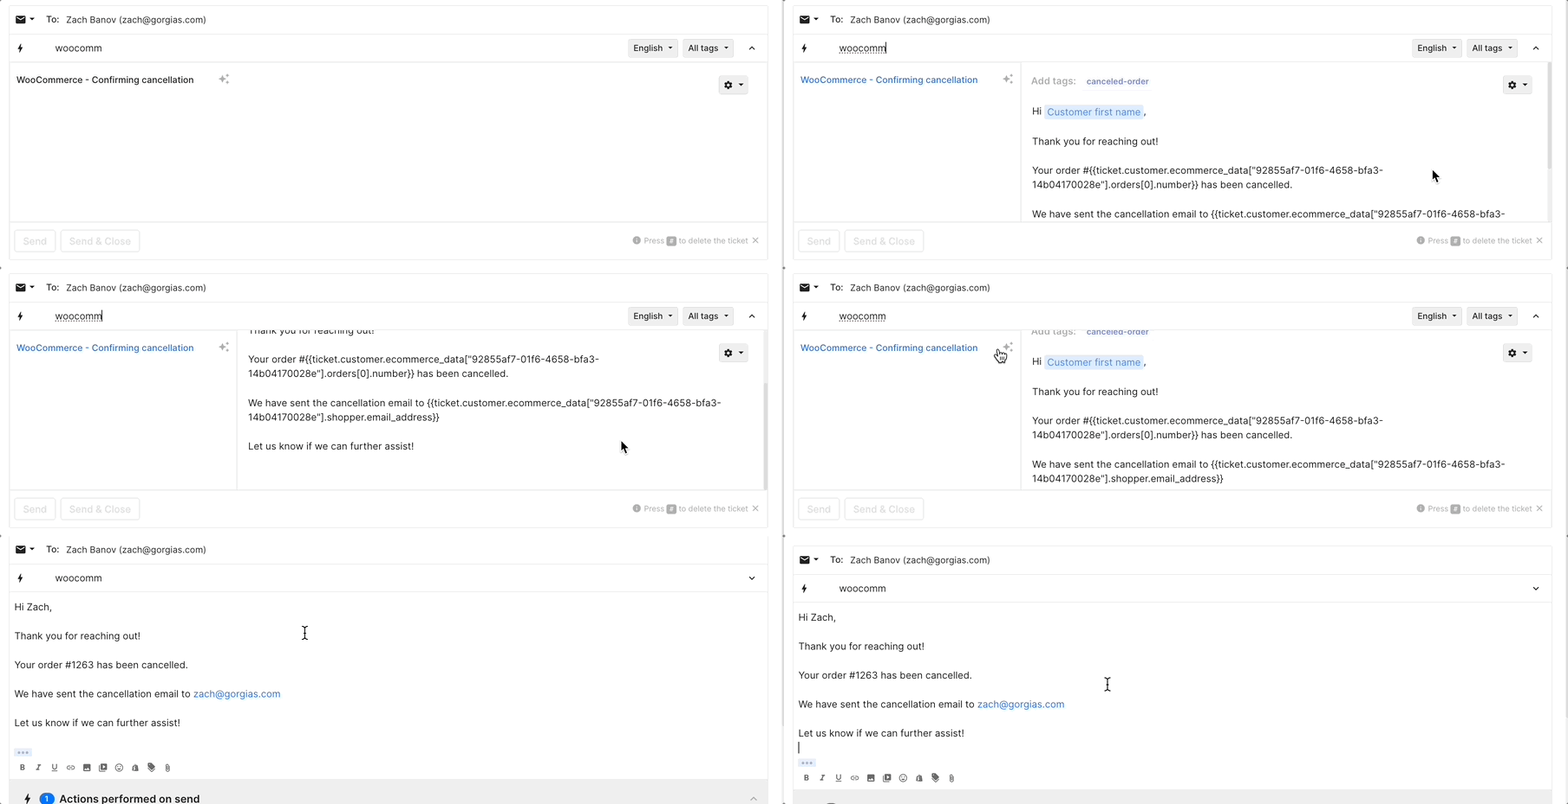
3. Write the message body and add variables where you want to see WooCommerce data populated.
4. Optionally, add Tags and Macro Actions.
5. Click on Create macro.
