Outlook as forwarding integrationUpdated 9 months ago
This guide will help you to configure Outlook forwarding. Ensure you’re logged into your Gorgias account as an Admin and logged into the Outlook account you're trying to configure.
Before you begin
Before you start, please Allow External Forwarding through Outlook as some accounts tend to block automatic email forwarding due to spam protection.
If you have external forwarding disabled, you will encounter the following error:
*550 5.7.520 Access denied, Your organization does not allow external forwarding. Please contact your administrator for further assistance. AS(7555)*
To change your outbound spam protection settings, please contact your Microsoft 365 Administrator and ask them to allow automatic external forwarding for each email address you want to enable the forwarding.
Steps
Navigate to Gorgias --> Settings --> Channels --> Email.
Click on Add Email Address in the top right corner.
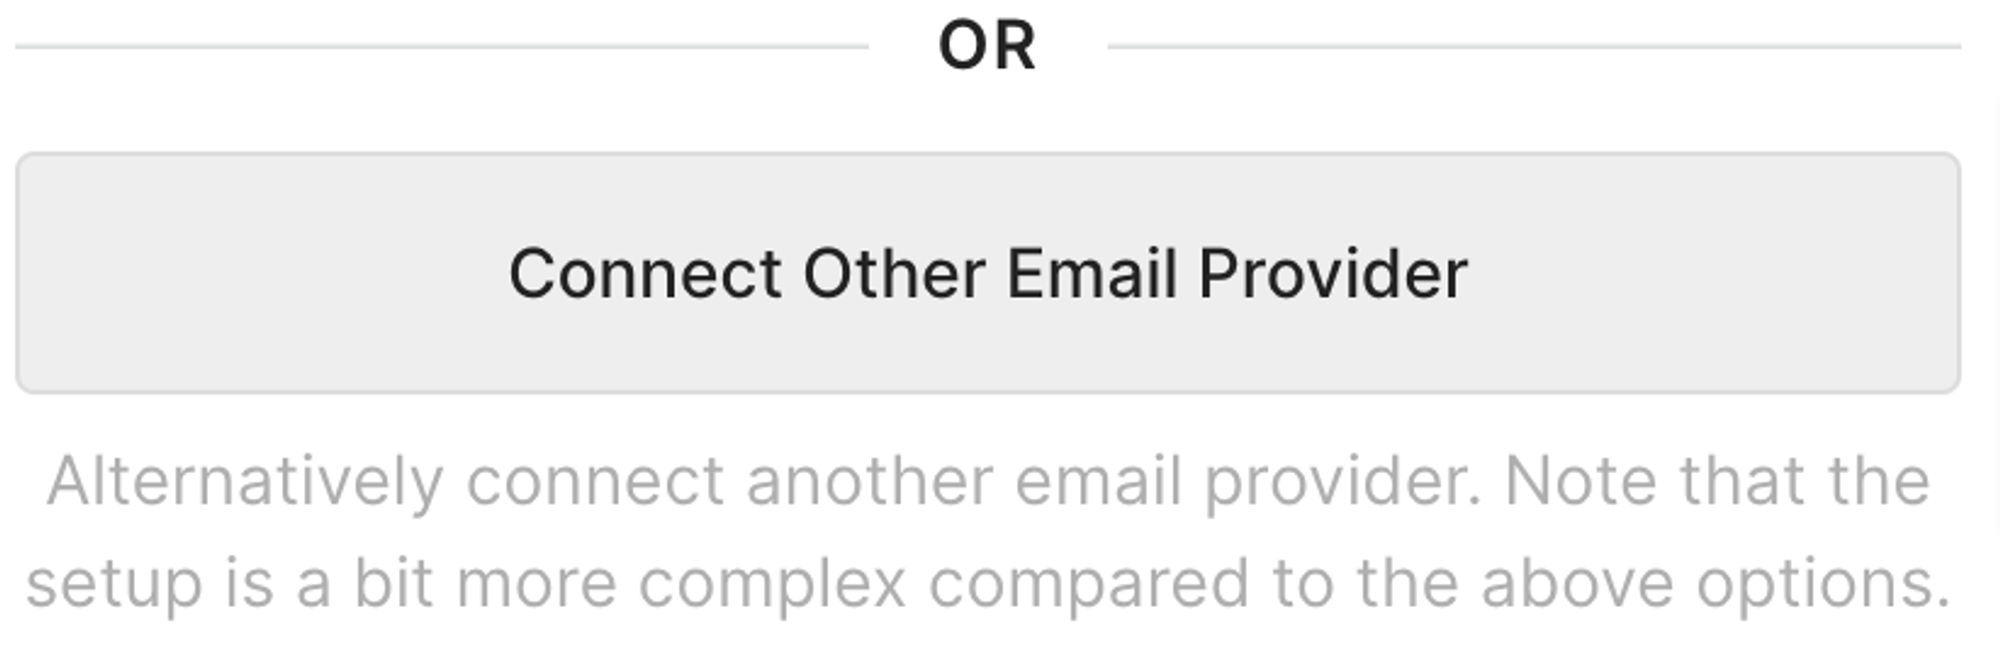
Click on Connect Other Email Provider
Enter your address name and the email address you want to connect.
Click on Connect This Email Account.
Copy your default Gorgias email address (it'll look like a long email with a bunch of numbers and letters).
Navigate to the inbox of the Outlook email you'd like to integrate.
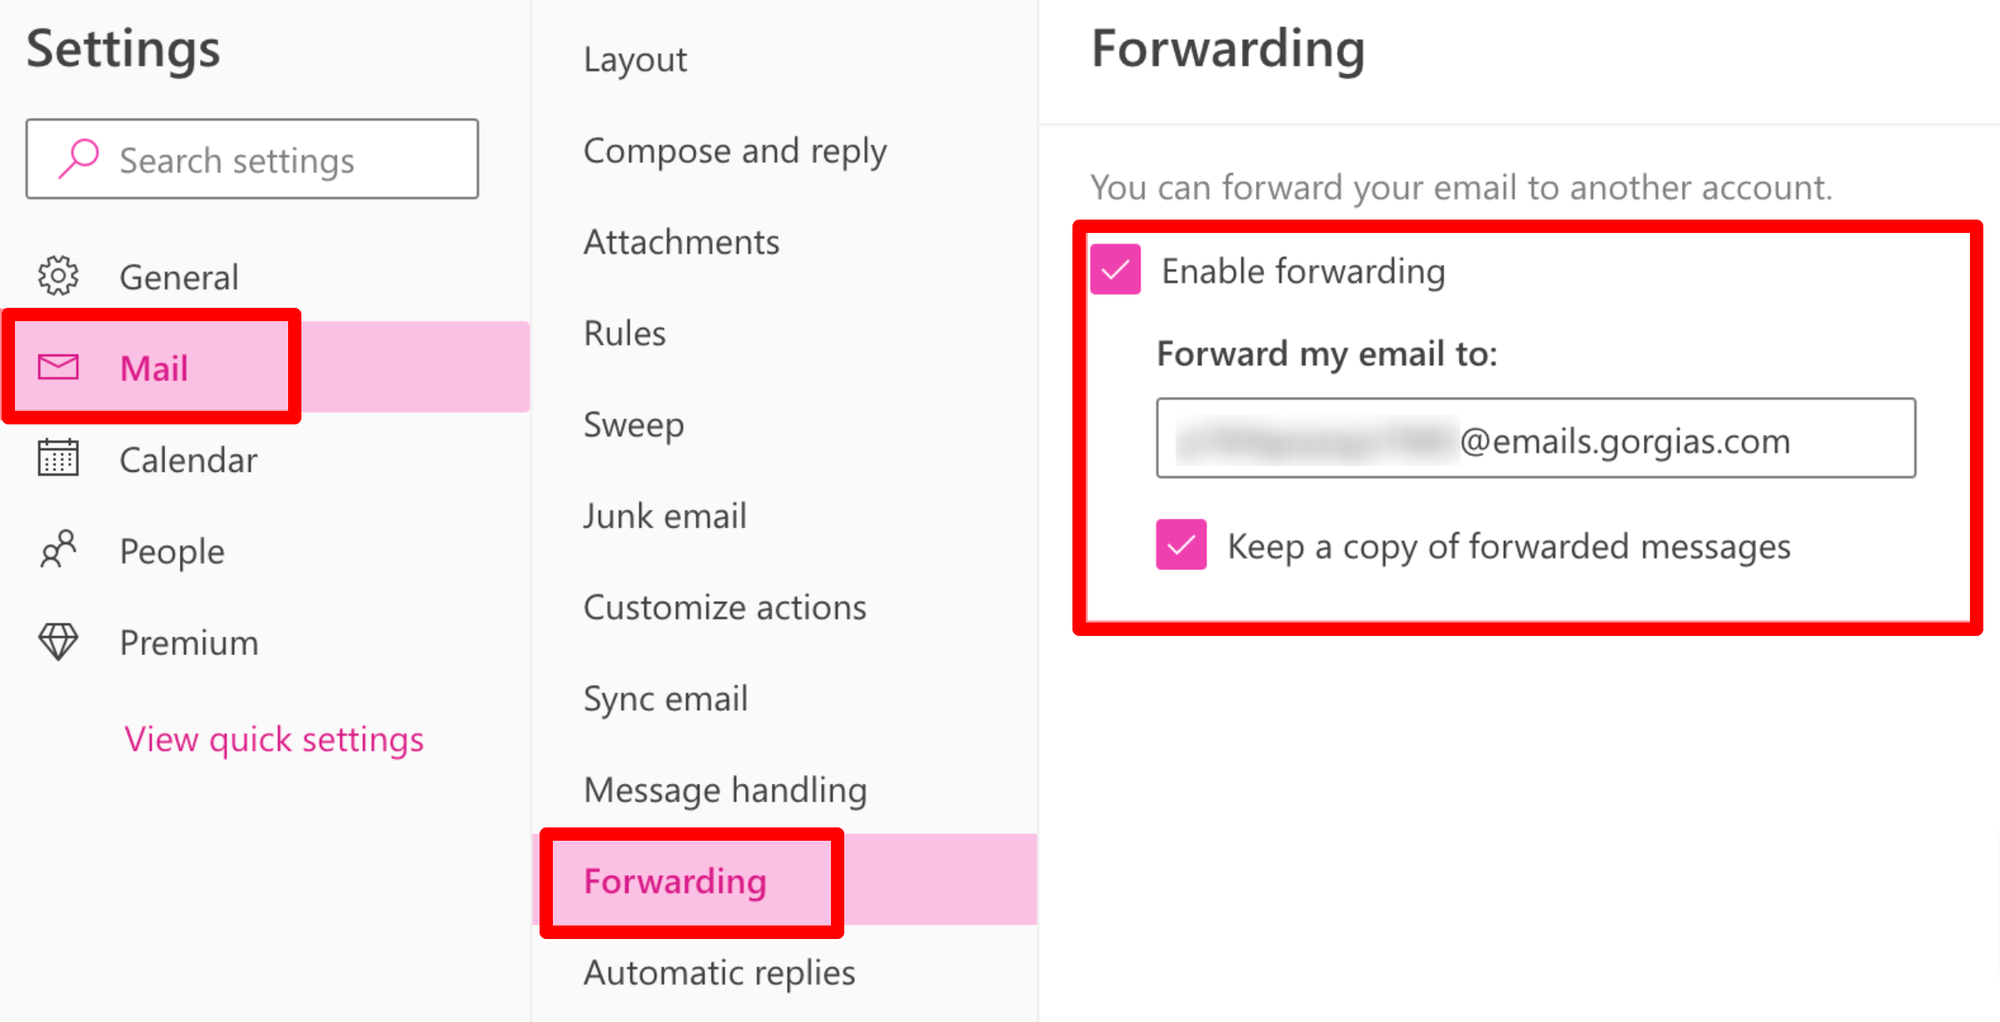
Click on Settings --> View all Outlook Settings

- Click on Mail --> Forwarding --> Enable Forwarding. Insert the default Gorgias email address that you copied on step 6 and save your changes.
- Navigate back to Gorgias --> Settings --> Channels --> Email --> your Outlook integration.
Click on Verify Email Forwarding and wait until the app validates the forwarding.
ℹ️ In case you’ve completed all the steps correctly but the integration was not verified, resend the verification email by clicking the corresponding button.
Enable External Forwarding
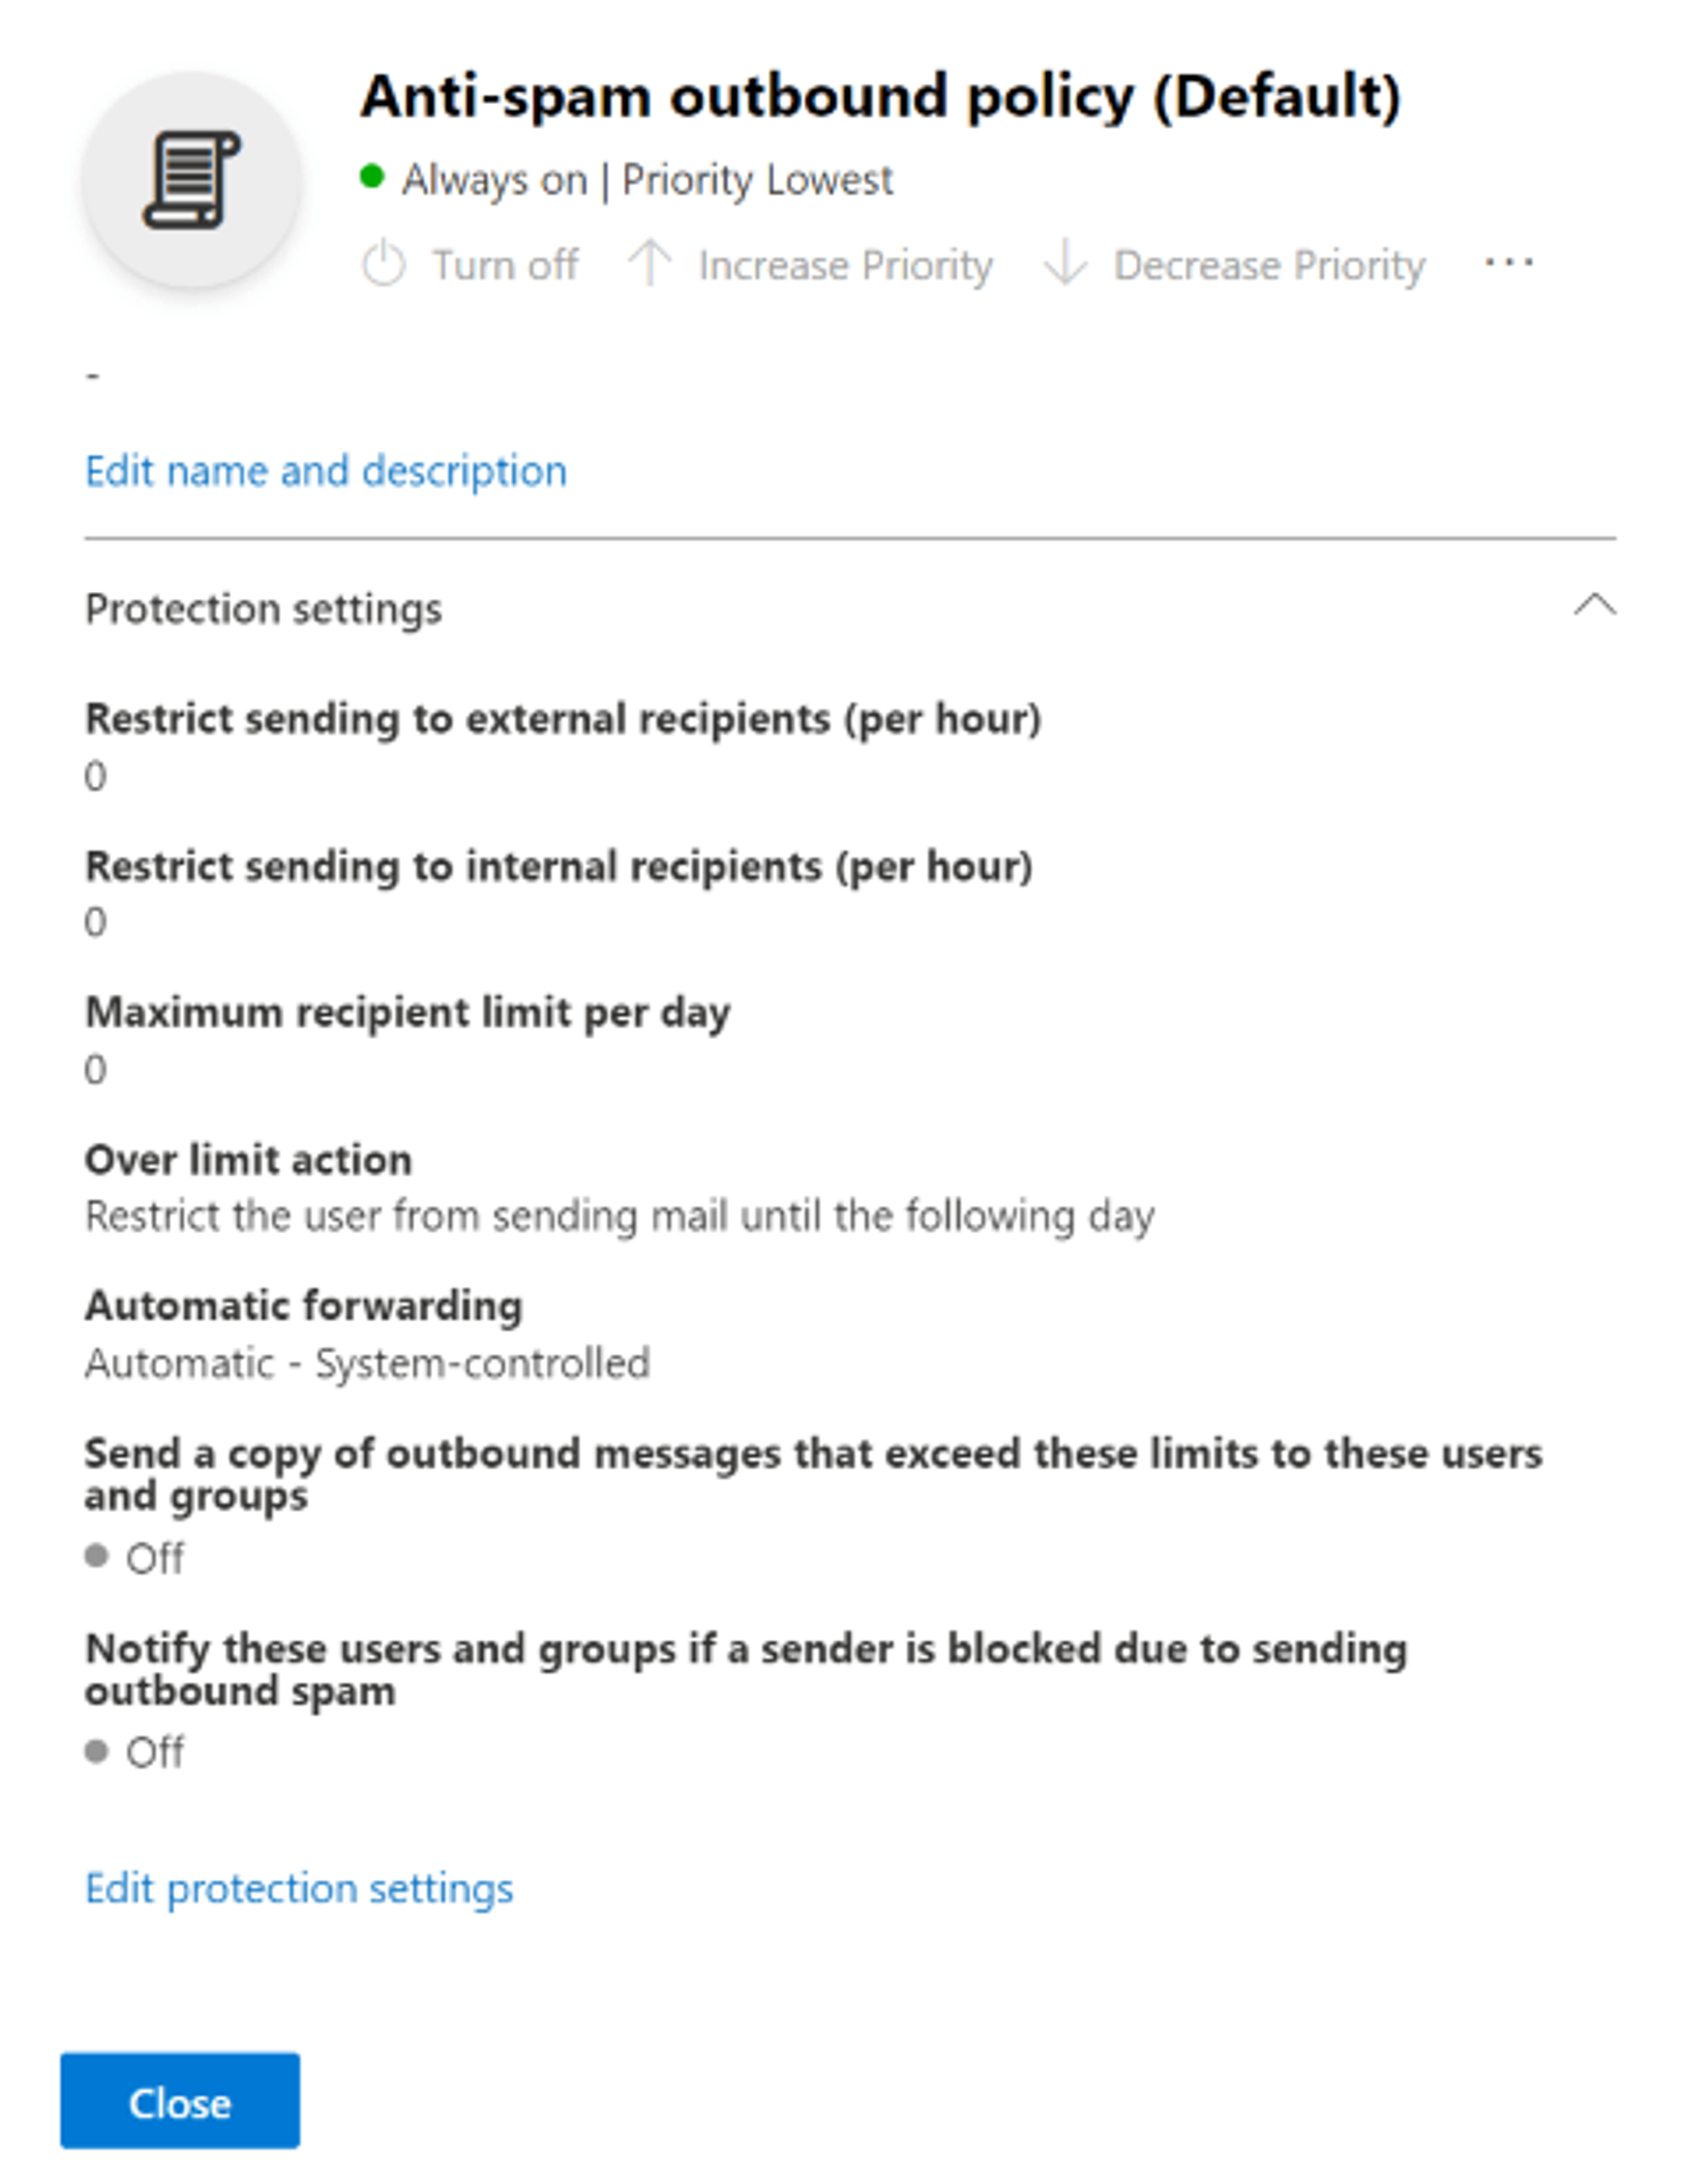
Log in to your Office 365 Security & Compliance portal for Microsoft 365 and choose Threat management -> Policy -> Anti-spam (the policies you see in your admin may differ from those shown here, as these are only the default policies).
- Click on Anti-spam outbound policy (Default), then click the Edit protection settings link at the bottom of the sidebar
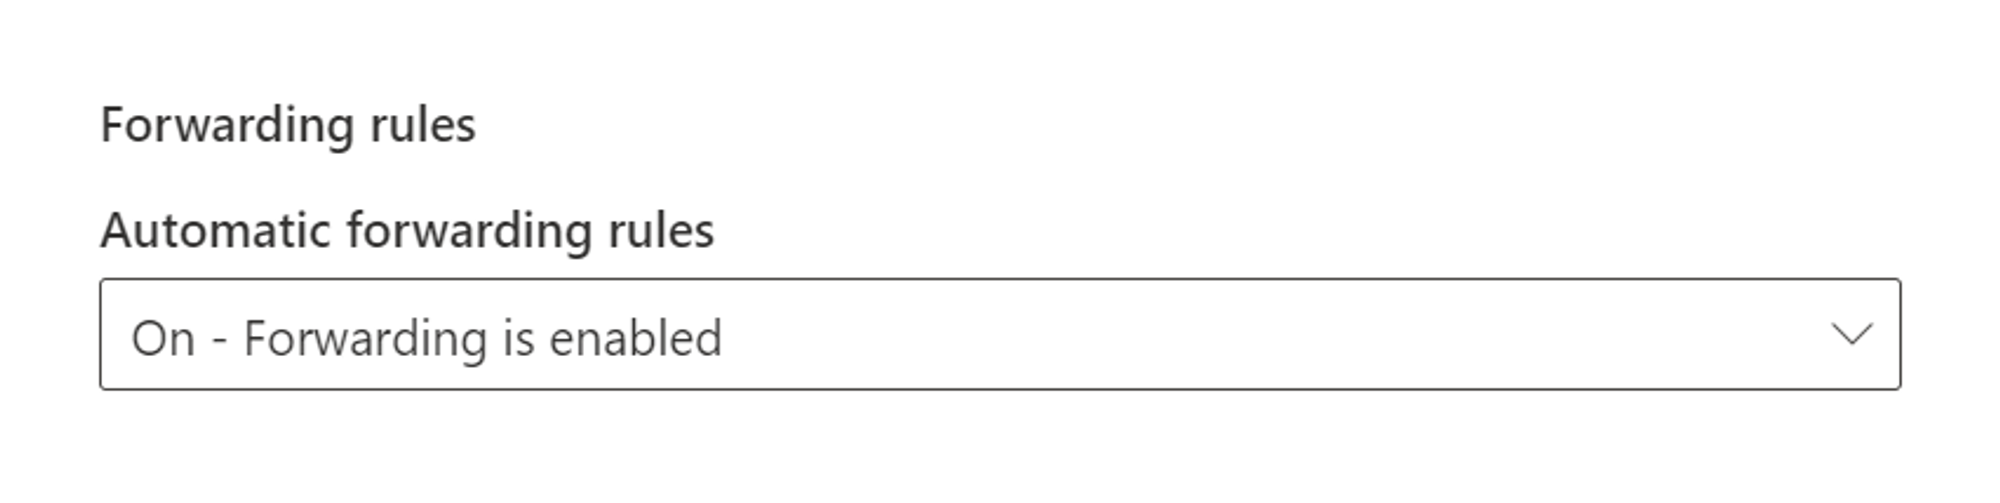
Find the section called Forwarding Rules and the dropdown called Automatic Forwarding Rules
Choose On - Forwarding is enabled and click Save at the bottom
Domain verification
⚠️ All forwarding integrations require domain verification, to ensure maximum deliverability of emails. Please check out our dedicated article and go through the steps there.
