Add email to Klaviyo via FlowsUpdated 6 months ago
You can create a Flow with HTTP request that will automatically create a Klaviyo profile for your customer as soon as they leave their name and email address. You can then manage how the profile will be added to lists and segments through Klaviyo settings.
Steps
1. You can start the Flow with the Trigger button Keep me informed about updates and promotions.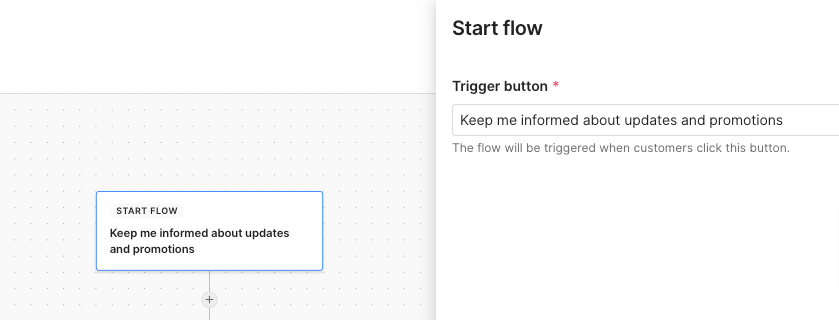
2. For the second step select Collect text reply option and ask for the customer's first name that will be used to address them in the email.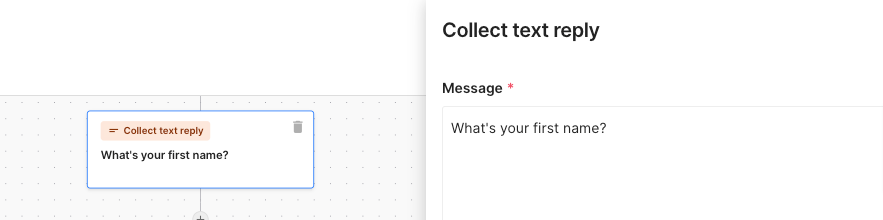
3. Next, add another Collect text reply step. You can immediately use the customer's name from the previous step to personalize the message and ask them for the email address they would like to use for your brand's offers and notifications.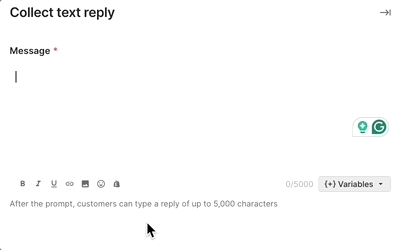 4. Add HTTP request Flow step and fill in the following information:
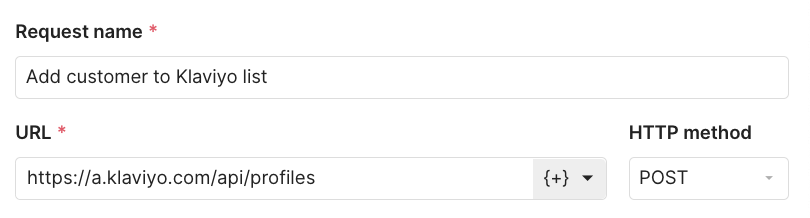
- Request name: Add customer to Klaviyo list
- URL: https://a.klaviyo.com/api/profiles
- HTTP method: POST
5. Click 2 times on the Add Header button and fill out the fields:
- authorization: Klaviyo-API-Key your private Klaviyo API key
- revision: copy the date from this page in the format of YYYY-MM-DD

6. Select application/json in the Request body drop-down menu and copy the script below
7. Add the variables from step 2 and 3 in the designated spots.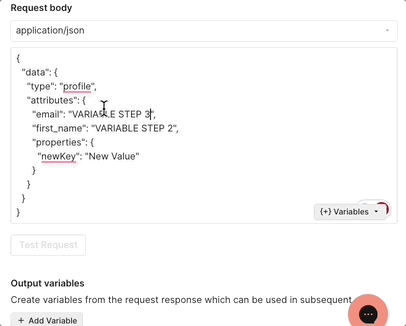
8. You can test your request by clicking Test Request. If there's an issue with the request you'll get an error status code, if the request is successful you'll get a 200 OK or 201 CREATED response.
9. Click on ESC on your keyboard, or simply go to the + sign in the Flow builder to add a new step - we recommend adding an Automated answer step that will inform the customer that they've been subscribed to your newsletter.

10. The ending of the Flow will be automatically set to Ask for feedback - you can leave it like that so the customer can ask for additional assistance if needed.
Alternatively, you can change it to End interaction so the customer will have to leave the Flow to ask for further assistance.
11. Once you're satisfied with your added steps, click Publish and the Flow will be live on any of your connected channels.
