How to use Gorgias: a quick start guideUpdated 3 hours ago
Welcome to Gorgias, we’re so excited you’re here! Gorgias brings customer support requests from a variety of channels into a centralized, AI-powered platform; so you and your team can efficiently monitor, prioritize, and solve any volume of customer inquiries. Read on for an overview of the helpdesk, and to learn the basics of responding to tickets in Gorgias.
Sidebar
The sidebar on the left-hand side of Gorgias is the menu you use to navigate around your helpdesk. It will update based on the currently active page, but the items located at the top and bottom, described below, will always be accessible, no matter where you are in the app.
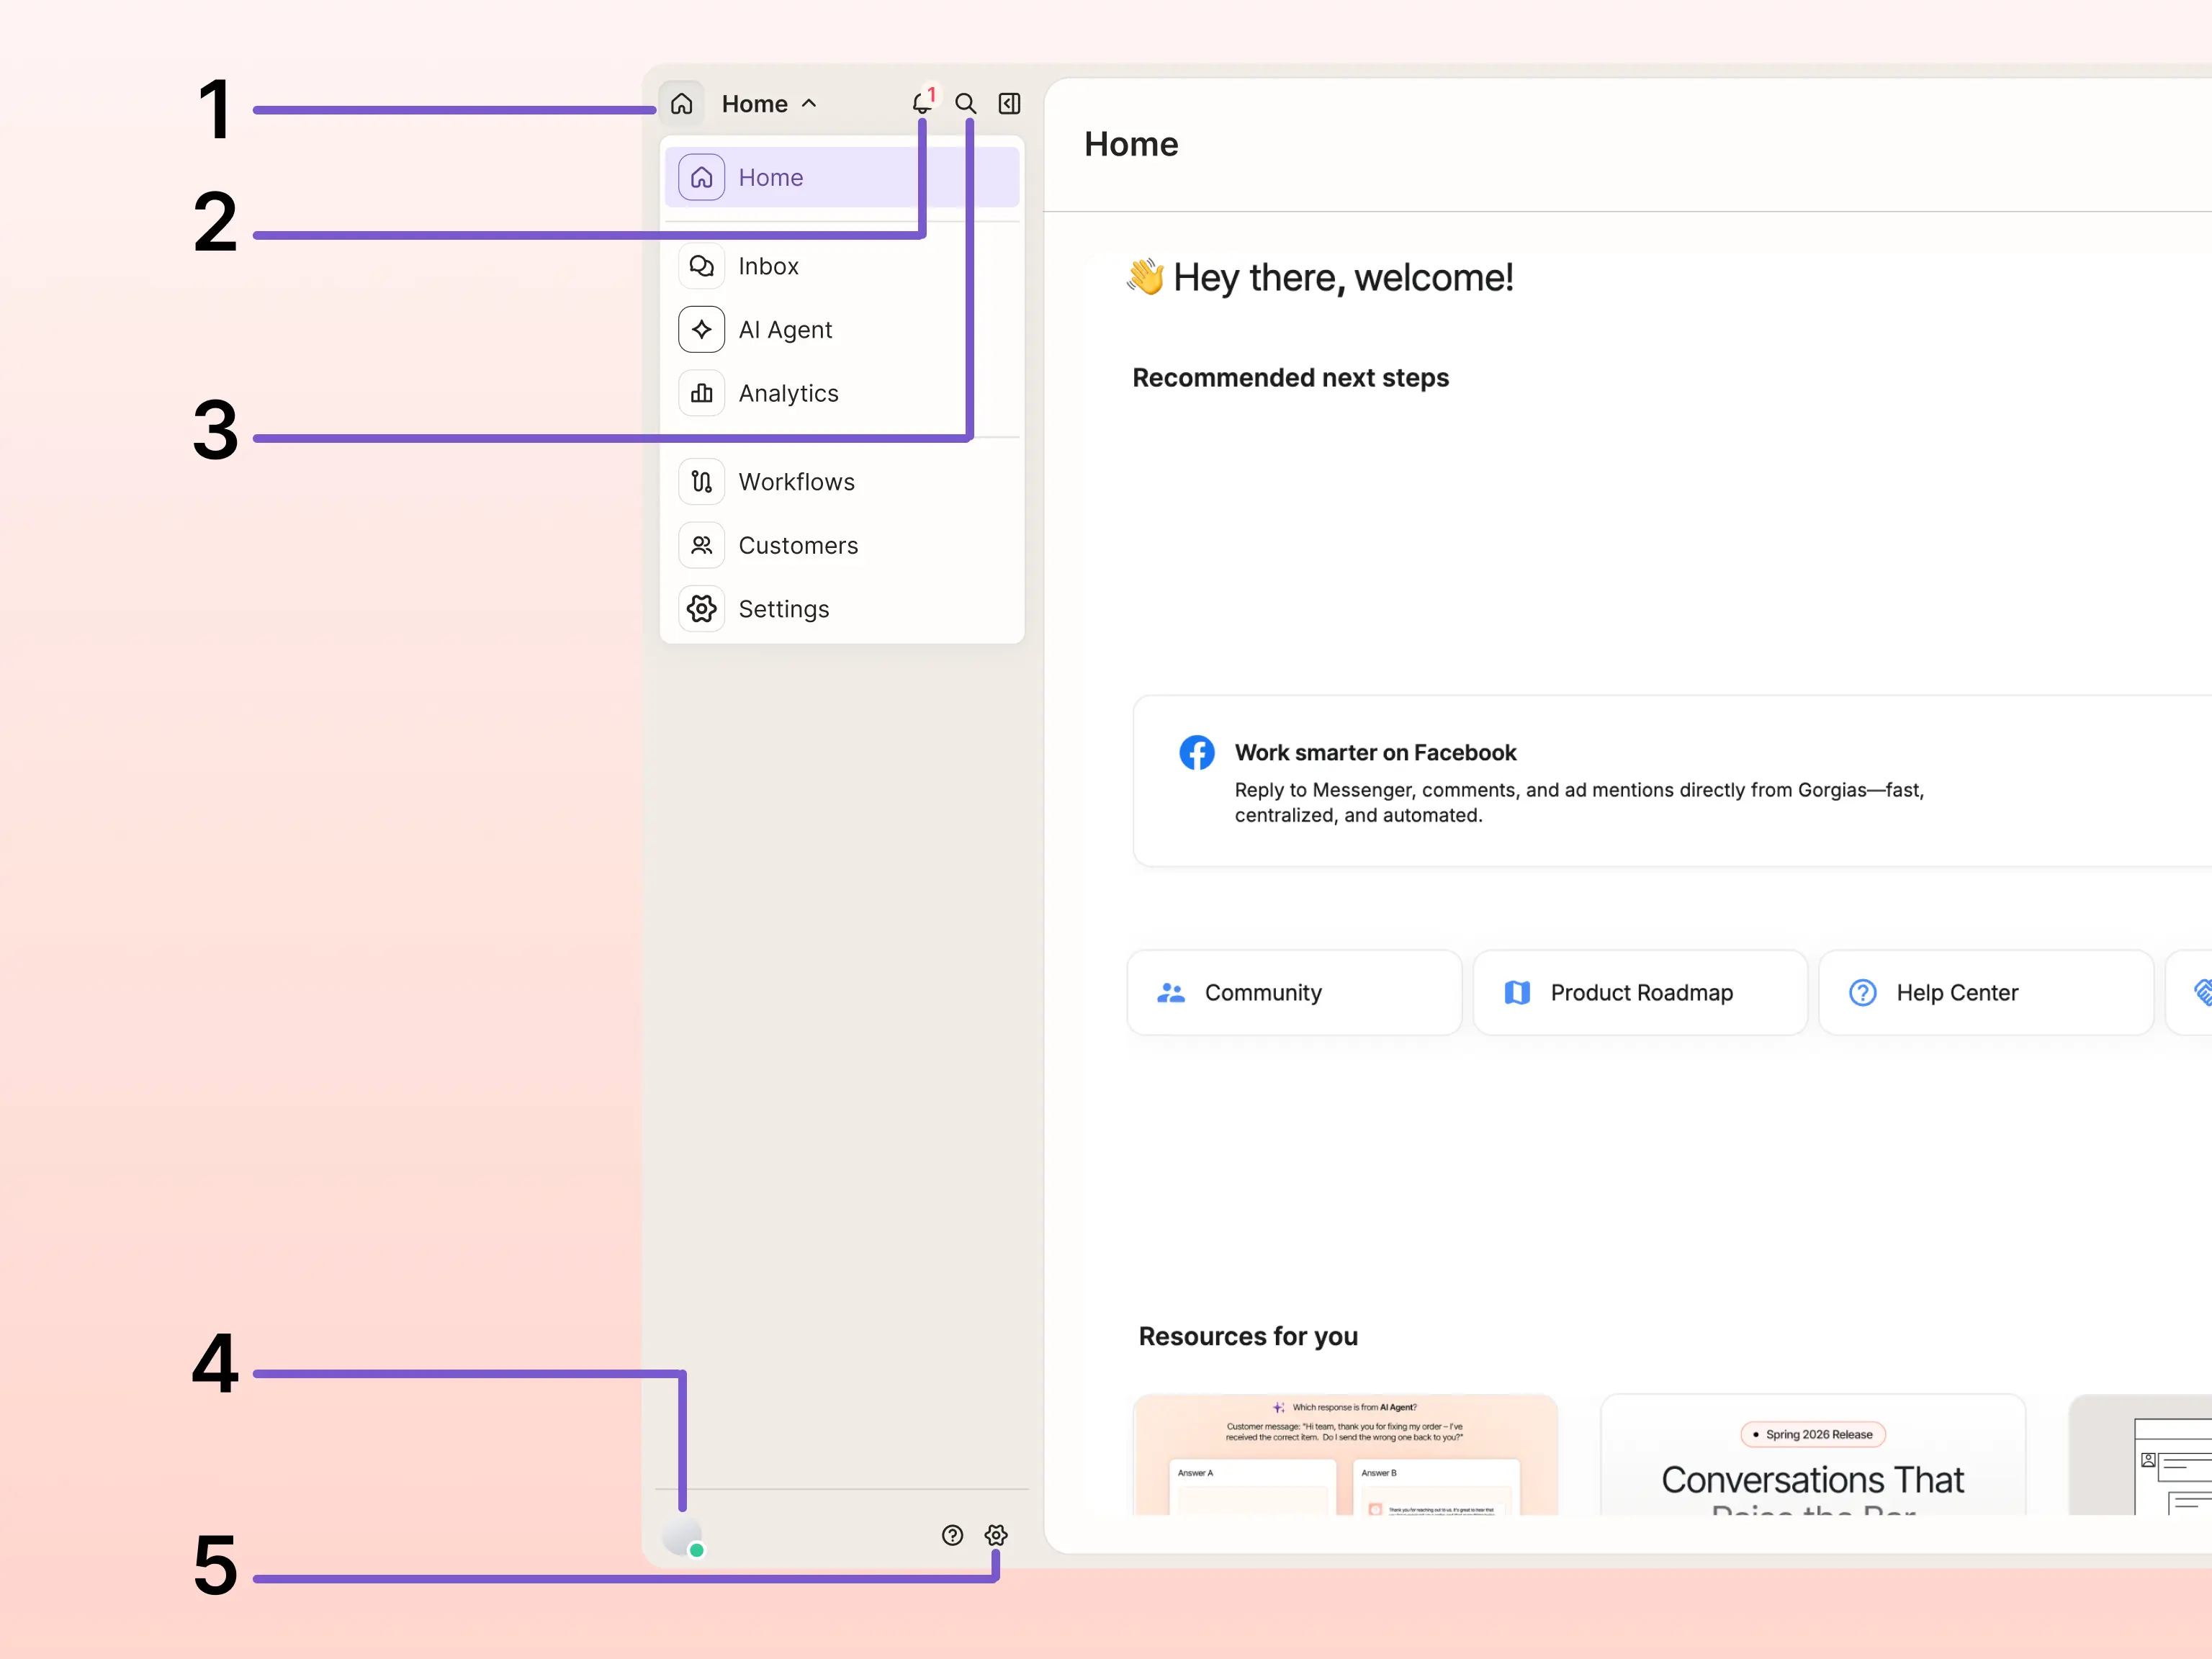
1. Main menu
Click the dropdown menu in the top-left corner of your sidebar to switch between key areas in Gorgias, like Inbox, Analytics, Workflows and Customers.2. Notifications
Activity from your helpdesk that directly relates to you will appear in your notifications. When you have unread activity, you’ll see a numbered badge on the notification icon to let you know. To adjust your notification preferences, click the settings icon at the top of the notifications list.3. Search
Click the search icon to search Gorgias for tickets, calls, and customers in your helpdesk.4. Profile menu
The profile menu shows your profile picture and current availability status at a glance. Click it to open a menu where you can set your status, switch themes, access your profile settings and preferences, or log out.5. Settings
Depending on your role, you’ll be able to manage a different variety of account settings from this page.Inbox
The inbox is your primary workspace in Gorgias. This is where you’ll manage your conversations and respond to customer inquiries from each of your team’s connected channels — like email, chat, and social media — all from the same place.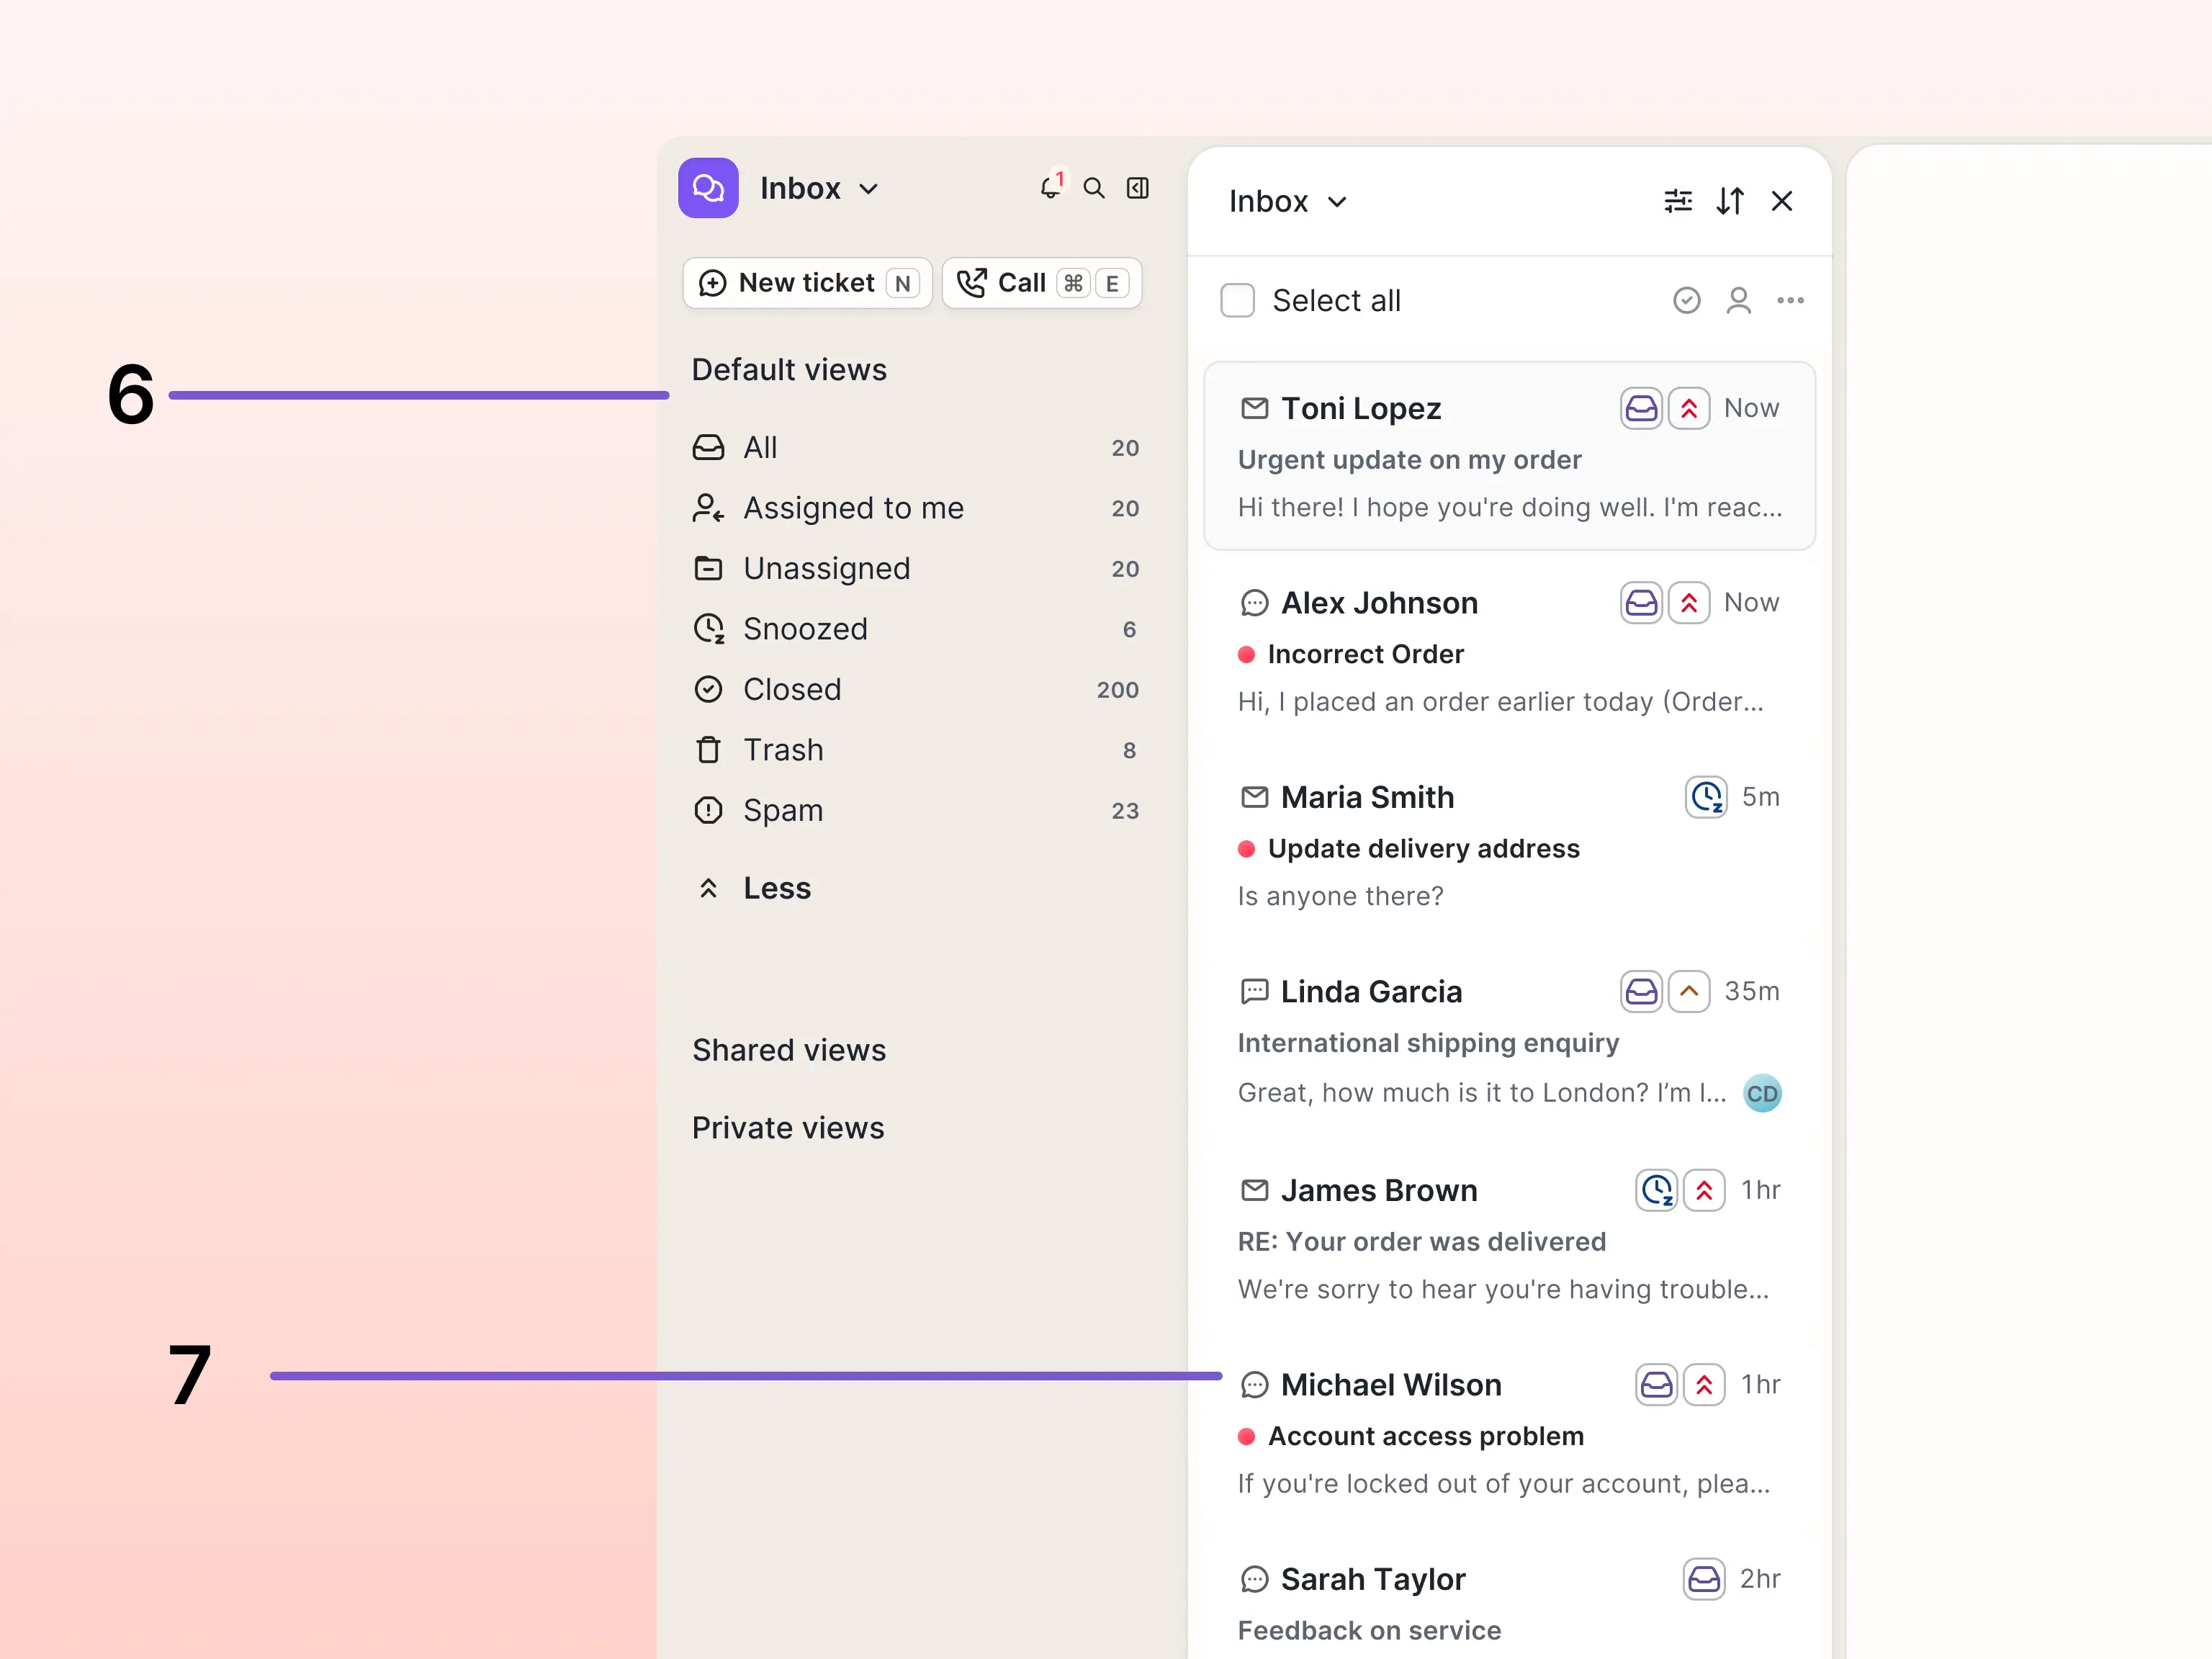
6. Ticket views
When you navigate to Inbox, the menu in the sidebar displays a list of default, shared, and private ticket views. Views filter the tickets in your helpdesk, organizing them into categories based on conditions like status, assignment, or contact reason.- Default views are standard across all Gorgias helpdesks.
- Shared views are created by your admins to meet your team’s unique needs.
- Private views appear in only your sidebar — you can create them to organize tickets based on conditions that are important to you.
Select a view from the sidebar to display the associated tickets.
7. Ticket panel
The ticket panel displays a list of tickets from the view you select. Each ticket is a separate customer conversation, and you can decide which conversation to respond to first by skimming the details available in the ticket panel. You'll see details like the customer’s name, the channel their message came from, how long ago it was received and its priority, and a preview of the most recent activity in the ticket.Select a ticket from the list to read the conversation and reveal additional ticket details.
Ticket
When you open a ticket, the conversation shows every sent and received message, as well as any internal notes and ticket activity, like assignments and status changes. To the right of the conversation is the ticket sidebar, where you’ll find the ticket details, customer profile, customer timeline, and data from your connected apps that’s related to the conversation.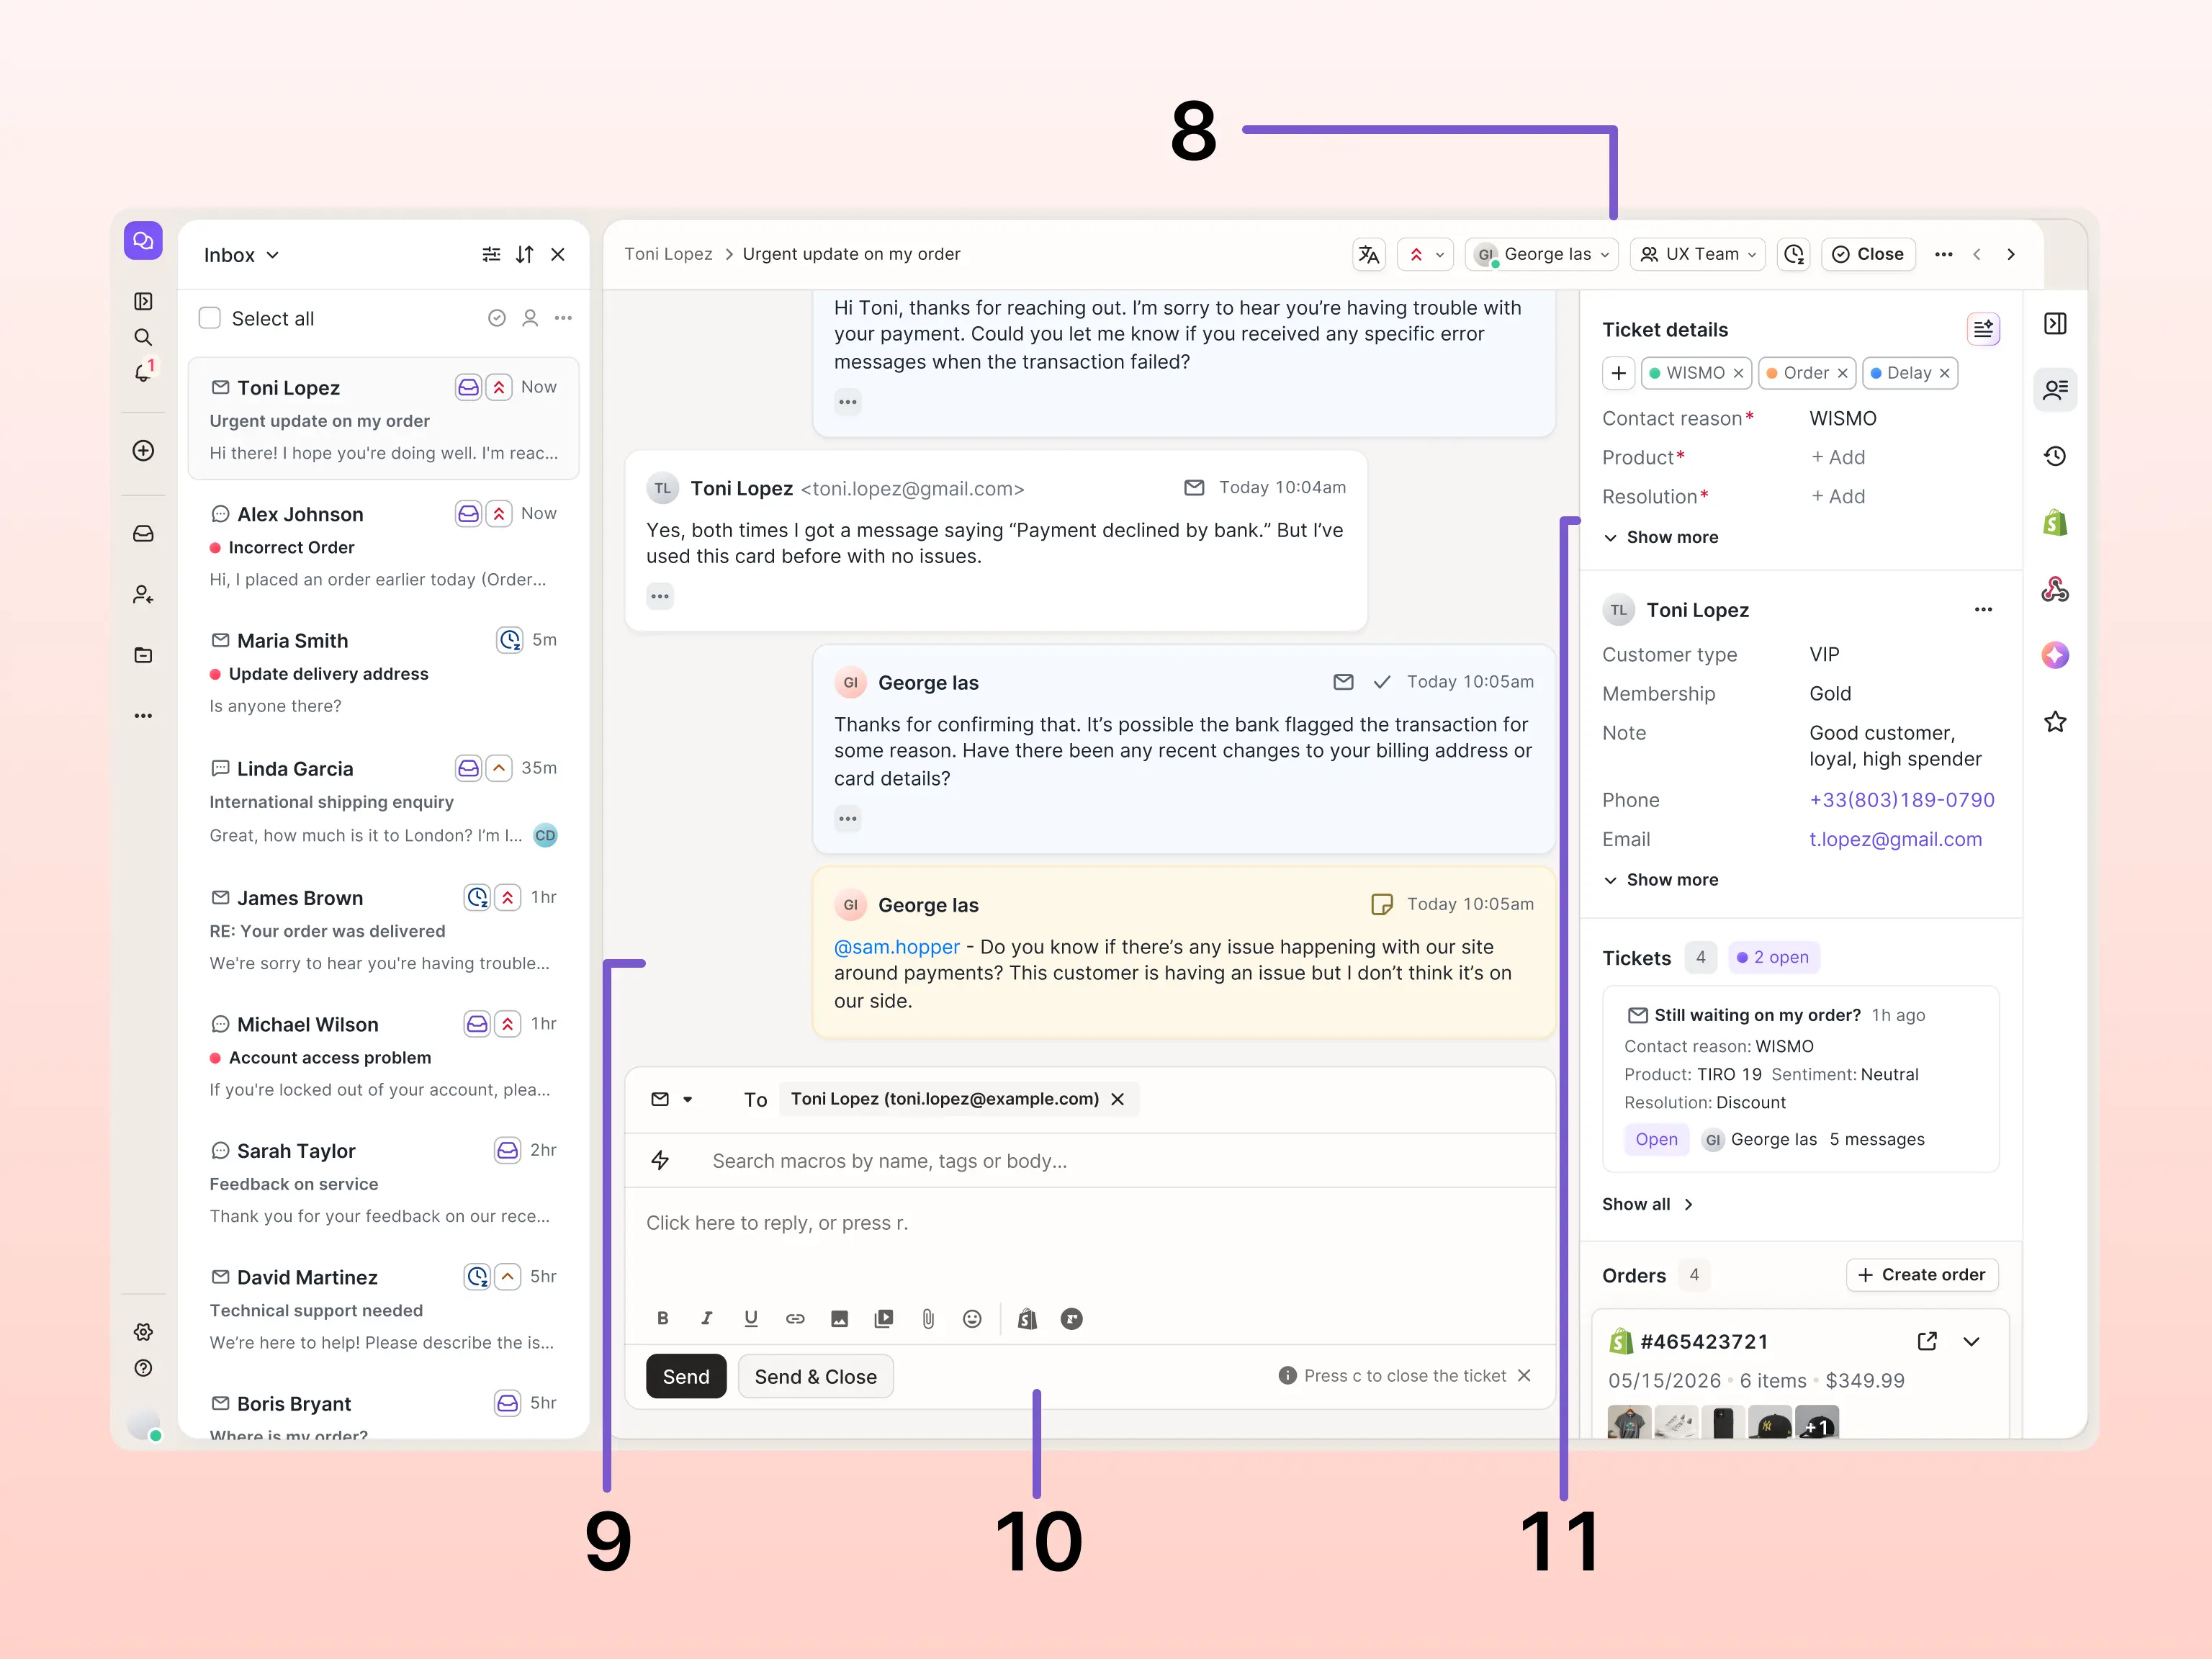
8. Ticket header
The ticket header is where you can take key actions on your ticket, like updating the ticket’s status to open, closed, or snoozed, setting the priority to low, normal, high, or critical, and assigning the ticket to an agent or team.9. Ticket conversation
Below the ticket header, the conversation thread shows the full message history between your team and the customer in chronological order; as well as ticket events like status changes, assignee updates, or rule automations that ran on the ticket. Your teammates can also leave internal notes, which will appear in the conversation thread on a yellow background.Before replying to a customer, reading through the full ticket conversation can help you understand the full context of the issue you’re working to resolve. If it’s a particularly long conversation, the option to summarize the ticket will appear in the top-right corner of the ticket details.
10. Message composer
Use the message composer at the bottom of the page when you’re ready to reply to your customer. From the message composer, you can send a reply to the customer, leave an internal note for your team, or apply a macro.11. Ticket sidebar
The ticket sidebar appears on the right-hand side of every ticket, and updates dynamically for every ticket. In the ticket sidebar, click through the icons on the right-hand side to find details relevant to resolving the customer’s inquiry, including:- Ticket and customer details
Shows details related to the ticket such as tags and ticket fields; and key details from the customer's profile, like their name, email, and customer fields. Depending on your team’s ticket handling workflows, you might need to add tags or fill out fields before solving a ticket. - Customer timeline
Shows a chronological history of every conversation this customer has had with your team. Check the timeline before responding to a repeat contact to find out whether they've raised this issue before and how your team handled it. - Widgets and integrations
If your helpdesk is connected to third party platforms, we’ll surface relevant data from those tools in widgets in the sidebar. For example, if your ecommerce store is hosted on Shopify, you can view recent order details from Shopify without navigating away from the ticket. Click the icon for the relevant tool in the ticket sidebar to display its data alongside your ticket.
Analytics
Gorgias measures your key performance metrics so that you can analyze your helpdesk trends from Analytics. Here, you’ll find dashboards, reports, and metrics that give you visibility into how your team is performing, and surface insights that can improve your customers’ experience. If you click a report and see an upgrade prompt or a restricted access message, check with your admin about whether your account has access — some reports are restricted to lead agents and admins, and others require add-on products like Voice or AI Agent.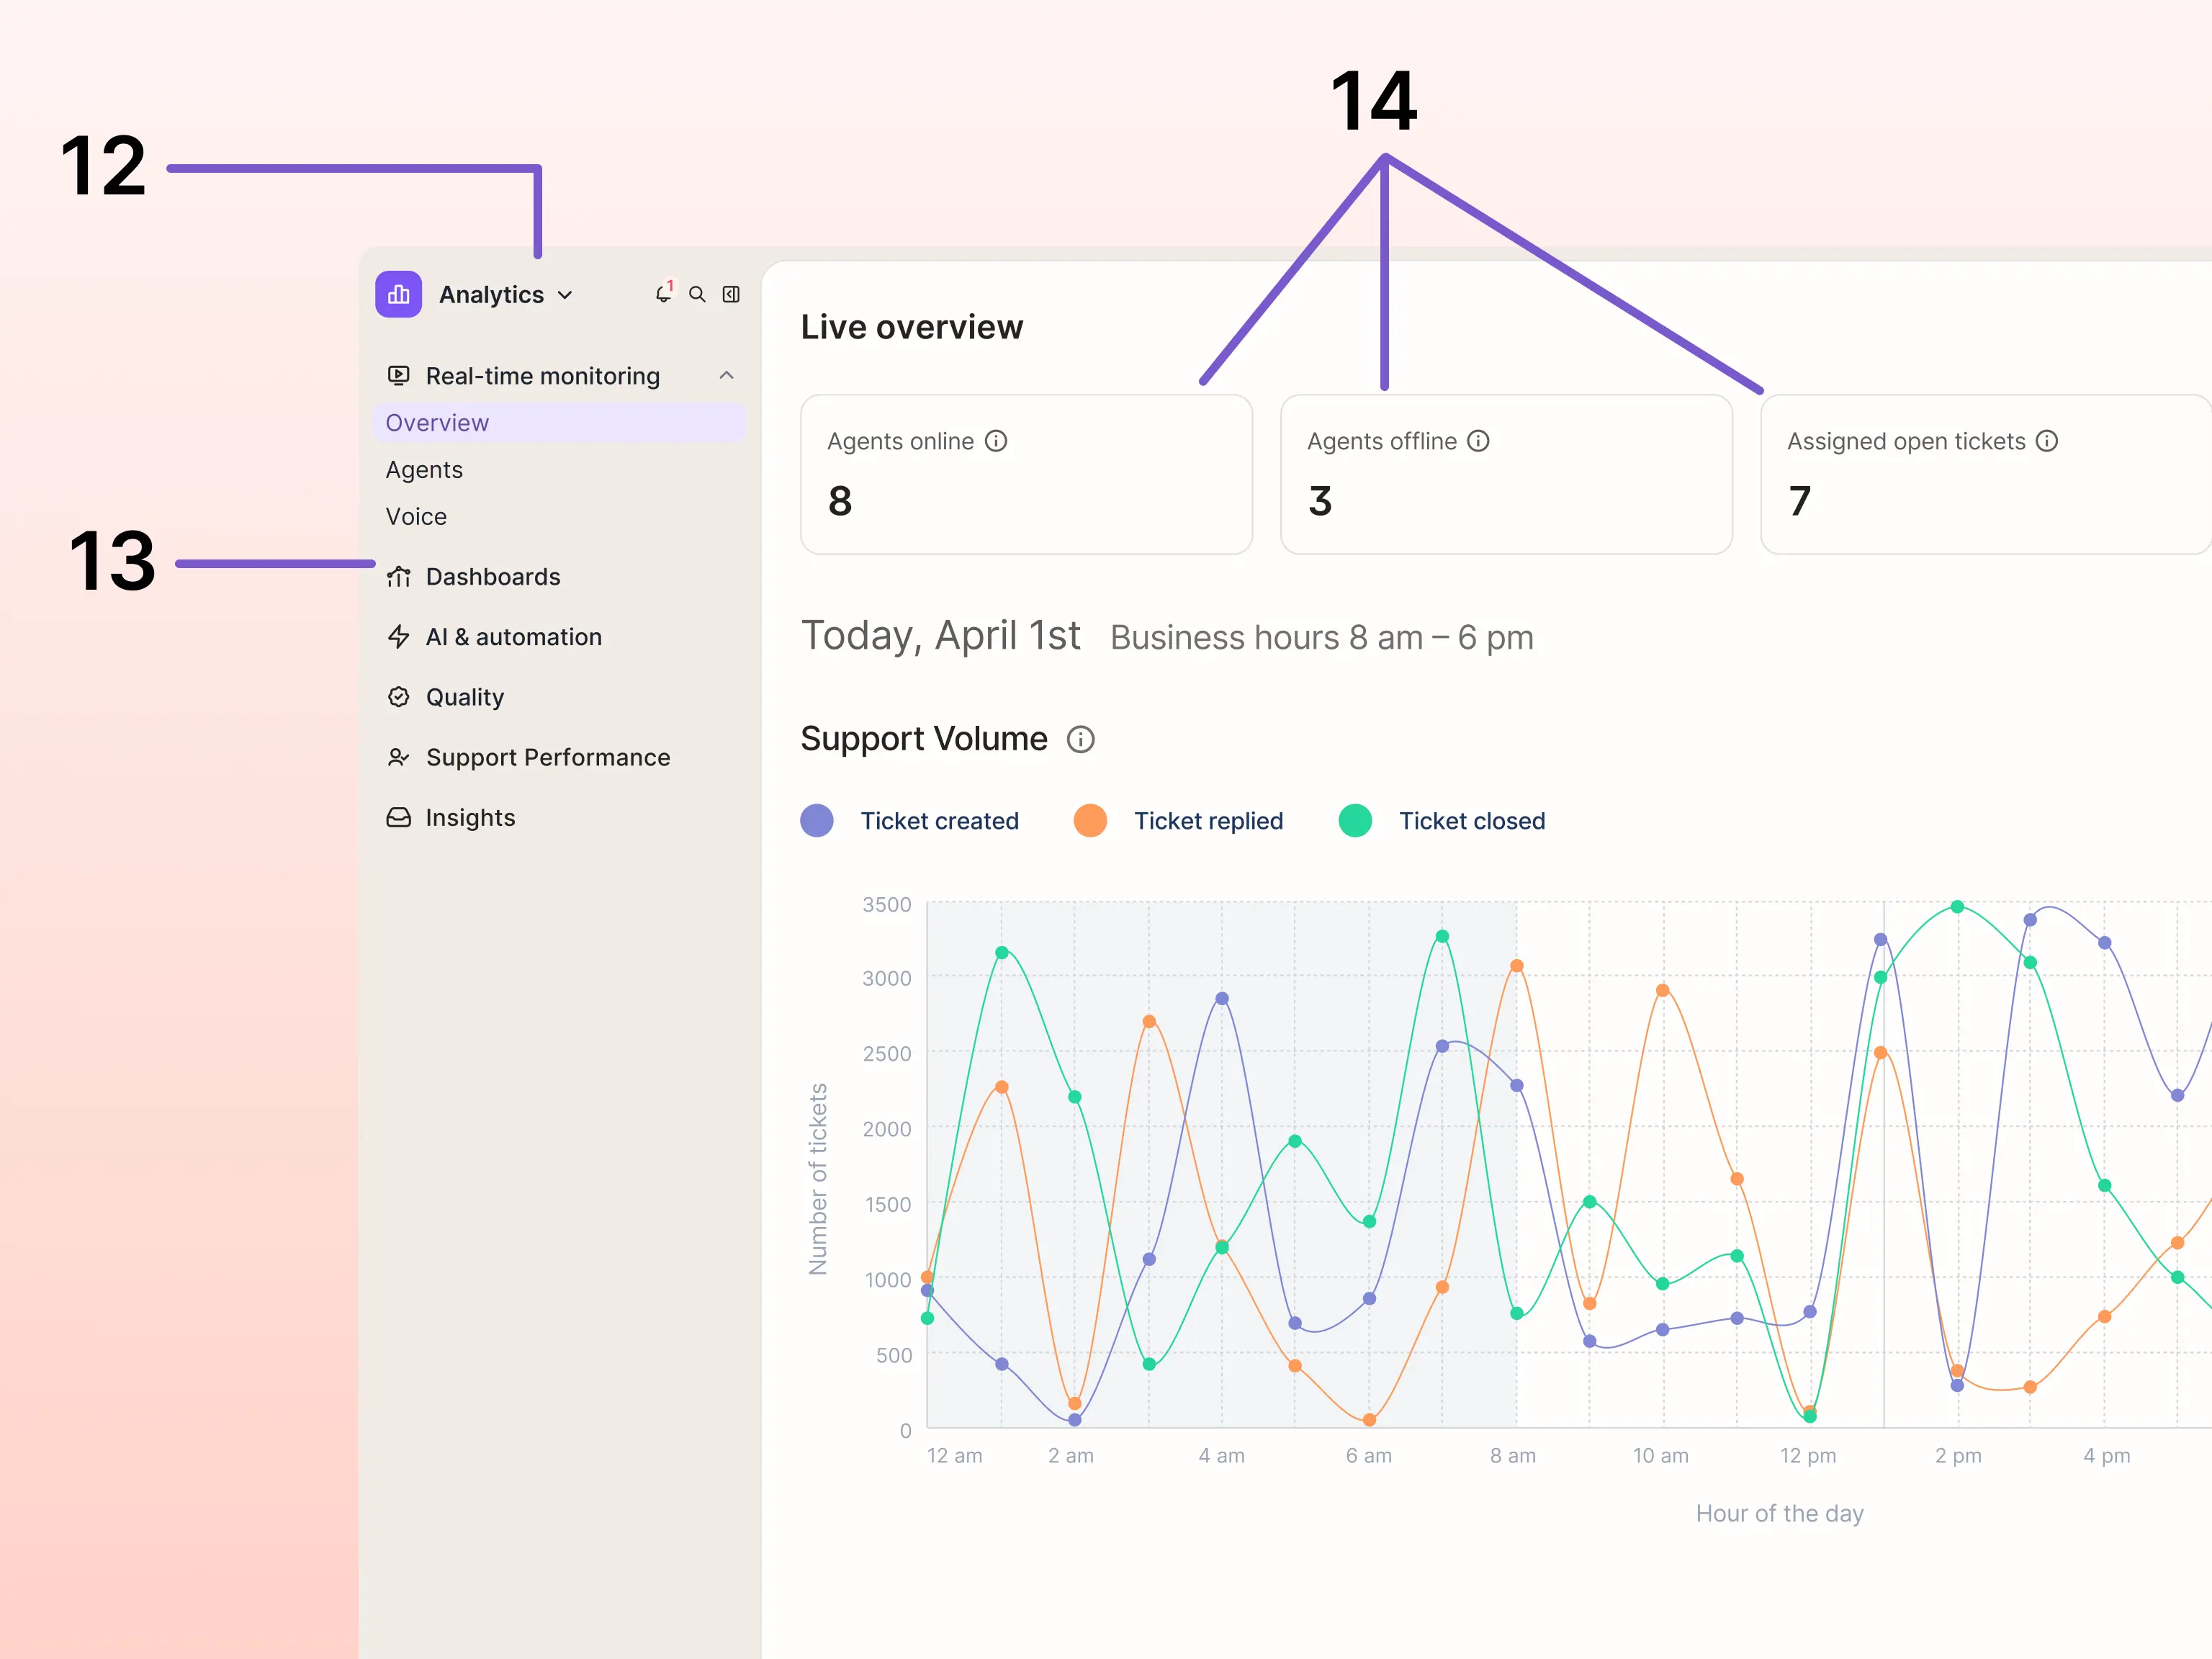
12. Reports
Gorgias analytics are broken down into categories that each contain their own series of reports with relevant metrics. Select a category from the menu to expand the available reports, then select a report to review the metrics. You can filter or download the data in each report to zero-in on specific details.13. Dashboards
To review multiple metrics from separate reports in the same place, you can build a dashboard. Dashboards can be customized to display the particular metrics that are relevant to your support workflows, and just like reports, you can filter or download the data for further analysis.14. Metrics
Metrics are the values displayed in each report. Each metric has a unique definition, calculation, and could be presented as either a volume, median, average, or percentage.Workflows
Your helpdesk comes with a variety of features designed to improve your support processes that you can access from Workflows. Some features can only be set up by admins or lead agents, so if you’re looking to set up a feature but don’t see it in Workflows, reach out to your admin to confirm you have access. The features in Workflows are divided into two categories: Tools, and Fields and tags.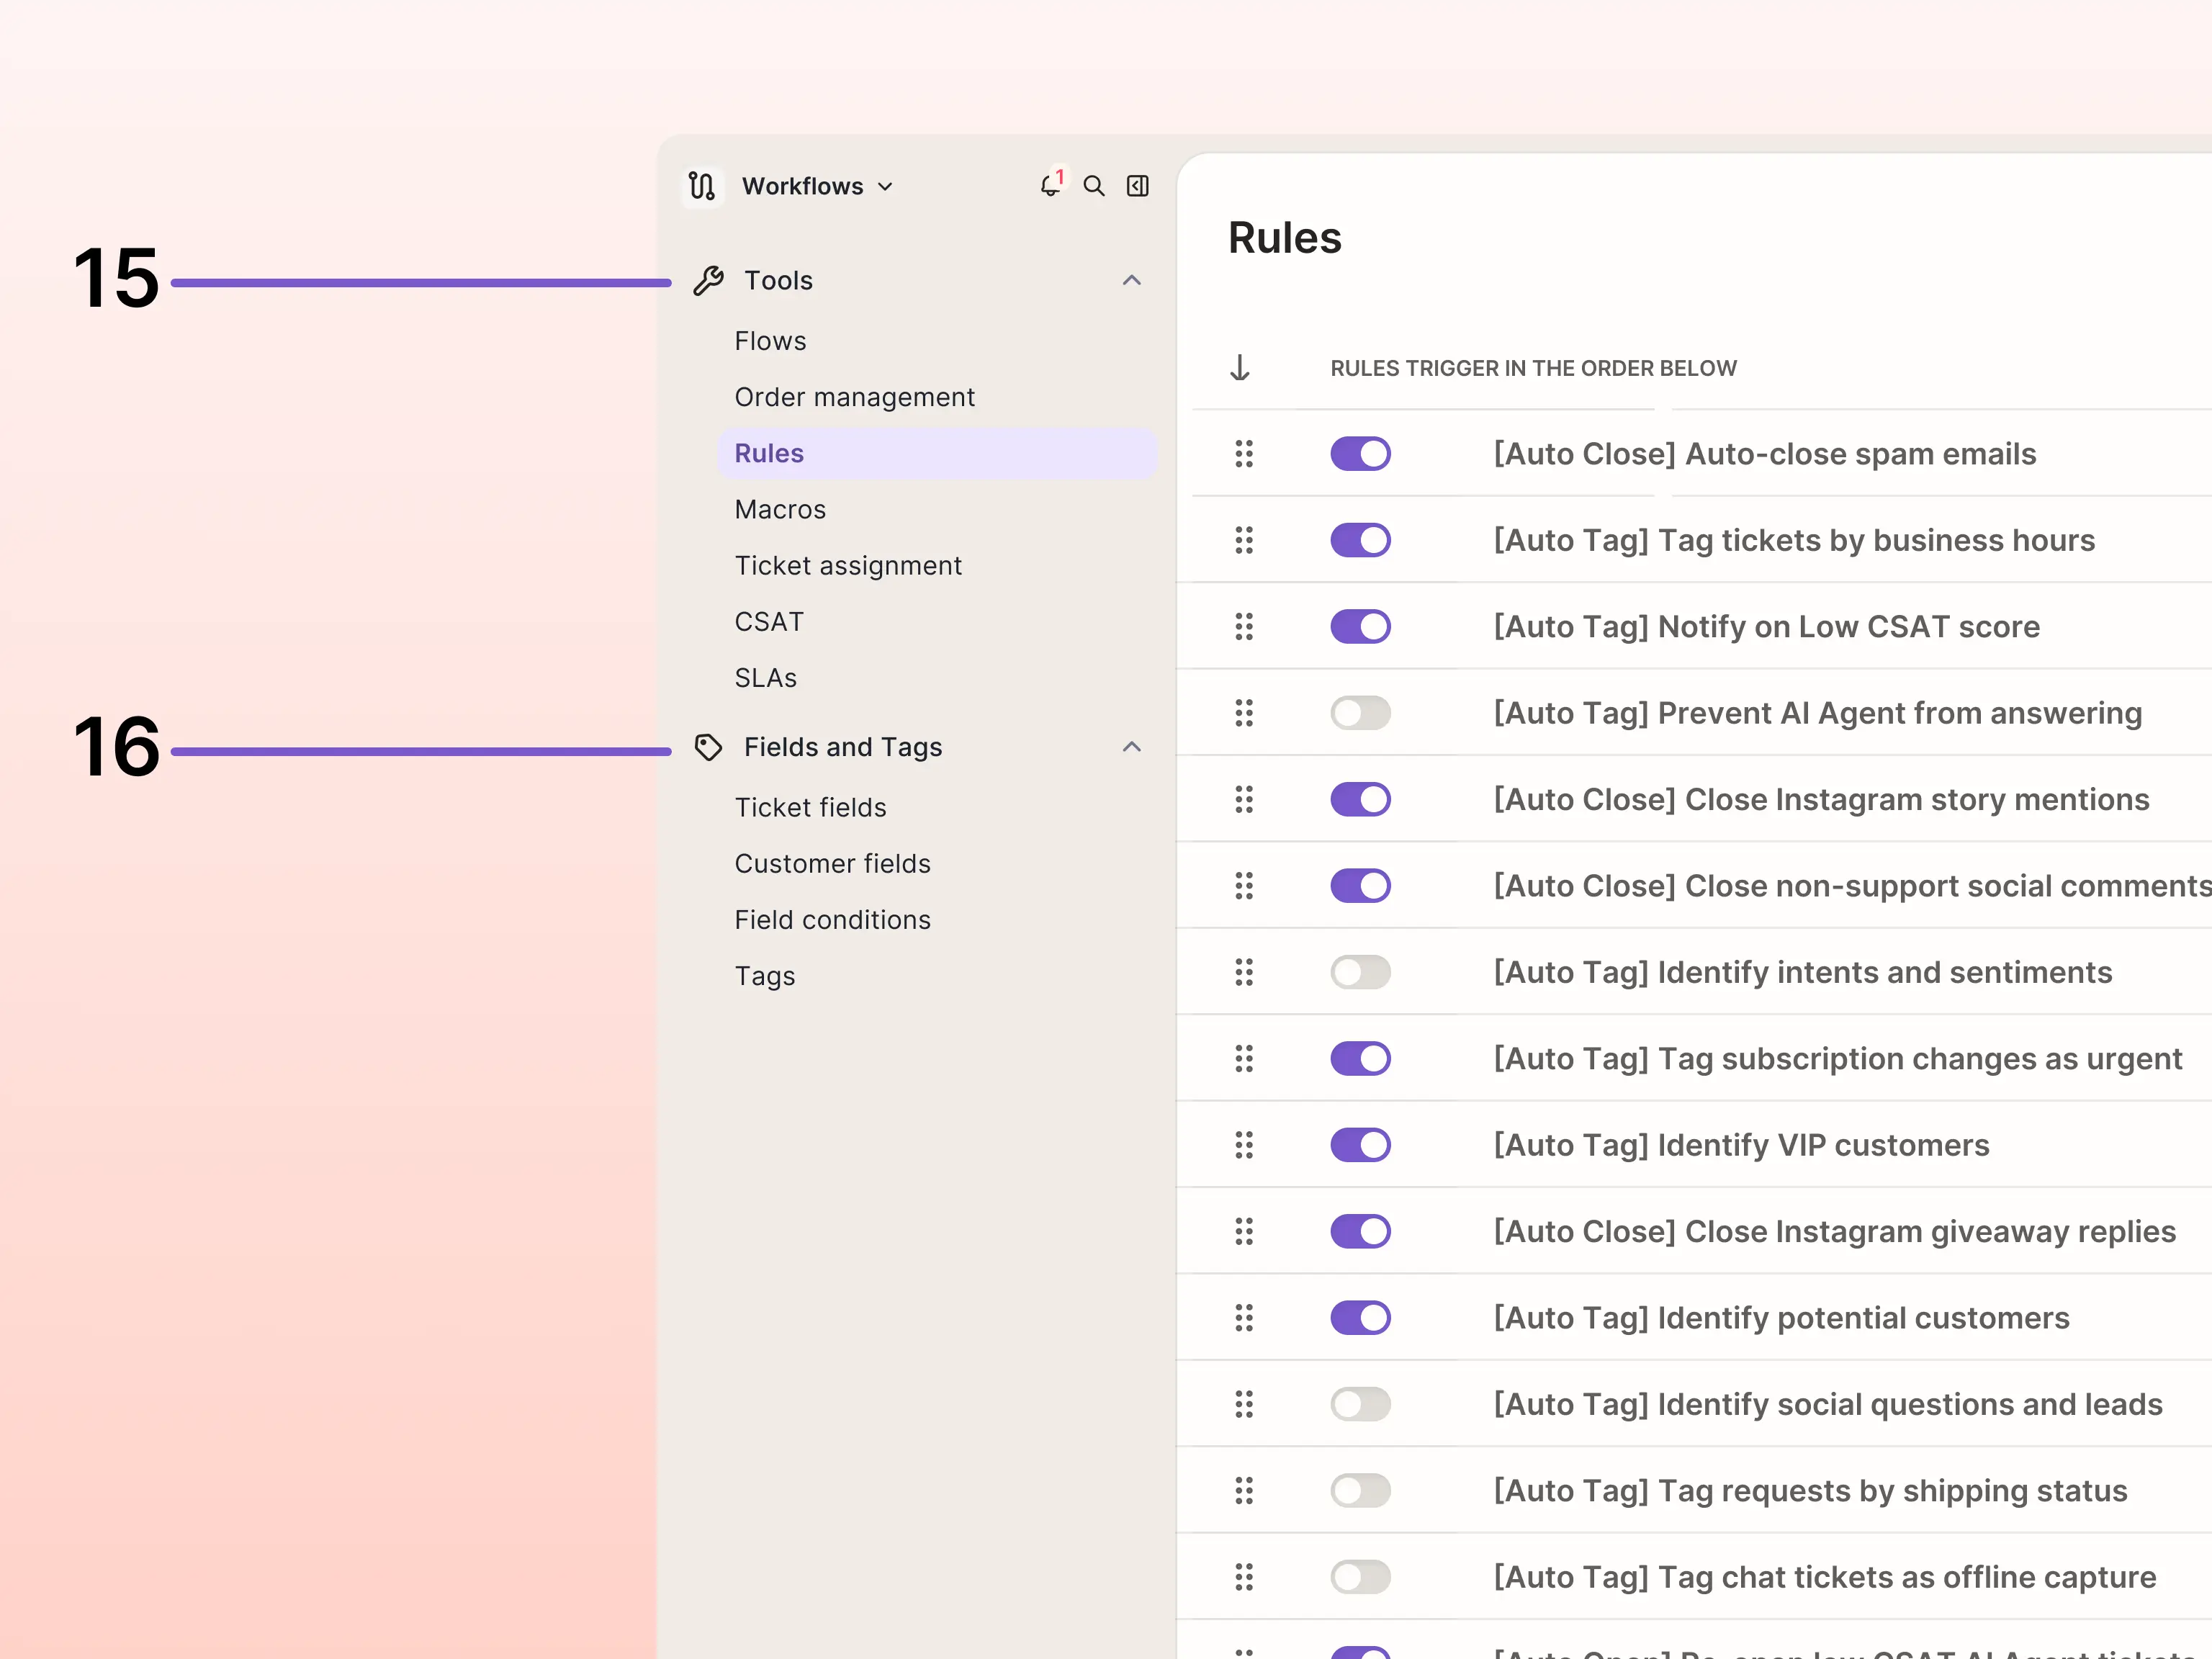
15. Tools
If you have the correct permissions, you can set up and manage tools like rules, macros, ticket assignmentand auto-merge to automate ticket actions, and configure customer satisfaction benchmarking with CSAT and SLAs.16. Fields and tags
You can use fields and tags on your customers and tickets to organize your helpdesk, and power certain automations. Create ticket fields and customer fields to collect consistent data for your tickets and customers, or use tags to create lightweight ticket categorization.Customers
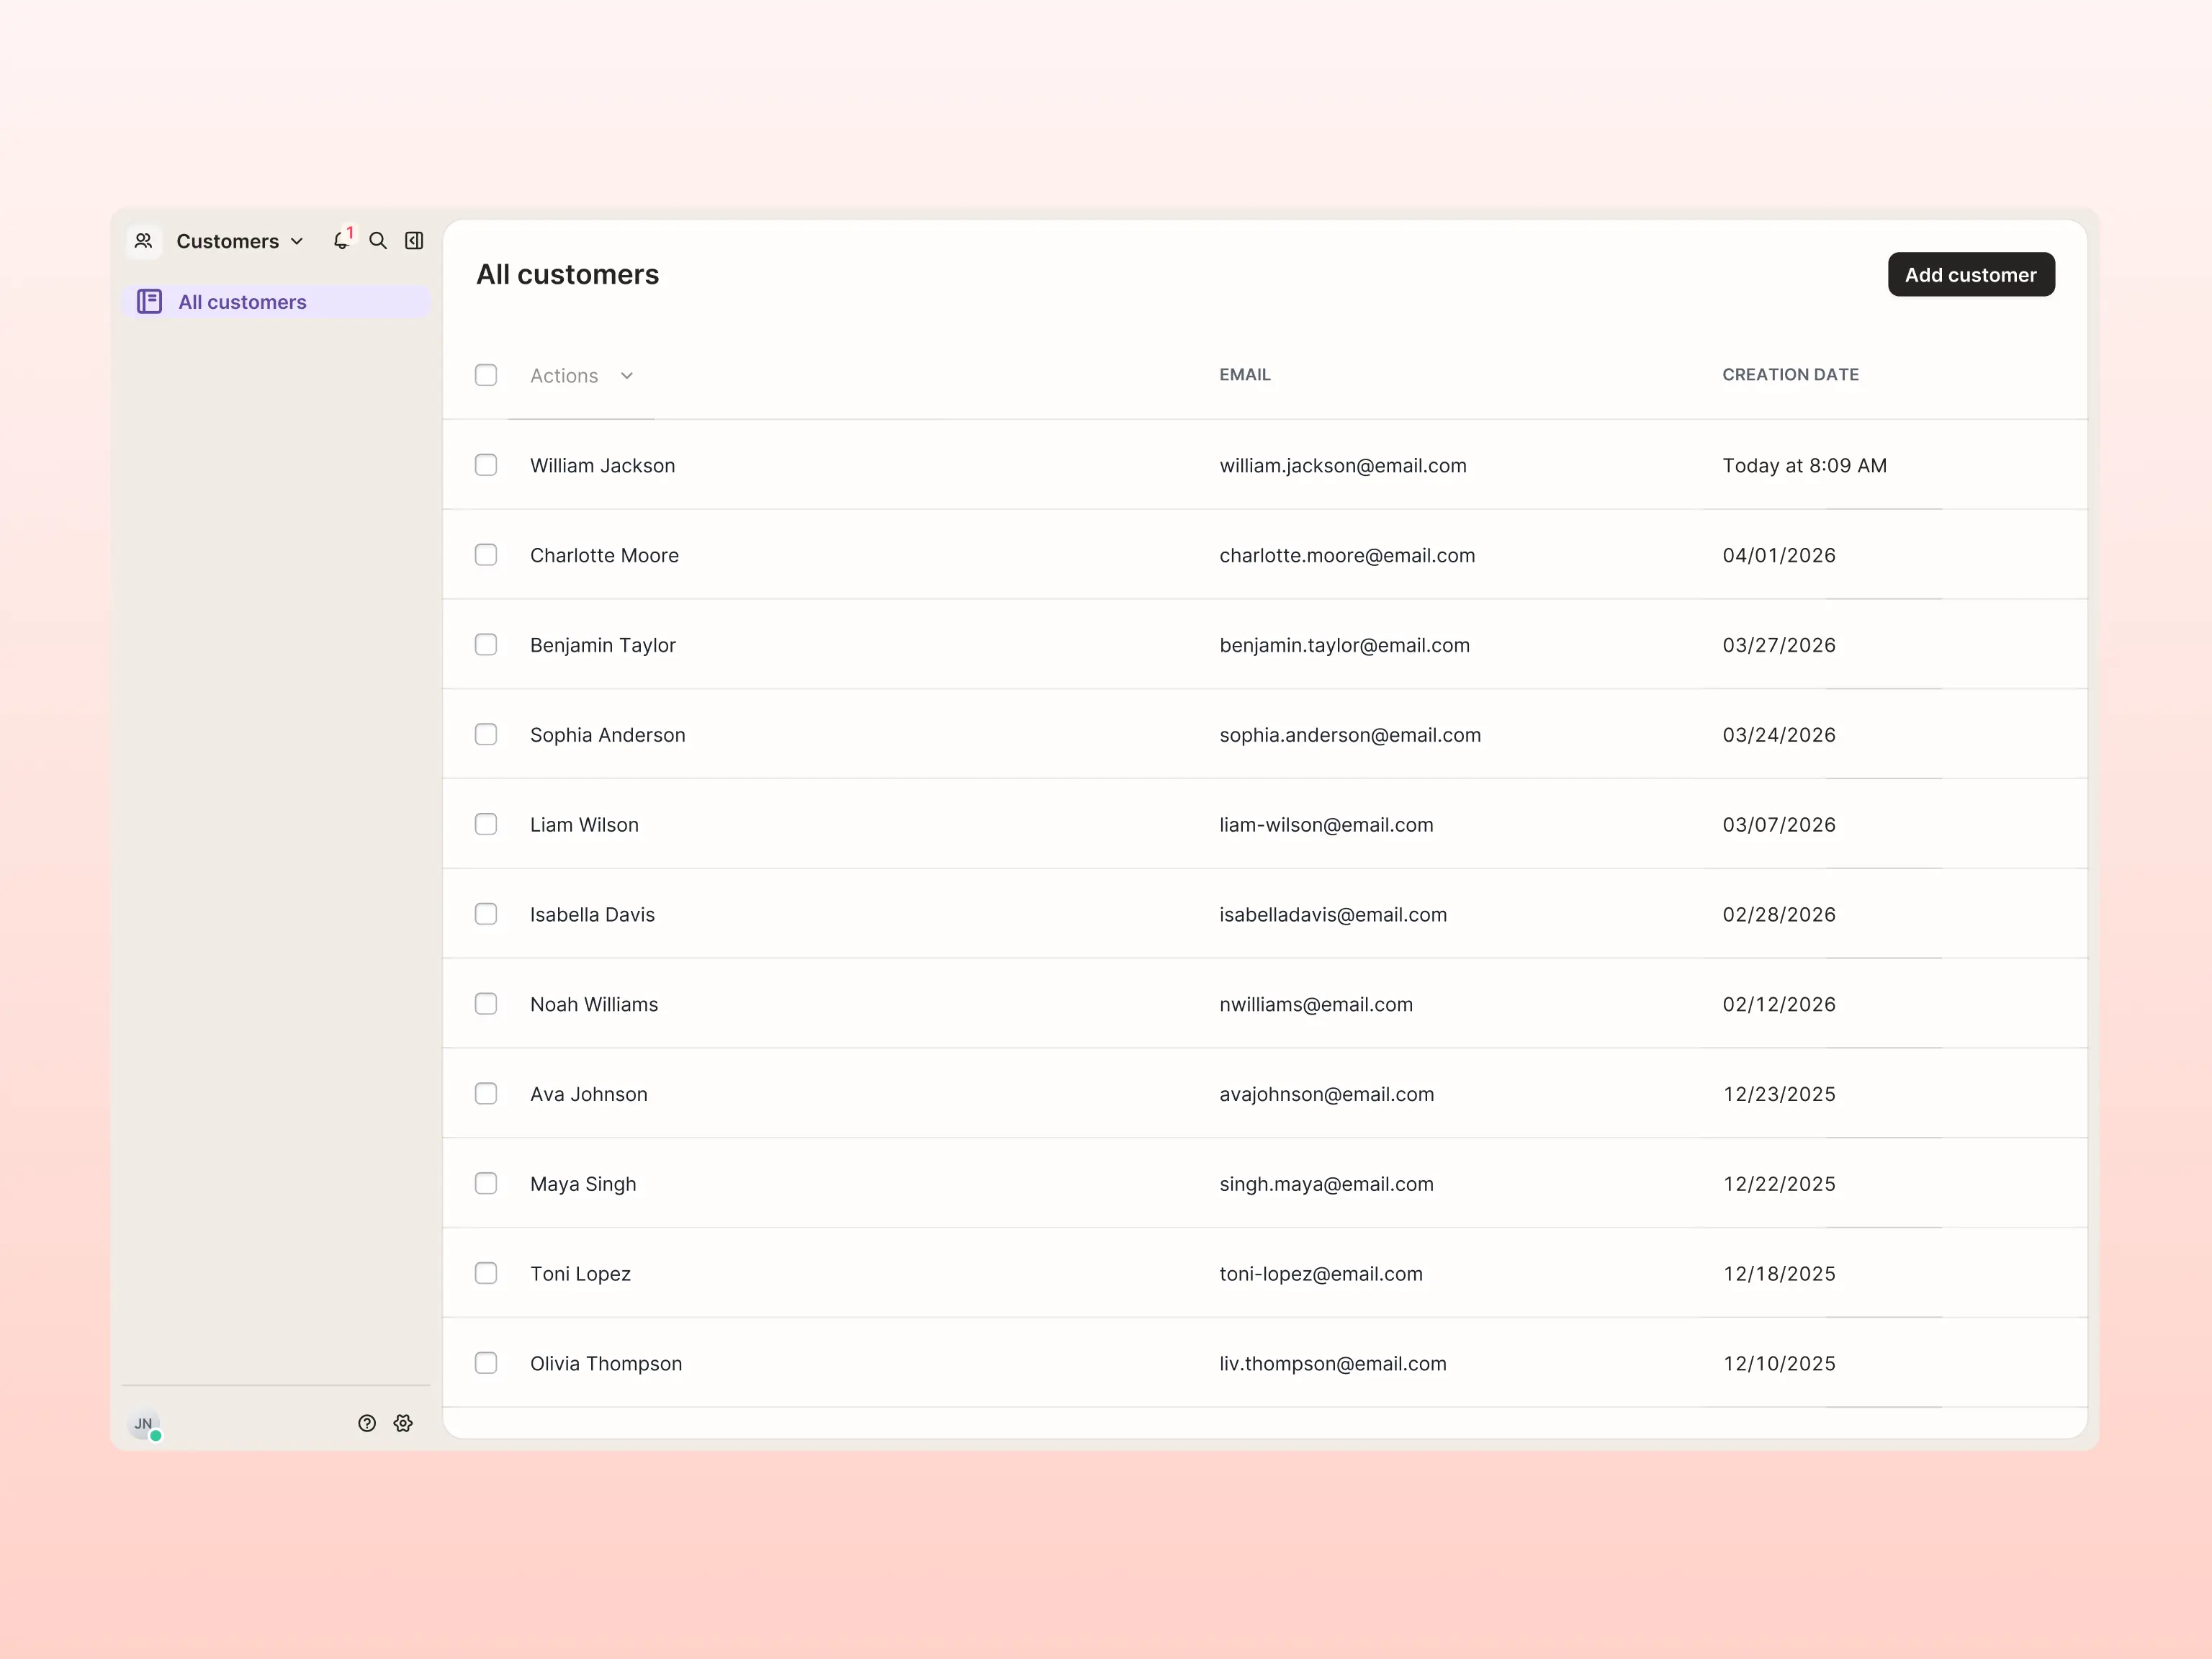
The Customers page is a searchable directory of everyone who has ever contacted your team through a Gorgias connected channel, like email, chat, or social media. If you have an ecommerce store connected to Gorgias, you can also browse customers who have placed orders from your store, even if they haven’t made a support request. Select any customer from the directory to review their profile and a timeline of their support requests and order history.
