Add an email capture form to your Convert campaignUpdated 6 months ago
You can use an email capture form directly within your Convert campaigns to collect shoppers’ email addresses.
Capturing email addresses helps to grow your customer contact list. You can then use your email marketing tool to re-engage shoppers through newsletters, special announcements and promotions.
When a shopper submits their email address, we’ll capture their information for you in Shopify and create a new customer profile (if they don’t already have one).
Requirements
- You must have an active Convert subscription
- You must have Admin permissions to create new Convert campaigns
Add a form to your campaign
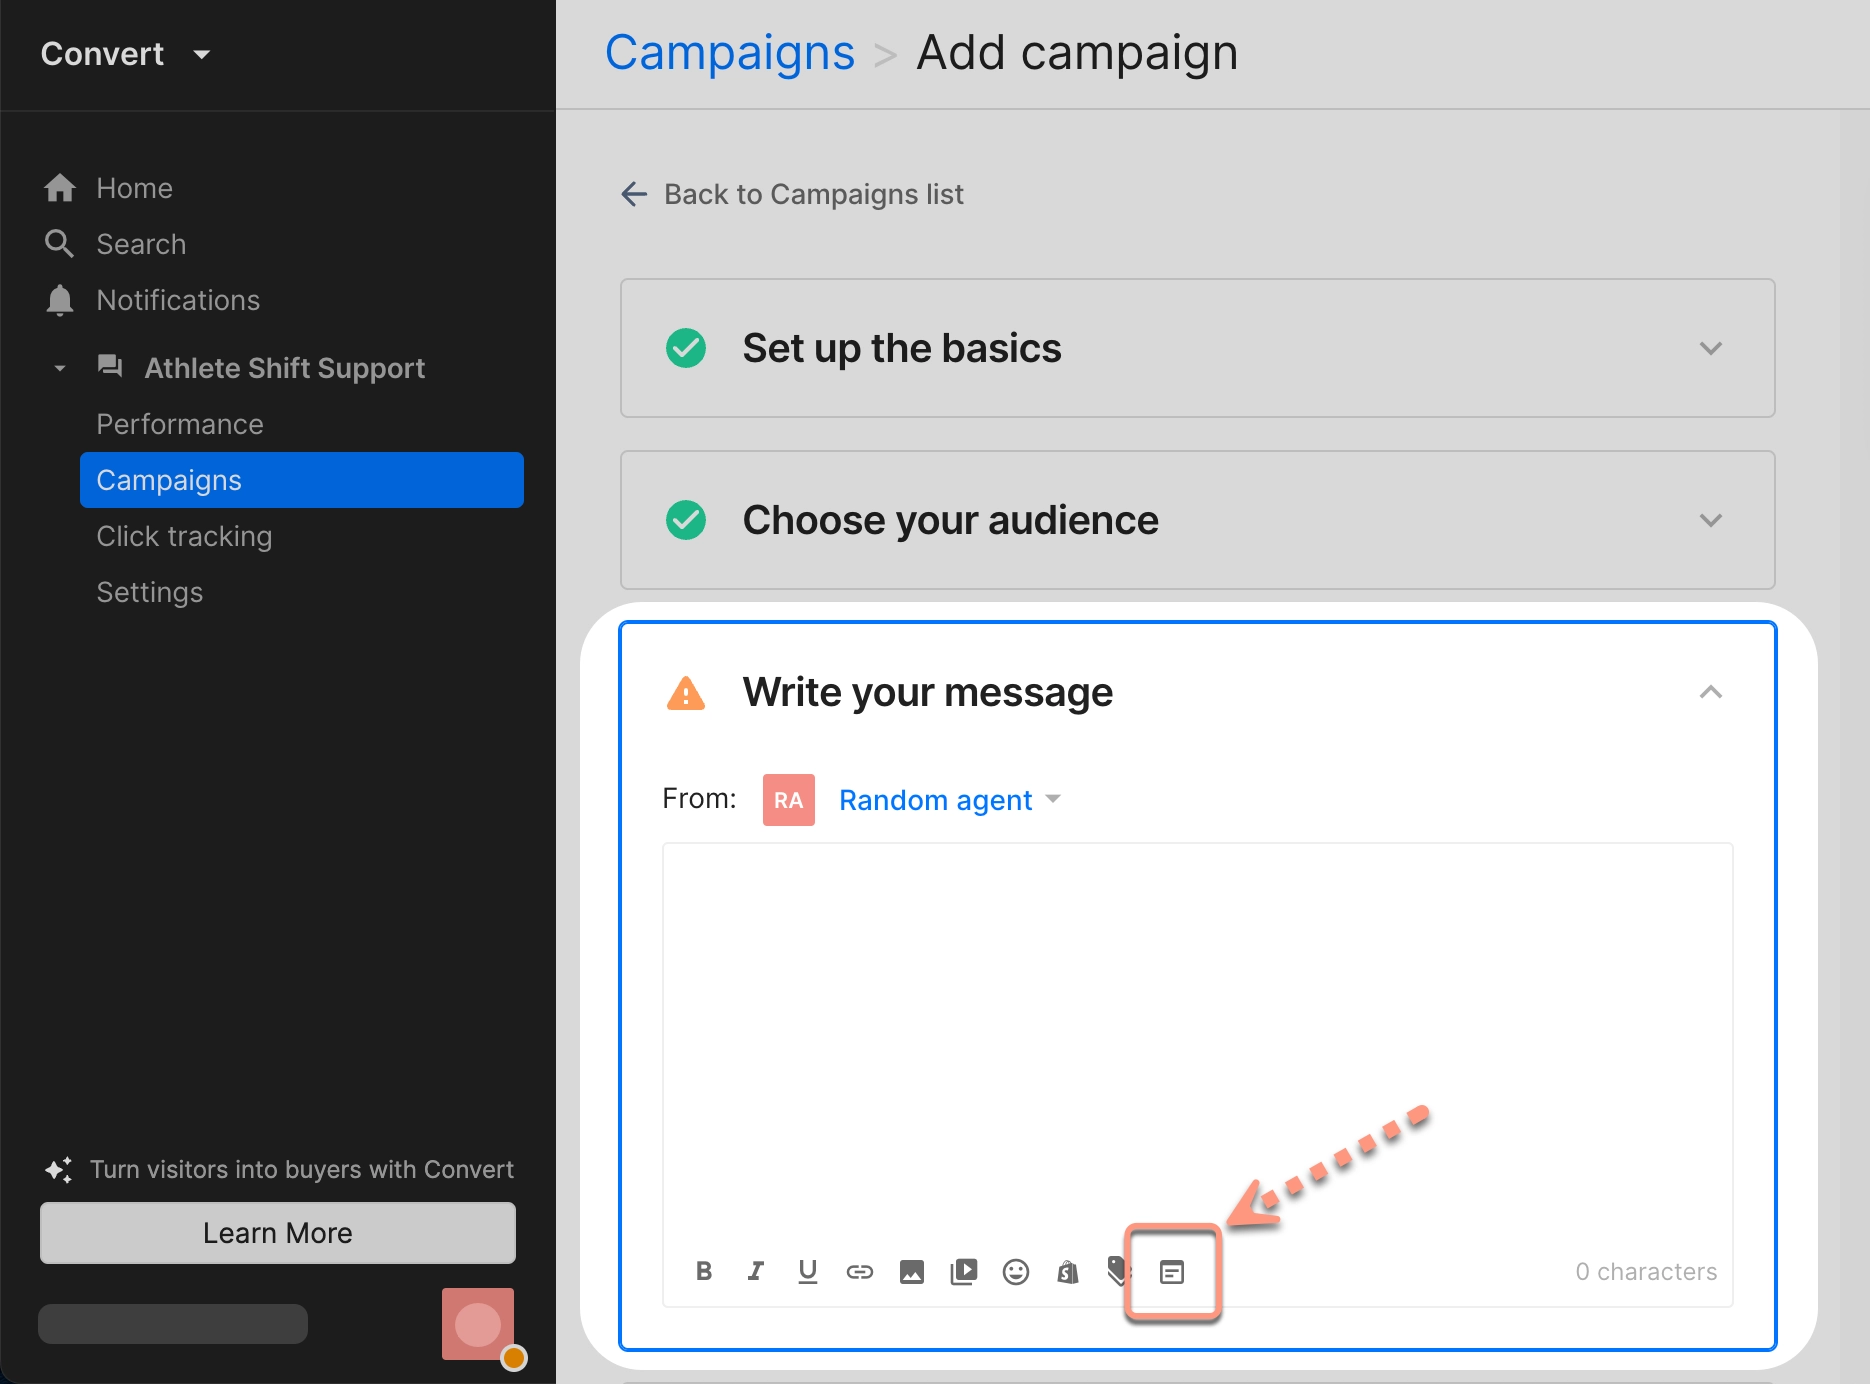
When you create a Convert campaign, use the Insert Email Capture Form option to add a form directly in your campaign. The form appears in the Chat widget alongside your campaign message.
- Go to Convert → Campaigns to create a new campaign
- Open the Write your message section
- Select Insert Email Capture Form from the toolbar
Collecting your shoppers’ contact info
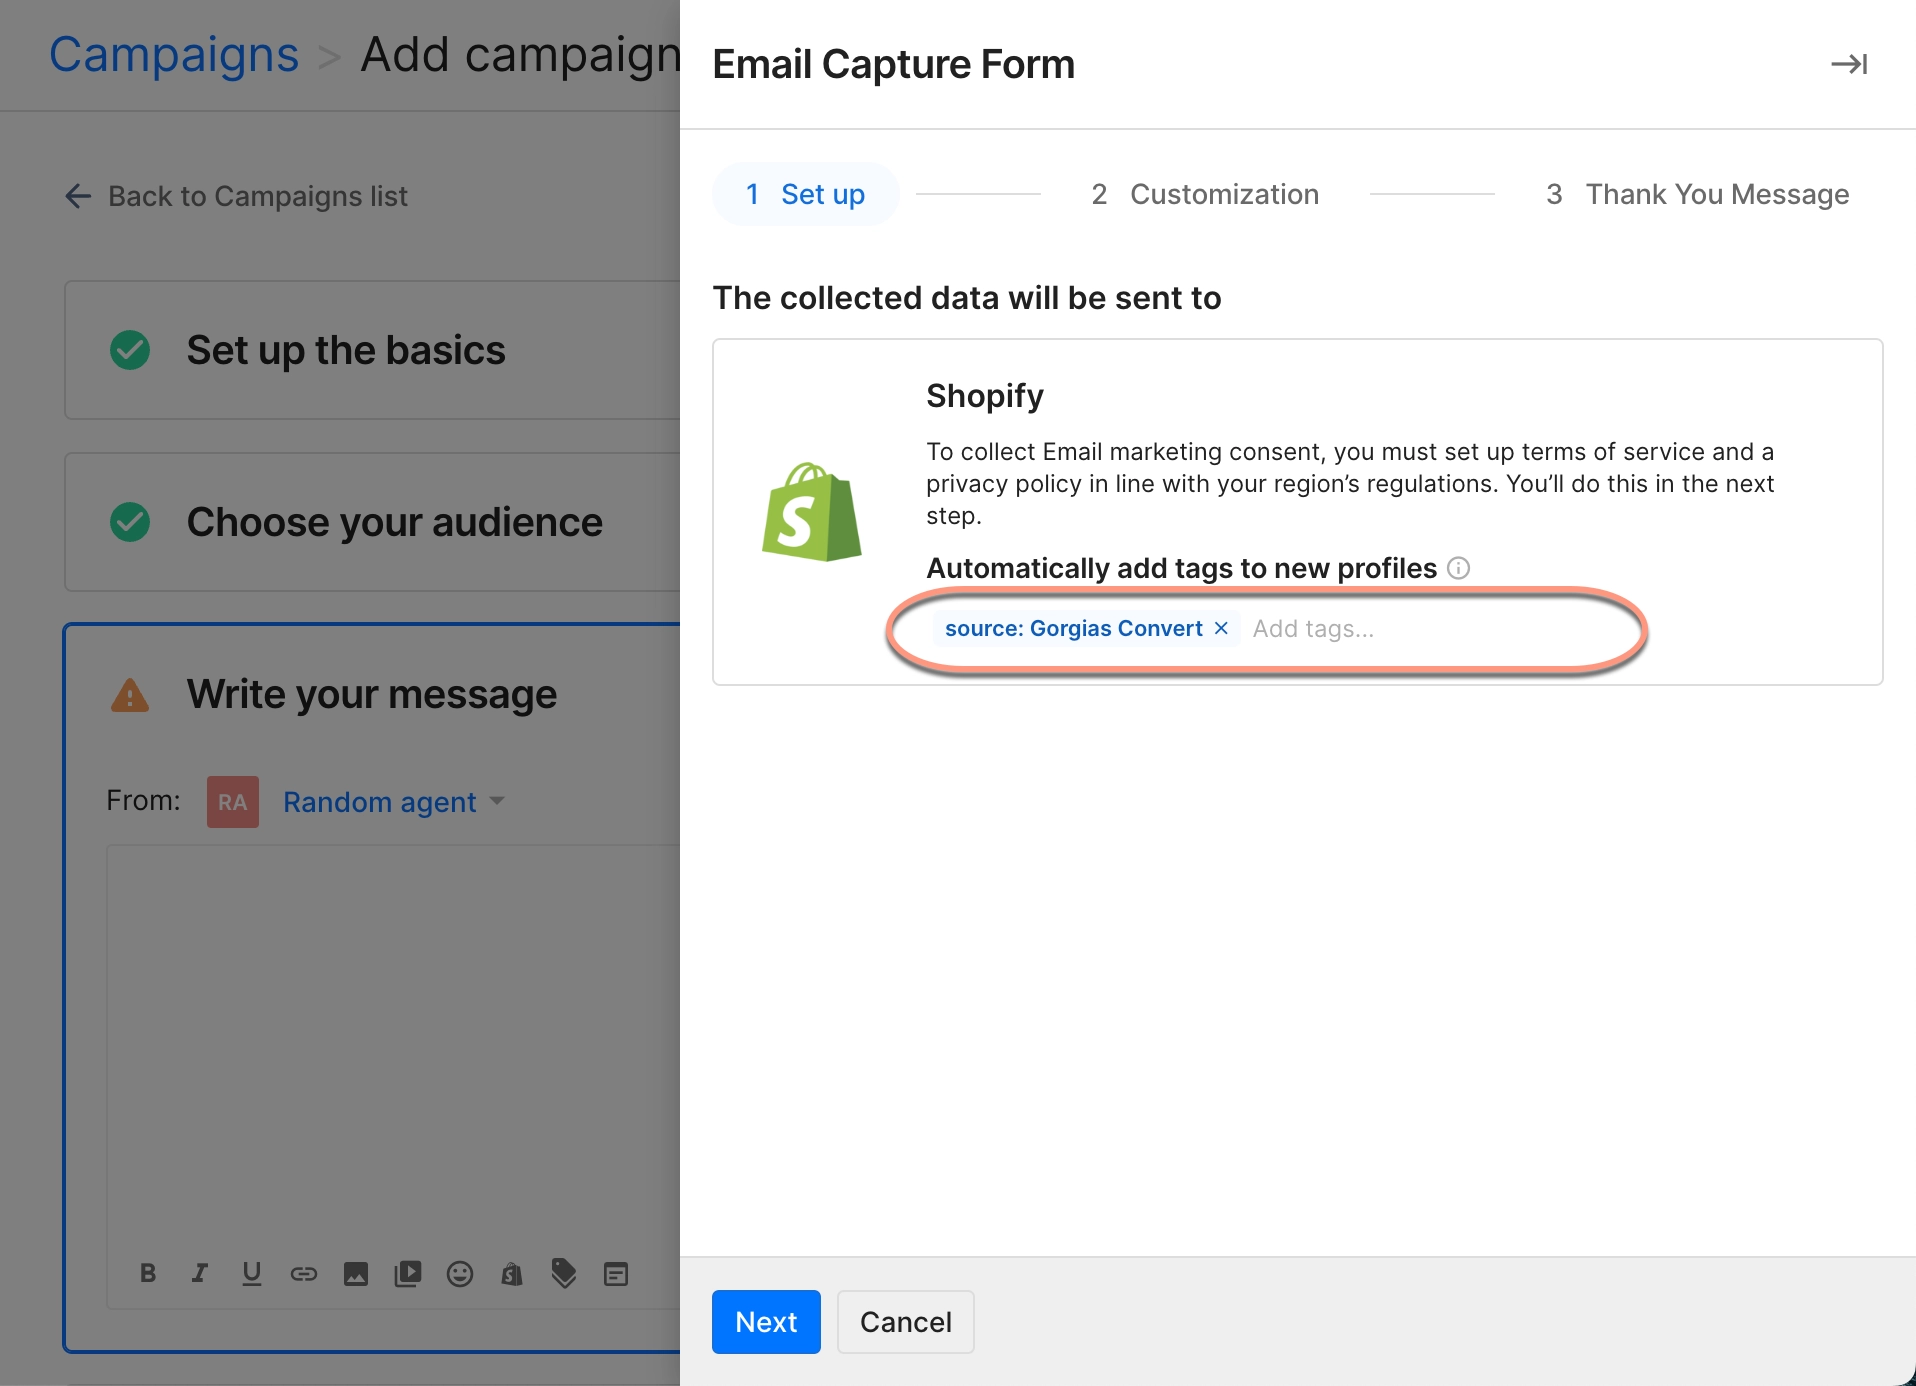
When you set up a new form, you can decide where you want to collect the information that shoppers submit. At the moment, you can only select and use Shopify to collect contact information from shoppers in your campaigns.
- Choose where you want to collect shoppers’ contact information
- Currently, you can only use Shopify
- Optionally, select Add tags to automatically add Shopify tags to new customer profiles that are created from your form
- The default tag
Source: Gorgias Convertallows you to attribute new contacts to Gorgias Convert - You might also add tags to identify the specific campaign you acquired a new contact from, for example
Gorgias: email sign up Campaign
- The default tag
- Select Next to continue setup
Customizing your form
You can customize your form by changing the placeholder text on the form field and submission button.
Optionally, we recommend that you also add a privacy policy disclaimer to your form in order to get your customers’ consent to collect and use their email addresses. You can set up a privacy disclaimer in your Convert settings.
- Customize the text on your form
- For example, if you’re collecting shoppers’ emails, enter “Email” to the form field
- Your button might say “Submit” or “Subscribe”
- Select Next to continue setup
Adding a thank you message
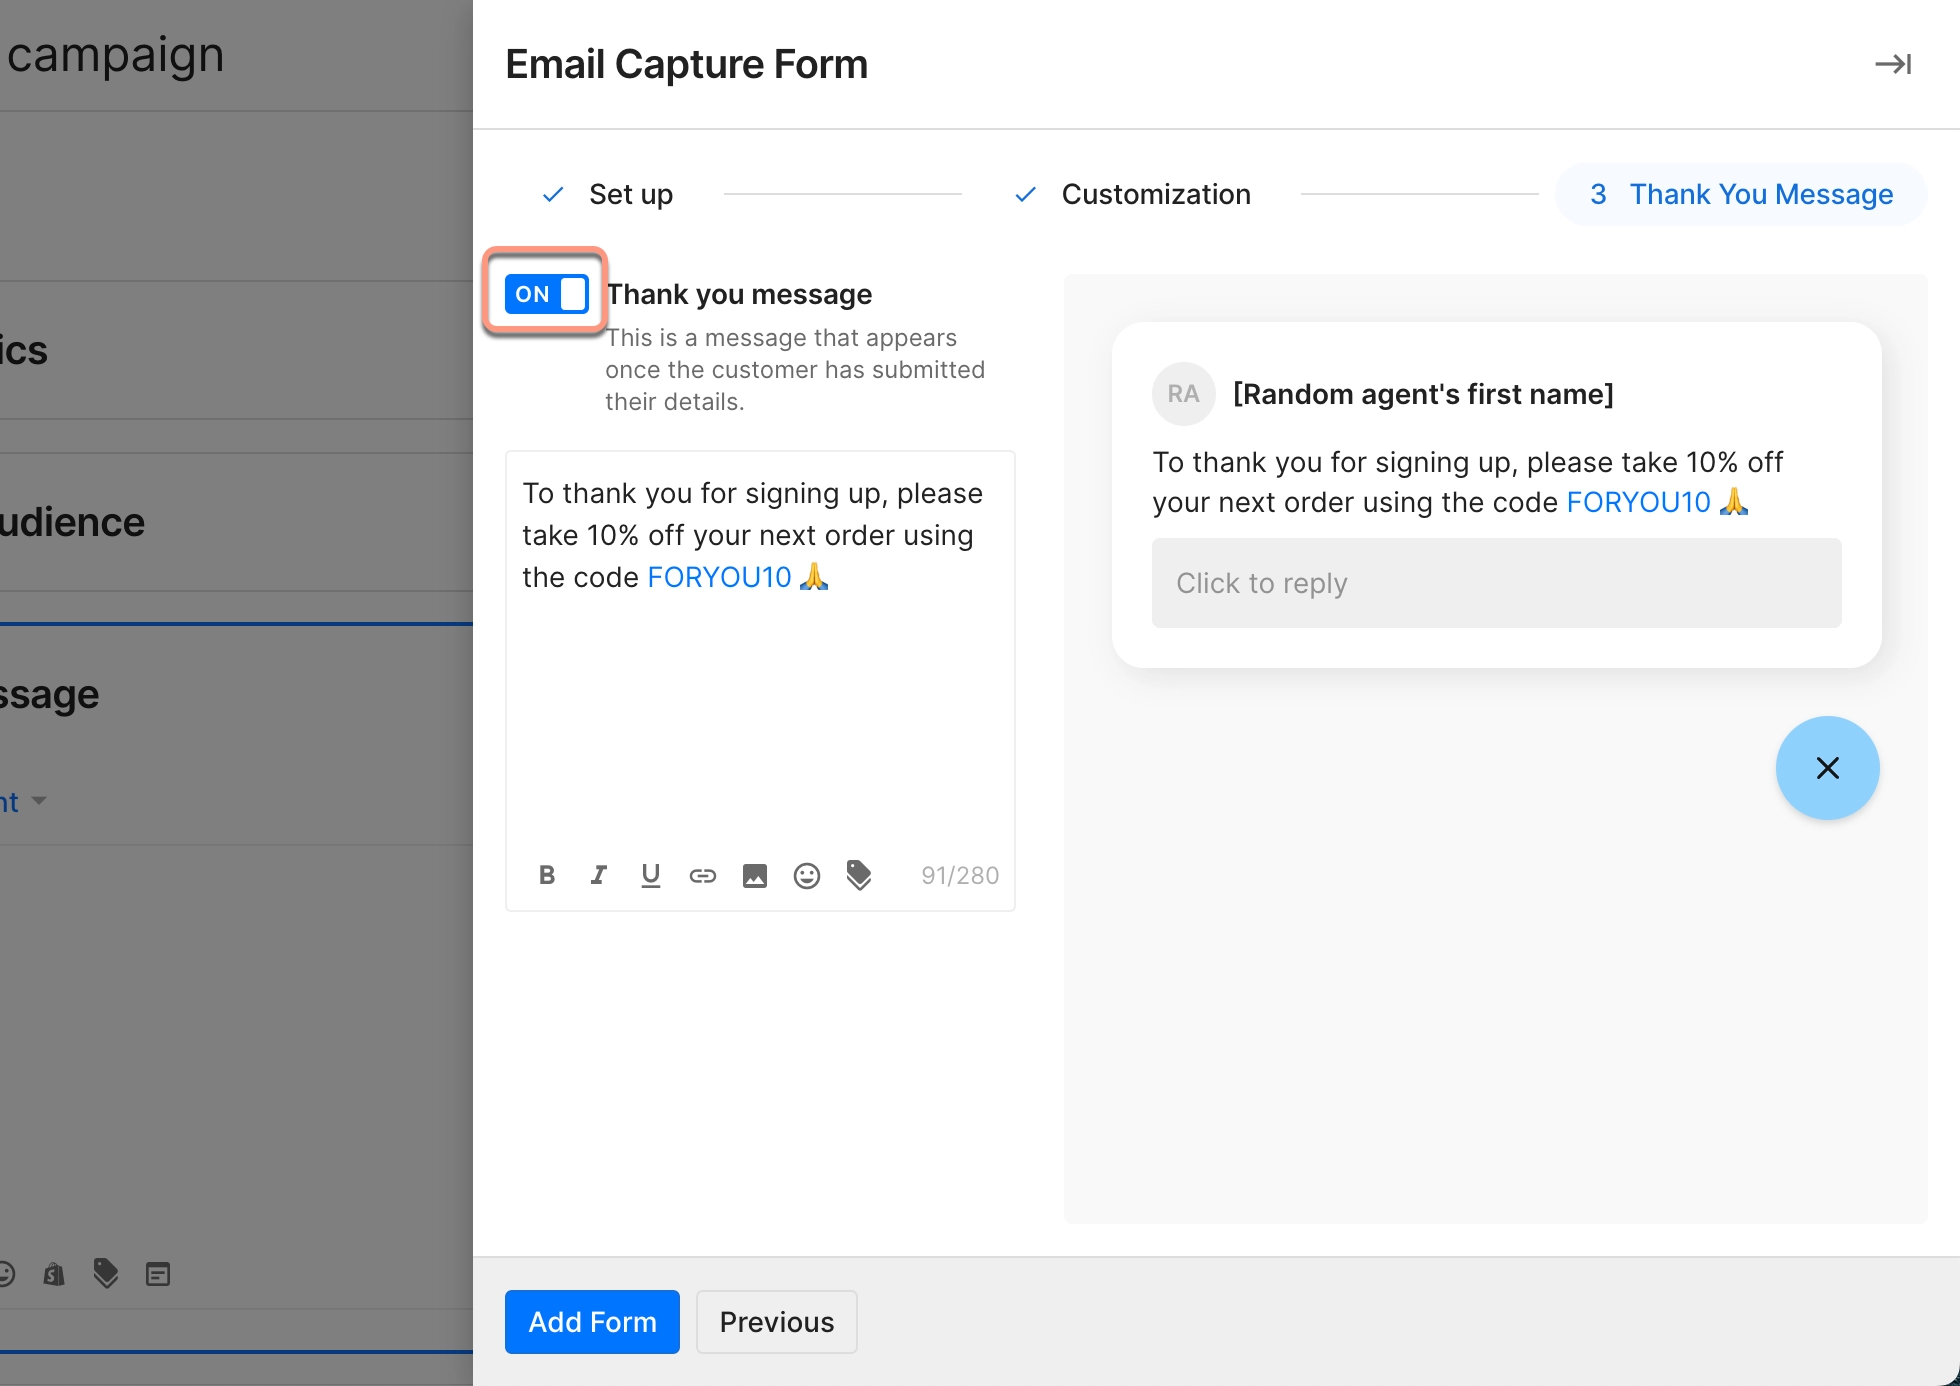
Your thank you message appears after a shopper submits their contact information. You can keep your thank you message simple, or use it as an opportunity to give shoppers a discount code in exchange for providing their email address.
- To write a custom message, switch the Thank you message toggle to ON
- Enter your thank you message in the text box
- Format your message. Use the toolbar in the editor to:
- Add links (learn how to set up your own short-link domain and track clicks)
- Add an image
- Insert emojis
- Insert Shopify discount codes
- Select Add Form to finish
Setting up a privacy policy disclaimer for your store
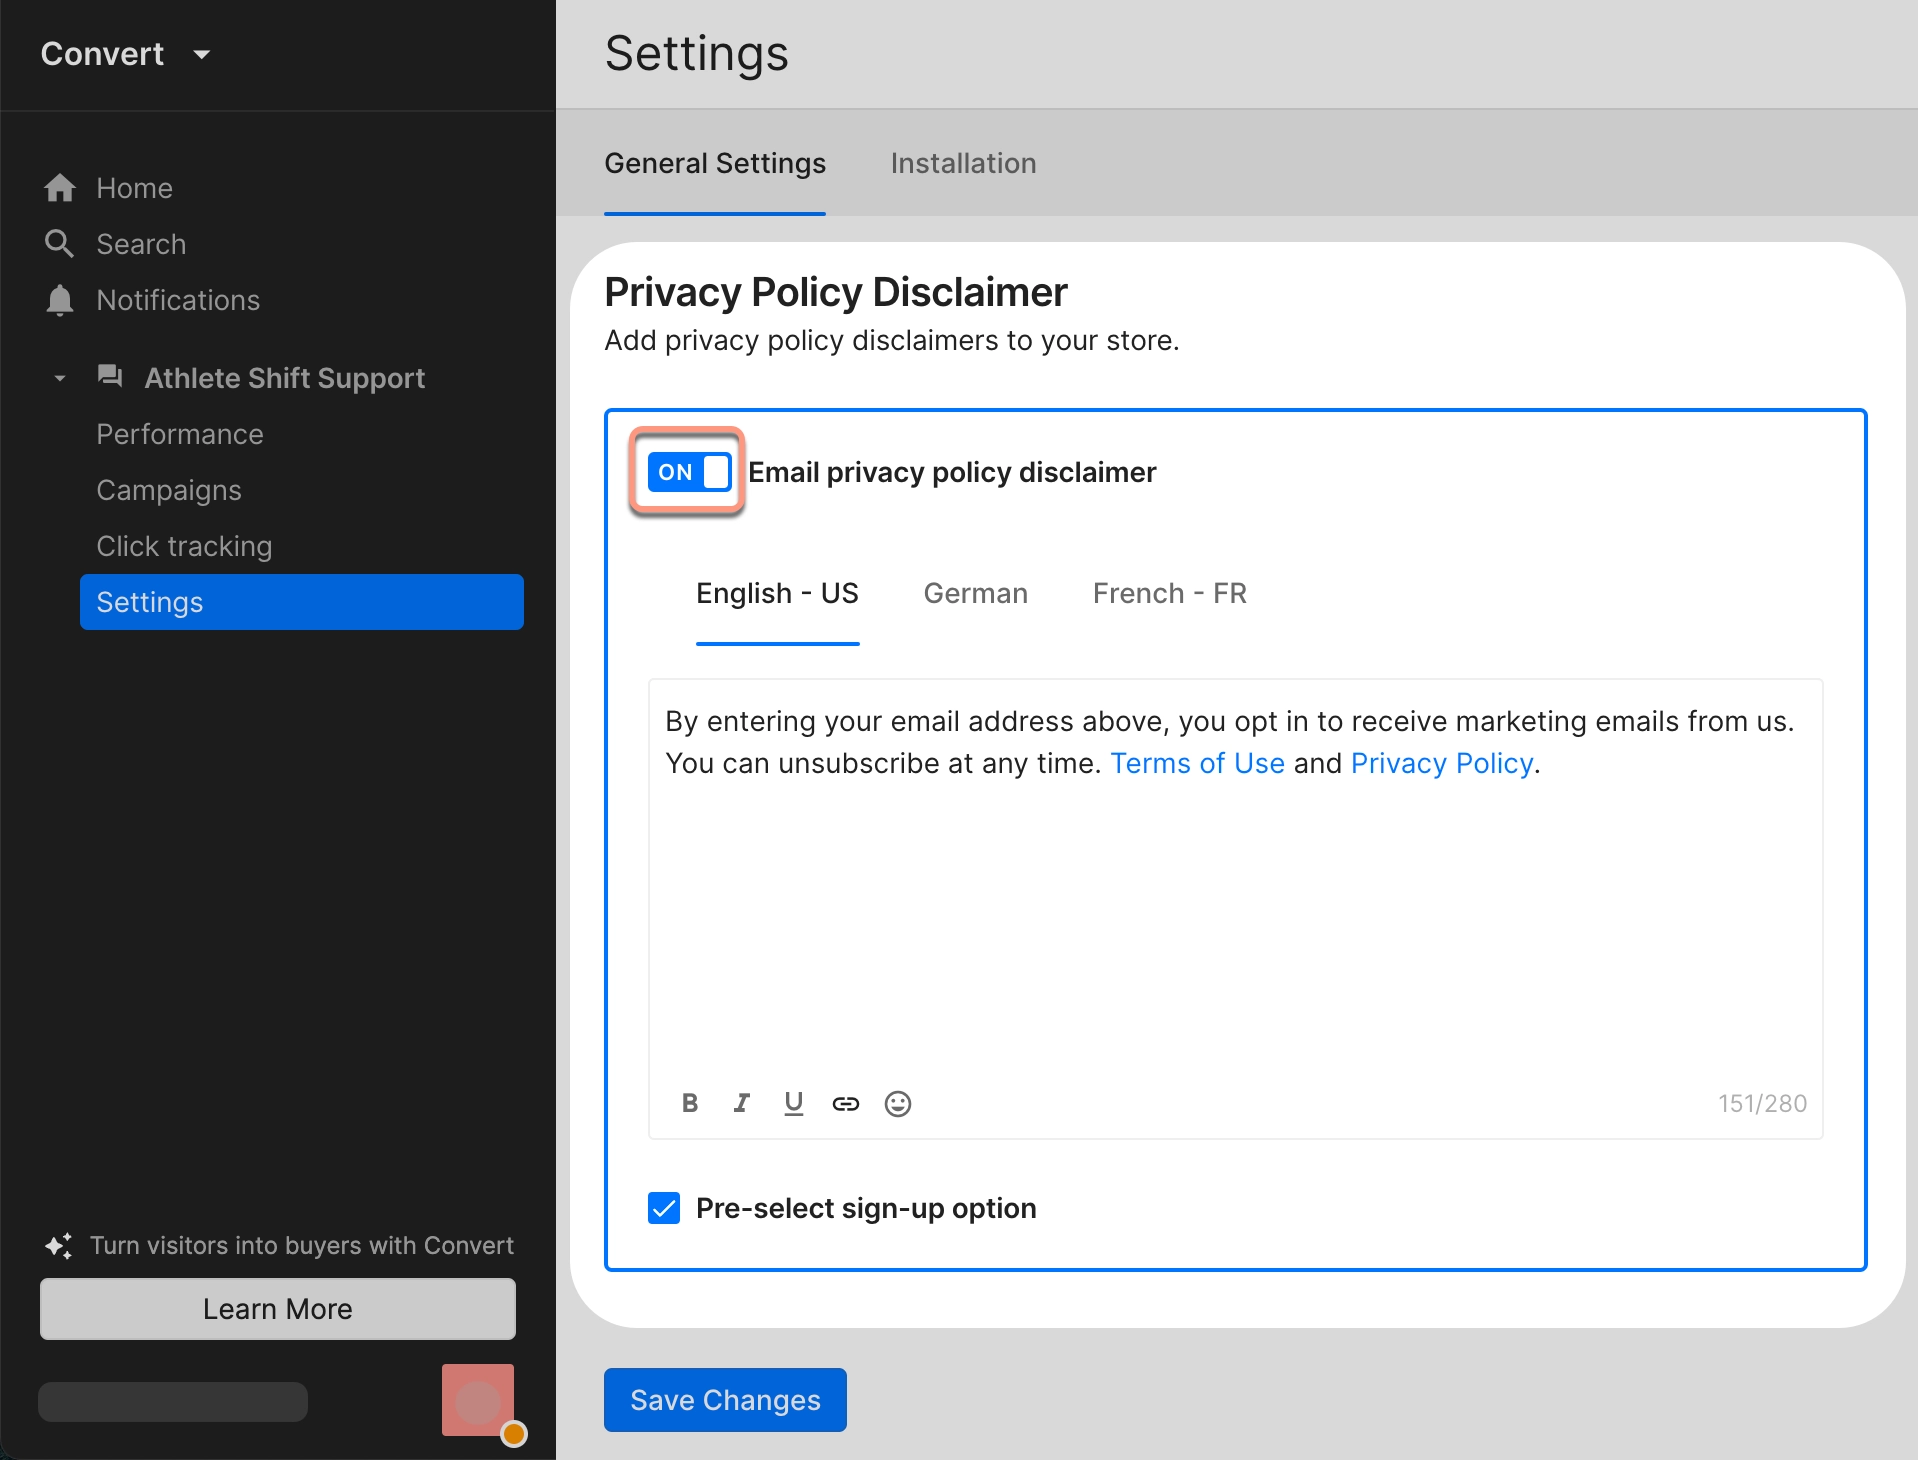
We recommend that you set up a privacy policy disclaimer in order to collect shoppers’ email addresses through your store’s campaign forms. You can create a privacy policy disclaimer for each of your Chat’s supported languages.
A disclaimer allows shoppers to opt-in to email marketing and gives you consent to collect and use their contact information according to the terms of your privacy policy.
- Go to Convert → Settings
- In the General Settings tab, use the toggle to switch Email privacy policy disclaimer to ON
- In the textbox, enter a disclaimer statement. You can use this as an opportunity to link to the Terms of Use and Privacy Policy for your store.
- If your Chat supports multiple languages, use the tabs above the textbox to edit your privacy disclaimer for another language
- Use the Pre-select sign-up option checkbox to have the opt-in for your disclaimer statement pre-selected for shoppers
- Select Save Changes when finished
FAQ
Can I collect shoppers’ contact info in apps other than Shopify?
Currently, we only support the collection of contact info from your campaign forms in Shopify. We hope to add additional marketing tools later.
Check back for updates.
How do you handle duplicate customer profiles in Shopify?
If a shopper submits their email address in a form, we will only create a new customer profile in Shopify if one does not already exist. When shoppers do have an existing profile in Shopify, we’ll update their profile to indicate that they have agreed to receive email marketing.
What happens if a customer is already subscribed but submits their email address again?
The customer will remain subscribed to your marketing list.
However, one thing to keep in mind — if you have chosen to provide a discount code in your thank you message, make sure it is limited to only one use. That way shoppers who submit the form more than once cannot reuse the code.
How do I know if a customer profile was created through a Convert campaign?
By default, new customer profiles are tagged with Source: Gorgias Convert. You can choose which tags get added to new customer profiles when setting up your form.
How are “billable clicks” determined with campaign forms?
Convert plans are charged based on clicks. When you use a form in your campaign, it will count as a billable click so long as the shopper submits their information by selecting the “submit” button — regardless of whether they have an existing Shopify customer profile or not.
