Rules 101Updated 8 months ago
Rules allow you to perform actions on tickets based on custom triggers to automate repetitive tasks, such as tagging tickets or responding to common questions.
Mechanic of Rules
Once you create a Rule, the first two parts will be WHEN something, THEN something and these two pieces of information are practically all that's needed to create a Rule. 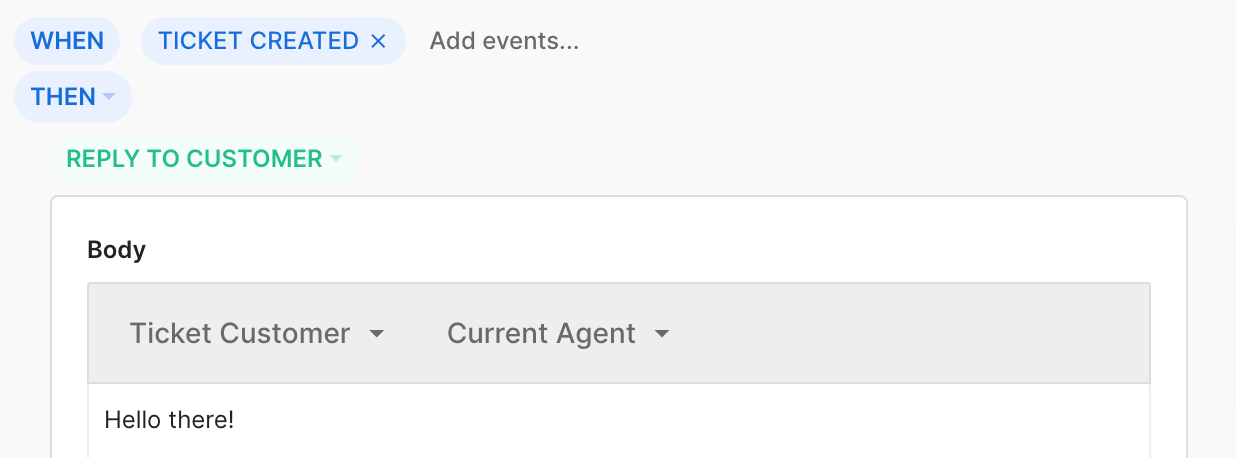 Once you start adding things to the THEN portion, you can see that it begins to get indented as the Rule gets longer.
  A common thing that happens when creating Rules that get very long is that they won't work as intended - here's an example of a Rule that will only partially work:
 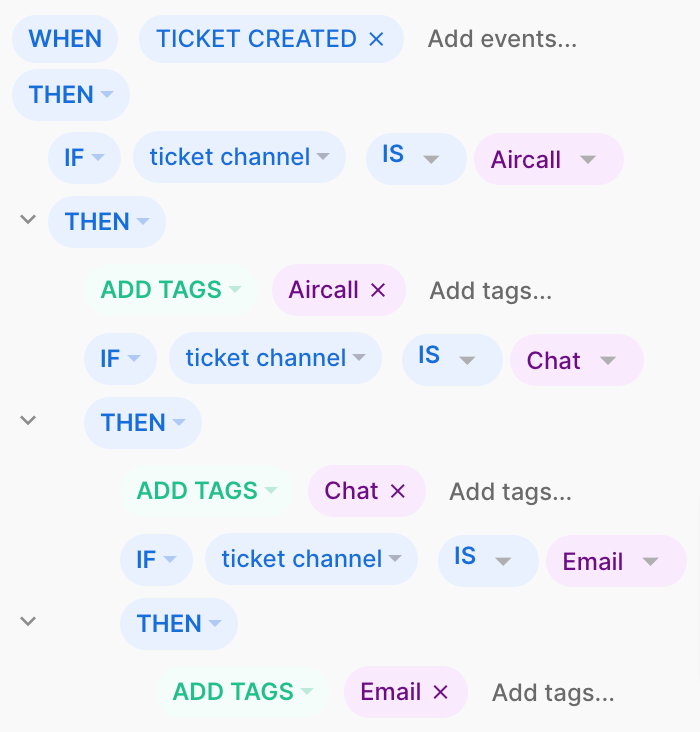 While this looks like a Rule that would tag tickets according to the channel they come from, the only part that would work here is that the tickets that were created via Aircall would be tagged with Aircall.
The other parts of the Rule will never work because they'll be checked only if the ticket channel is Aircall, and then, logically, will fail as one ticket can't have multiple channels.
So, to create a Rule that'll be used only for tagging purposes without creating 3 separate Rules, you just need to keep adding the IF statements using the same THEN statement.  While all of the Rule statements have the same indentation and aren't nested within the following THEN statements, the Rule will work. By pressing on the first THEN, you can add as many IF statements as you need.
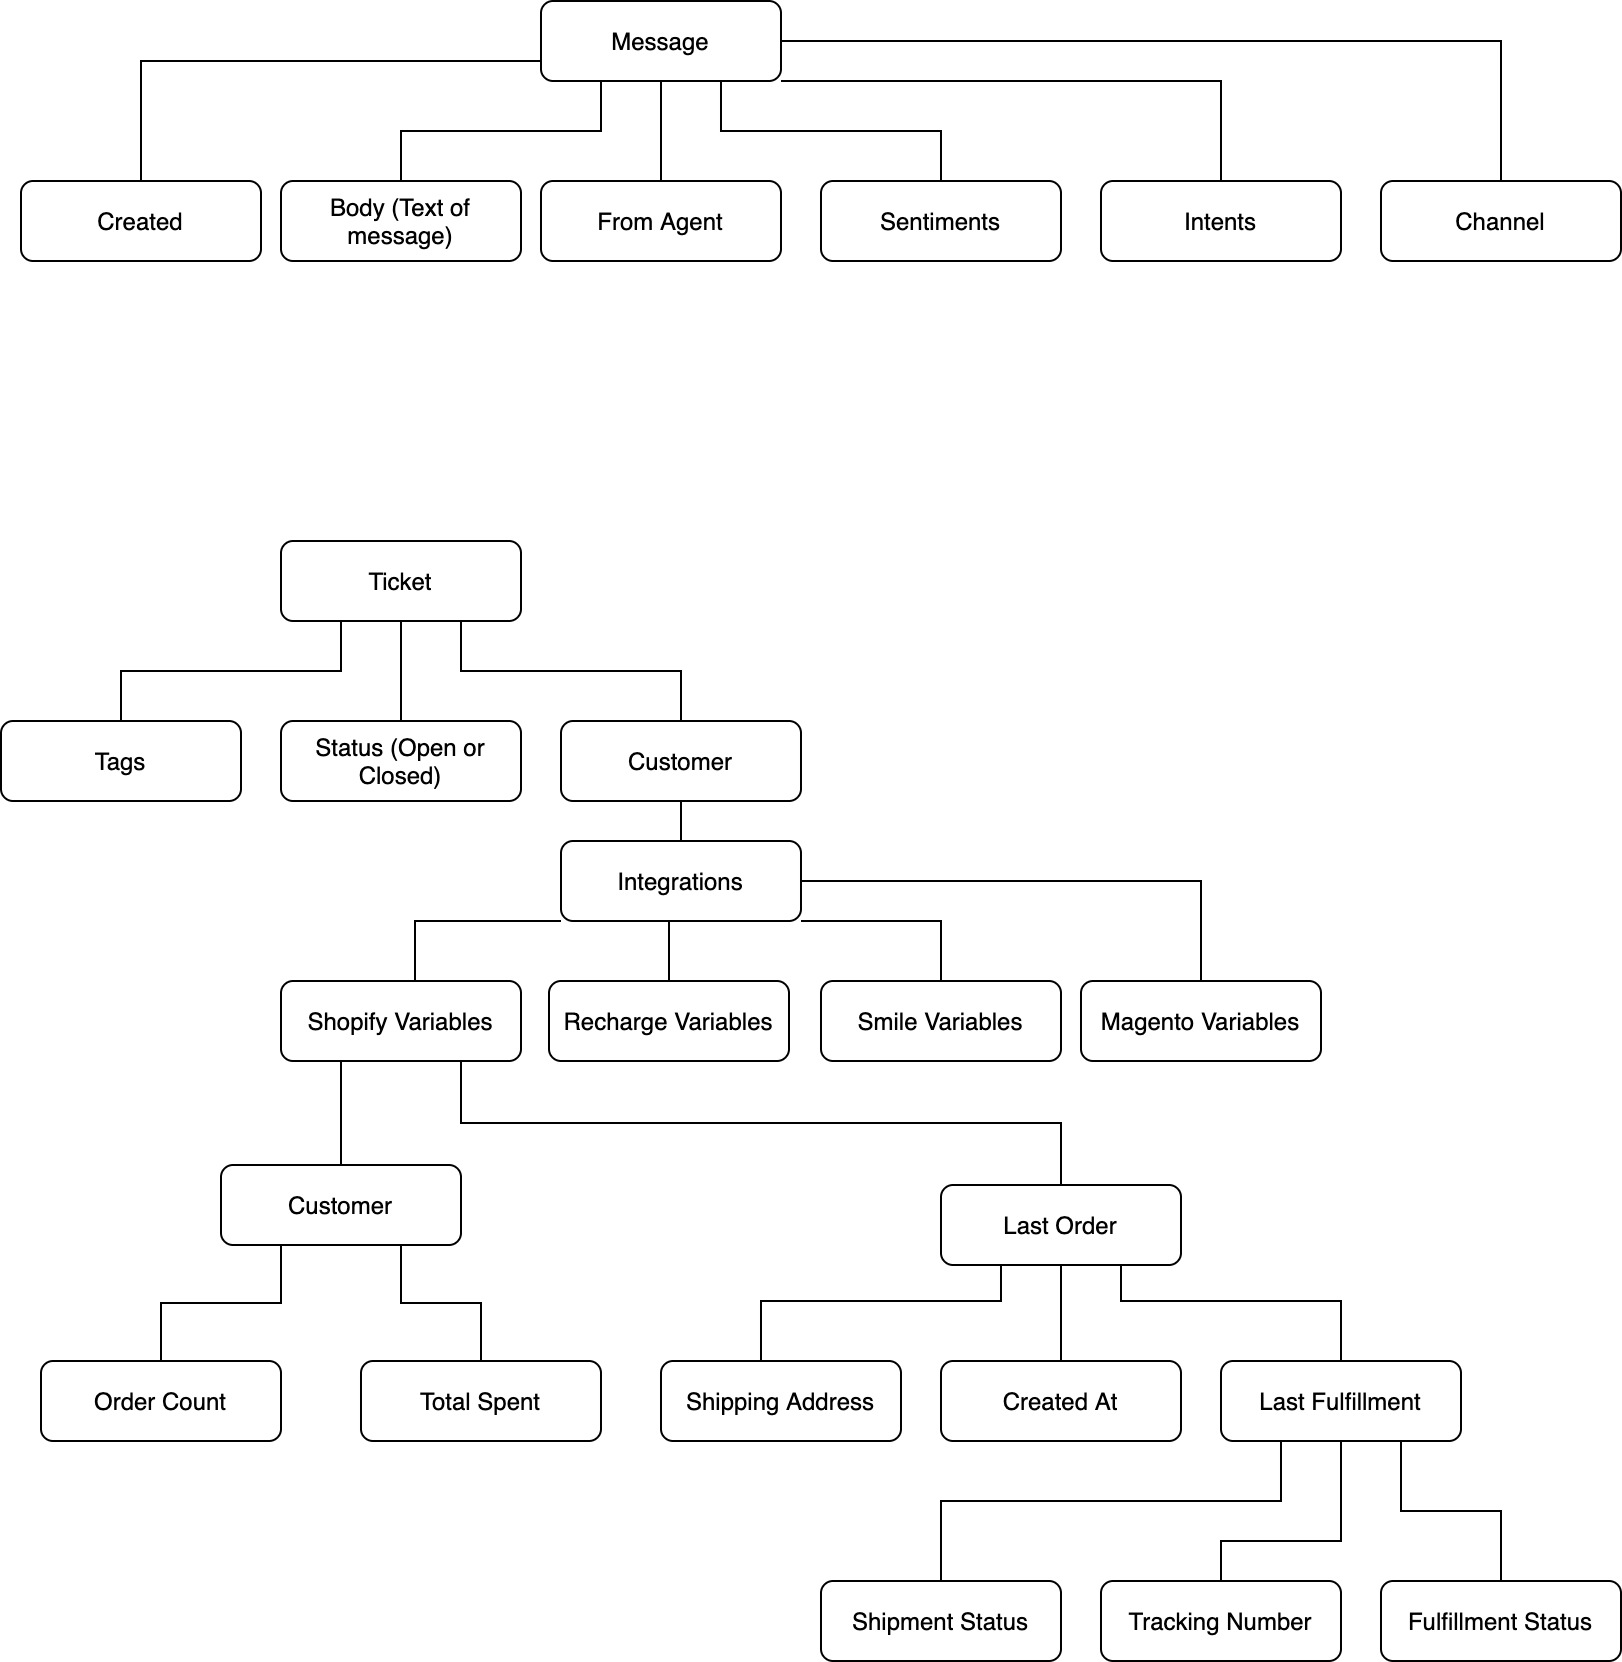
Common variables in Rules
Here's a diagram showing where to find the most common variables:
Date format in Rules
You can trigger a Rule according to a particular date using the following date format: weeks (w), days (d), hours (h), minutes (m), and seconds (s).
This applies to the following date conditions in your Rules:
Ticket
- Closed datetime
- Created datetime
- Last message datetime
- Last received message datetime
- Opened datetime
- Updated datetime
Message
- Created datetime
For example, the ticket closed datetime is less than or equal to 3d 2h 20m.
