Gorgias logo
Gorgias logo

All articles

ShopifyUpdated 19 days ago

Shopify is a complete e-commerce solution that allows you to sell your goods online.

By integrating Shopify with Gorgias you can:

  • Perform Shopify actions using Gorgias such as to refund, duplicate, create, and cancel order. No need to switch screens over and over again.
  • Display the customer profile and their latest orders from Shopify when you receive a message.
  • Automate common questions with Macros and workflows thanks to message Intent classification. "Where's my order?" type of requests can easily be automated, using Shopify Variables inside of Macros.
  • Prioritize Tickets based on customer data.

Gorgias is a customer service helpdesk built for Shopify stores. In this video, we will show you how to reply to customer requests easily and quickly:


Steps

To connect your Shopify account to Gorgias:

1. In Gorgias, go to Settings → All Apps → Shopify.

2. Click Add Shopify.

3. Once clicked, you will be redirected to the Shopify App Store.
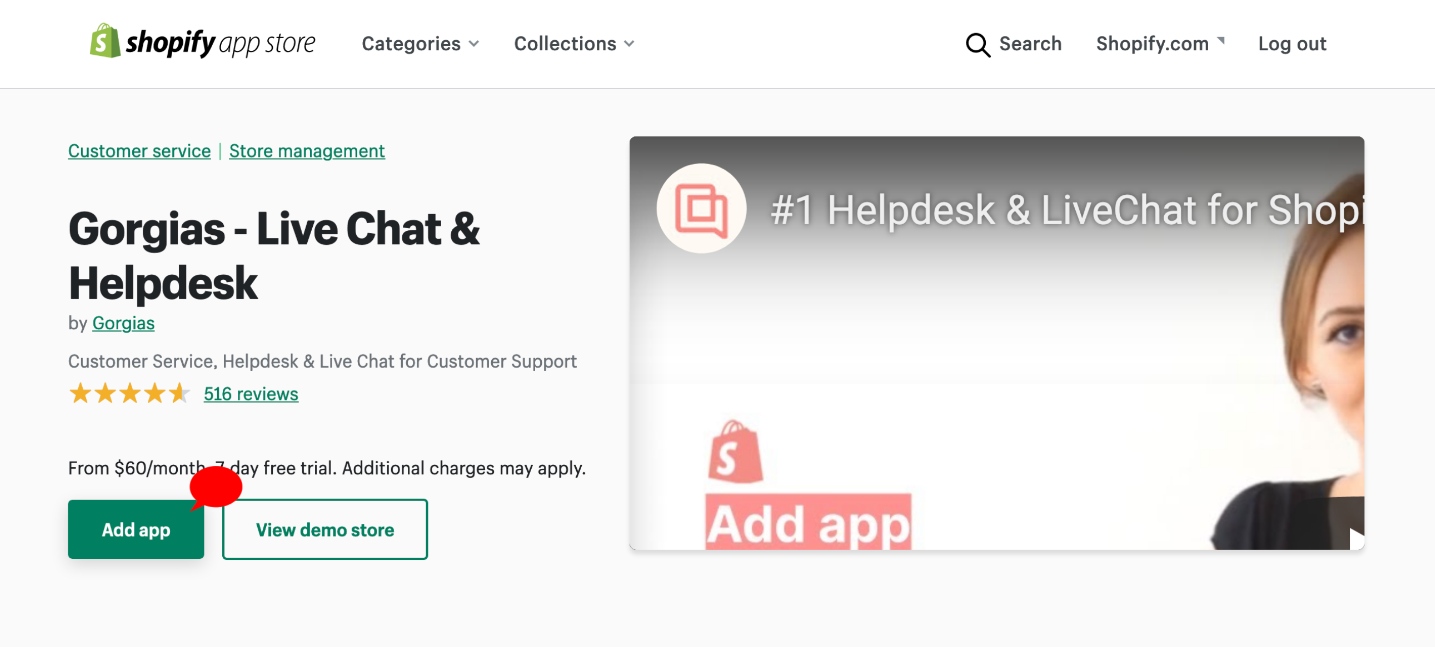

4. There you will be able to install the app on your store, which will send you to this screen:


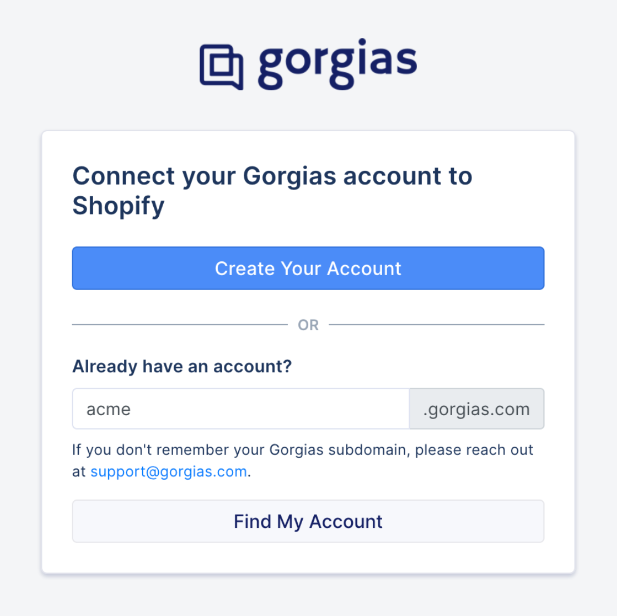
5. If you already have a helpdesk, you should add your Gorgias domain in the input field (if it's not already filled in for you). After clicking Find My Account, you'll be redirected to your Gorgias helpdesk with the new Shopify integration added.


6. Otherwise, you can click the Create Your Account button, which will redirect you to a page where you'll be able to create a new Gorgias account.


Now that you're with Gorgias, when a customer contacts you you’ll see their profile and orders in the sidebar on the right-hand side of each Ticket.


Multiple Shopify stores

Connect multiple Shopify accounts to a single Gorgias dashboard using the same process described above, but from an Incognito Mode on your browser. This will initiate the Login prompt, so you will be able to choose which store you wish to integrate.

Once done you'll have the following options:

Shopify Actions

If you open any Ticket where your customer has some Shopify data, you will notice a number of different possibilities concerning that data in the right-hand sidebar in Gorgias.

Here's what you can do in just a few clicks:


Create a new order

In the sidebar, in an existing Shopify customer's card, click on the button Create order.


Now you can:

  • add existing products via the search input
  • add custom items
  • apply a discount on a line item (percentage or fixed amount)
  • change quantities
  • remove an item
  • add Notes
  • add Tags
  • apply a global discount (percentage or fixed amount)
  • add shipping
  • choose to charge taxes

Then, you can choose to create the order as 'Paid' or 'Pending'. You can also choose to email the invoice to your customer. Finally, you can type a custom message for your customer.

 The invoice email is being sent from Shopify's end.

Adding notes to the order is only possible when creating a new order.


Duplicate an order

In the sidebar, click on the button Duplicate to open the following modal:


Here, you can:

  • add existing products via the search input
  • add custom items
  • apply a discount on a line item (percentage or fixed amount)
  • change quantities
  • remove an item
  • add Tags
  • apply a global discount (percentage or fixed amount)
  • add shipping
  • charge taxes (or not)

Then, you can choose to create the order as 'Paid' or 'Pending'. You can also choose to email the invoice to your customer and then type a custom message for your customer:


By default, when you open the modal, you can see that:

  • a 100% global discount is applied
  • if there is a shipping line, the price is set to '0'

Gorgias will fetch the available shipping rates via the Shopify API, so that you can quickly add a shipping line just like in this screenshot:


Check remaining stock

In the Create order and Duplicate order Shopify modals, we display the number of products in stock as well:

  • When you search for a product (on the right)
  • In the order itself (in the new column titled 'In stock')
The stock data is always updated in real time.


Cancel an order

Click on the button titled Cancel to open the modal:


Here, you can:

  • set quantities to refund
  • set shipping amount to refund
  • set custom refund amount
  • set the reason for the cancellation
  • restock items
  • notify the customer


Refund an order

Click on the button Refund button to open the modal:


Here, you can:

  • set quantities to refund
  • set shipping amount to refund (it will automatically be set to '0')
  • set custom refund amount
  • set the reason for the refund
  • restock items
  • notify the customer


However, while many refunds are also returns, not all of them are. You will notice that the quantity (QTY) field is always automatically set to '0' to avoid accidental returns, aligning with the default Shopify behaviour. 

If you want to process a refund and also process a return, you can simply set the QTY fields to the desired value before proceeding. If you don't want to process a return at the same time, simply change the QTY fields to '0' before clicking Refund' to complete the action.

If the quantity is set to anything else but '0', the action will trigger in Shopify as returning an item as well.


Refunding orders with multiple transactions

Gorgias will allow you to refund orders that have had multiple transactions within the following limitations:

  • You can only refund orders that are coming from one payment gateway (ex. 'Credit Card 1'). Orders that received payments from multiple different methods cannot be refunded.
  • Gift cards are not supported because they are considered a payment gateway in Shopify and are excluded from the total amount that can be refunded.

To clarify further, these are the 3 scenarios that can occur:

1. Credit Card 1 + Gift Card → Only the credit card amount will be refunded

2. Credit Card 1 + Credit Card 2 → A refund will not be possible

3. Credit Card 1 + Credit Card 1 → The full refund will be available


Display the customer's cart

Among other data that we pull from Shopify, you are also able to check which exact items the customer has in their cart at the moment. The cart option will be visible if the customer reaches out via Chat. But, please note that the Integration needs to be added via One-click Installation as, if the Chat code is added manually to your website, the cart option will not be available.


The cart will only be only updated when you receive a new customer message. If the customer contacts you and adds something to their cart you won't see the items until you have received another customer message.
Furthermore, if the customer's cart was empty at the time when they contacted you, the cart won't be displayed until you have received another message and there's something inside the cart.


Edit order from Shopify

This feature allows the agent to edit Shopify orders directly from the widget, whether or not the order is fulfilled.

However, the Edit order action is not available for archived orders, orders placed more than 60 days ago, and orders placed in a different currency than your store’s currency.


Creating a draft order

You can create draft Shopify orders directly from your Gorgias dashboard. Simply navigate to a Ticket with a customer, or if they don't have an existing Ticket, open a new one for them.

1. Click on Create Order in the sidebar widget:


2. Choose the products, and add other details if needed. Then click on Create Draft Order:


3. You will be prompted to send a message alongside the invoice to the customer: 


The draft orders also have their order number, usually starting with 'D' indicating that it's a draft:


You can add product links or product cards directly from the Ticket. The link redirects to the product page in Shopify and the customer can then add it to their cart.

Please bear in mind that the product card is only available on Chat. For other channels, like Email or Social Media, customers will receive a hyperlink to the product.


Edit the shipping address

To edit a shipping address:

1. Click the Edit button under Shipping Address in the Shopify order widget.


2. Clicking the button opens a pop-up with all the fields required for an address, including phone numbers, province (when necessary) and ZIP codes, pre-filled with the shipping address set for the current order.

3. To edit the order, change any of these fields to the correct value and click the Save changes button.

4. You can also completely replace the current order address with any of the addresses saved in the customer’s Shopify profile. To do so, click Select another address, choose the right address, and then click the Save changes button.


Once submitted, the order’s address will be updated in Gorgias and in Shopify. If you don’t see the change immediately in the Gorgias widget, you’ll just need to refresh the page to see the most up-to-date values.


Customer and order Tags

You have the option to edit the customer's and order Tags directly from your Shopify widget in the Gorgias helpdesk. Once editing is over, all of your Tags will be synced with Shopify.


You can add, remove or move this field as you like in your Shopify widget. If you removed this field and want to re-add it, make sure to use the new type as Editable List which is only available for the Tag field in the Shopify widget.


Please note that you can't add the same Tag twice.


To add the widget:

  1. Open the widget settings by clicking on the ⚙️ icon.
  2. Click the Tags Variable on the right side of the screen.
  3. Select the option Editable List from the drop-down menu and click Submit.
  4. Save your changes.

Here's a short video tutorial that you can follow along:


Customize your orders and customers using Suggested Shopify Tags

You can manage your Shopify customer's and order Tags even better by using the existing Tags provided from Shopify directly in the helpdesk. You can simply reuse an existing Tag, or create a new Tag if it’s not already on the pre-populated list.


Additional features

You can customize the Shopify widget on the right-hand sidebar further, until the information displayed is just what you need for your daily workflow.

To customize the fields that are displayed, please click on the little gear icon in the upper right corner of any Ticket where the customer has some Shopify data. A widget settings page will then open up for you as shown below:


From here you can simply grab any piece of info found in the list on the left and then drag and drop it to the desired display place in the sidebar on the right. If you do this on any one of your Tickets, all of the other Tickets where the customer has Shopify data will display the same field as well from then on.

You also have the option to add redirection links at the top of every root widget in the right-hand sidebar. Links can point to anything and open in a new browser tab. The link text and URL use the current templating system if you want to add dynamic stuff to it. More details in the video below:


Copy order number

You can copy the Shopify order numbers in just one click:


FAQs

Shopify FAQs can be found in this guide here.


Of course, our Support Team is also here to answer any questions that you may have about our Shopify Integration both via live chat and email at [email protected].

Was this article helpful?
Yes
No